Walkthrough for Lords of the Fallen (LotF) covers a detailed step-by-step guide for the main story and locations of the game. The Lords of the Fallen Walkthrough includes vital information about progression and getting all Items, Equipment, Enemies, Bosses, and NPCs that are encountered throughout the game.
LotF Walkthrough Helpful Pages
- For guides on NPCs and their quests, please visit the NPCs or Quests page.
- For strategies on how to defeat the different bosses of the game, please visit the Bosses page.
- Our Endings page covers guides on how to unlock the three available endings for Lords of the Fallen (LotF).
- You can also check our Game Progress Route page for Lords of the Fallen (LotF) for a summarized progression path.
Important Notes for Endings in LotF
IMPORTANT CUTOFF POINTS OR CONDITIONS FOR UNLOCKING THE FOLLOWING ENDINGS:
- Cleansing any beacon automatically locks the player from achieving the Inferno ending and the Umbral ending.
- Giving the Rune of Adyr to the non-hostile Remnant at Mother's Lull blocks the Radiance and Inferno endings.
- The Inferno Ending automatically locks the player in if you reach Bramis Castle without cleansing any of the beacons.
- Using the Seedpod item on certain NPCs will prevent the player from purchasing items or using their services. Make sure to buy the items you need or complete any necessary negotiations before you use the Seedpod on them.
Lords of the Fallen Walkthrough
Lords of the Fallen Walkthrough Quick Navigation (Part 1)
Click to be redirected to the specific location walkthrough
Defiled Sepulchre is one of the Locations in Lords of the Fallen (LotF). The Defiled Sepulchre is the first Location in the game and serves as the Location where players go through the basic tutorial and learn how to control their character, the Dark Crusader. The Defiled Sepulchre will also be the first time that the player has access to the Umbral and learns how to use the Umbral Lamp. In Lords of the Fallen (LOTF), players will get to explore a vast, interconnected world where they will journey across the worlds of the living and the dead. This page covers a full walkthrough and helpful guides for the Defiled Sepulchre location in Lords of the Fallen.
- Please visit the Walkthrough page for Lords of the Fallen (LotF) for a detailed guide on the main story.
- You can also check our Game Progress Route page for Lords of the Fallen (LotF) for a summarized progression path.
- Visit the Defiled Sepulchre Map for a visual aid in finding all Items, Shortcuts, and relevant markers.

General Information
- Previous: N/A
- Next: Abandoned Redcopse
- Bosses: None
- No. of Vestiges: None
Defiled Sepulchre Map
[map to be added]
NPCs in the Area
- None
Bosses
- None
Enemies
Items
Weapons
- None
Shields
- None
Armor
- None
Accessories
- None
Spells
- None
Runes
- None
Items
Upgrade Materials
Key Items & Others
Enemy Drops
Lords of the Fallen Full Sepulchre Walkthrough
Latest Receiver of His Grace
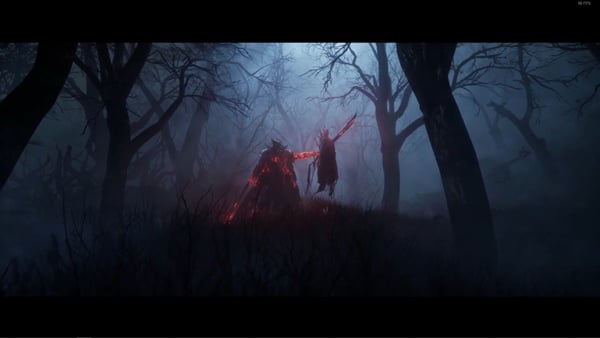
The game begins with a cutscene of the previously-tasked Crusader casting out the Umbral Lamp onto the Defiled Sepulchre before dying to a powerful Enemy. Players will then be able to go through Character Creation and choose their Dark Crusader's Class. You'll then open your eyes at the exact spot where the Umbral Lamp fell, and someone will greet you as you awaken, and grant you a gift. He'll talk of an important mission that you must carry out with this gift and tell you to meet him at the depths of Skyrest. Afterward, you'll get up and finally have full control of the Dark Crusader.
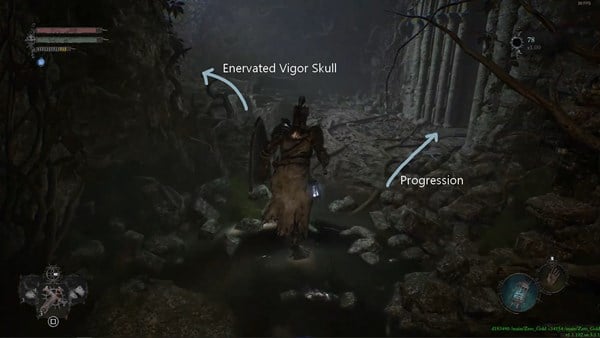
Head up the stairs and move forward. You'll have to make a U-turn and then destroy the obstacles with attacks or dodge roll through them to encounter your first Enemy, the Corrupted Penitent. After making quick work of it, you'll reach a fork. Turning left leads to an Enervated Vigor Skull in some water. Head back and progress to the right this time. You'll enter a doorway while being taught how to lock on to targets and switch between them as you fight.
In the next chamber, you'll have two Corrupted Penitents to practice this with. Head up either short set of stairs to find the only way forward to the left blocked by some vines. Simply attack them to pass through. Don't follow the tutorial and drop down the gap first to pick up the Forsworn Armour Tinct. Cross the fallen pillars back and find your way back up to the gap. Sprint forward and then jump over this time. Follow the path to find a Corrupted Pilgrim at the end of the path who'll attack you by throwing something your way. Follow the tutorials to dodge its attacks as you move close to it for the kill. Past it and up the stairs will be Throwing Rock on the ground. After picking it up, you'll be given a tutorial for fighting from a distance. You can practice by catching the Corrupted Penitent nearby unawares.
Head up the small slope toward the door to be given a tutorial on using your Umbral Lamp to reveal how the area looks in the Umbral realm. Make sure to use this feature whenever you get stuck or in interesting spots, especially in areas where there are lots of moths. Use your Umbral Lamp near the door to reveal a figure on it with a large eye, which is barring you from opening it. This is called an Umbral Tumor. To destroy it, you have to find the corresponding targets to Soulflay. Follow the path to the right first to reach a closed gate. Use your Umbral Lamp to move past it. You'll be given a tutorial on switching stances with your Weapons here, and some more Corrupted Penitents to practice with.
Umbral Rift
Move forward until you reach a short bridge. You'll be given a tutorial on how to fully transition to Umbral through Umbral Rifting, as opposed to just being able to see a perspective of Umbral through the lamp. You'll be appropriately warned that if you do transition to Umbral, you'll be stuck in Umbral until you reach specific points where you can exit. Transition to Umbral to reveal large hands that extend the wooden bridge, allowing you to cross over. Grab the three Wither Wards on the corpse before you move forward.
While in Umbral, there will be points marked by a distinct blue marker. This indication means you can use Soulflay on them by using your Umbral Lamp. Drop down to the left of where you got the Wither Wards to find one such point behind the eerie creature. After getting rid of the obstacle, drop down to the lower platform it was blocking off, and then drop down again onto a path. Follow that path down to get a tutorial on Soulflaying Enemies this time, and you'll have another Corrupted Penitent to practice on.
Afterward, head up the slope and Soulflay the obstacle in front of you to move forward. You'll get another tutorial on recovering Soulflay charges after using them up on Enemies, and there'll be a few Umbral blisters around to practice on. When you're done, drop down to a lower area past the blisters. You'll get a tutorial on Withered Health this time along with a few Corrupted Penitent Enemies to defeat. Afterward, Soulflay the Umbral Belly jutting out of the wall to pick up an item called the Saintly Quintessence, which will be very important later on.
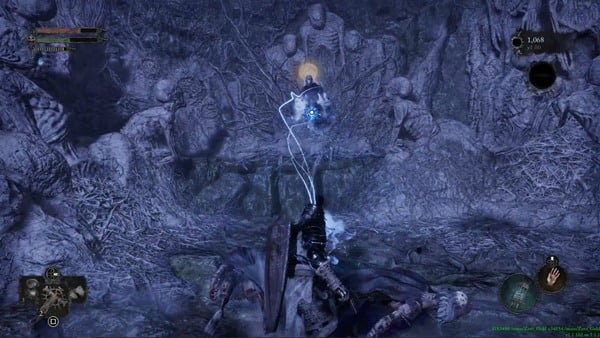
Move forward to the end of the path to get a tutorial on executing a plunge attack. There'll be two Remnants below you to try it out on. Head up the path formed by a large spine to get another tip on using your Soulflay, and another Remnant to practice it on. Keep heading up the path to eventually reach some Umbral Eggs blocking your way, along with information regarding the fact that you'll face more dangerous Enemies the longer you stay in Umbral. However, this will also increase the amount of Vigor you get from defeating them, as indicated by the multiplier below your Vigor count on the top-right corner of the screen. Destroy the Umbral Eggs to have a couple of Remnants come out for you to defeat. Behind them will also be a Shrouded Remnant who'll join the fight, depending on how long you've been in Umbral.
Continue up the path and then up the ladder. Proceed past the hole and you'll find a dead end. Hang a right to reach a ledge outside. To your left will be a Soulflay target. Soulflaying it will disintegrate the Umbral Tumor on the door that was previously blocking your entry. Head back toward the dead end to find it open now and proceed past it. At the end of the path, you'll find an Emergence Effigy which you can interact with to exit Umbral and transition back to Axiom, which is the normal realm.
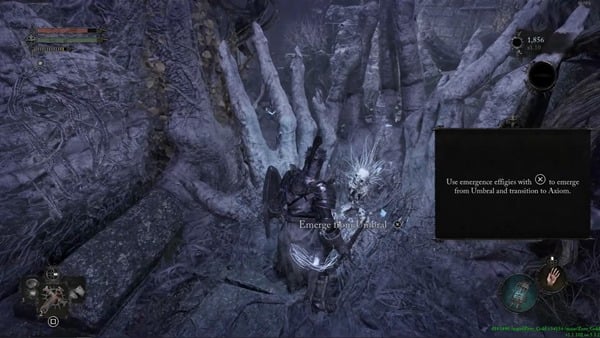
Once you're back, there'll be some stairs on your left where the effigy was. Head down and follow the path to find a Corrupted Penitent and then jump down to find yourself in front of the door from before. Open it to officially finish your tutorial through the Defiled Sepulchre, and enter the Abandoned Redcopse.
Defiled Sepulchre Map
Map to be added
Defiled Sepulchre Videos
Videos Related to this Location
Lords of the FallenWalkthrough Quick Navigation (Part 2)
Click to be redirected to the specific location walkthrough
Fitzroy's Gorge is one of the Locations in Lords of the Fallen (LotF). As the Location's name suggests, Fitzroy's Gorge is an area structured around a stream. Players will be able to traverse the high area of mountainsides, mired with different Enemies and obstacles. In Lords of the Fallen (LOTF), players will get to explore a vast, interconnected world where they will journey across the worlds of the living and the dead. This page covers a full walkthrough and helpful guides for the Fitzroy's Gorge location in Lords of the Fallen.
- Please visit the Walkthrough page for Lords of the Fallen (LotF) for a detailed guide on the main story.
- You can also check our Game Progress Route page for Lords of the Fallen (LotF) for a summarized progression path.
- Visit the Fitzroy's Gorge Map for a visual aid in finding all Items, Shortcuts, and relevant markers.

General Information
- Previous: Forsaken Fen
- Next: Lower Calrath
- Bosses: Crimson Rector Percival, Ruiner, The Lightreaper
- No. of Vestiges: 1 - Vestige of Betrayed Eliard
Fitzroy's Gorge Map
NPCs in the Area
Bosses
Enemies
- Avowed
- Bringer of Stillness
- Corrupted Pilgrims
- Marksman
- Mendacious Visage
- Proselyte
- Ravenous Fascinator
- Raw Mangler
- Remnant
- Rhogar Hound
- Ruiner
- Shrouded Sparrow
- The Lightreaper
- Trapper
- Umbral Egg
- Womb of Despair
Items
Weapons
Shields
Armor
Spells
Accessories
Runes
- None
Items
- Ammunition Satchel
- Animated Vigor Skull
- Briostone Trio
- Charred Fingers
- Faint Vigor Skulls
- Fire Wards
- Holy Salts
- Magic Wards
- Manastone Cluster
- Snake Oil Grenade
- Unripe Berries
- Vigor Moth
Upgrade Materials
Key Items & Other
- Cracked Rune Tablet
- Crimson Ritual Fervour
- Map of Fitzroy's Gorge
- Umbral Eye of Hooded Antuli
- Umbral Scouring
- Vigor Moth
- Weighted Bolts
- Vestige Seed
Enemy Drops
- Briostone
- Briostone Trio
- Charmed Paw
- Corrupted Pilgrim Belled Cape
- Corrupted Pilgrim Cape
- Crimson Rector Set (Boss Drop)
- Despair's Cocoon
- Despair's Grasp
- Enervated Vigor Skull
- Large Manastone Cluster
- Lightreaper Flesh
- Mask of Wrath
- Minor Fire Salts
- Proselyte Gauntlets
- Proselyte Garb
- Proselyte Sword
- Raw Mangler Trousers
- Ring of Brilliant Protection (Boss Drop)
- Ruiner Set (random pieces)
- The Lightreaper's Umbral Parasite
- Unripe Berries
- Vigor Moth
- Vestige Seed (Boss Drop)
- Wither Salts
Merchant Wares
Lords of the Fallen Full Fitzroy's Gorge Walkthrough
Progressing from Forsaken Fen
After activating the Vestige of the Pale Butcher and crossing the bridge ahead at the Forsaken Fen, you'll eventually get to a metal gate blocking your way forward. To the right, you can pick up the Map of Fitzroy's Gorge from the ground. Shine your Umbral Lamp at the gates and you'll be able to to phase through them. Be careful of the Remnant nearby, waiting for you to shine your lamp at it and attack you.

Emerge back outside and head down the slope. Follow the path until you get to a broken-down carriage. Behind it, two Rhogar Hounds can be found patrolling the area. Be careful of the hairless hound as it can breathe fire and will explode on death. Continue up the slope, where you'll bump into another two Rhogar Hounds and a Raw Mangler. Near the top of the slope, a small altar can be found on the right that houses the Piercing Light Spell. While you pick it up, another wave of Rhogar Hounds and Raw Manglers will come rushing at you. Defeat them, then you can continue pressing forward.

At the top, you'll get into a fork in the road, with one path going right and the other going left. There's a sign on the path to the right mentioning a place called Calrath. Head down this path and when you can, turn left to go up a slope going slightly backwards. Up here you can grab four Small Deralium Fragments. Keep moving forward down this path and if you're in the Umbral, you'll find a group of Remnants and Womb of Despair. Nearby, there'll also be an Umbral Flowerbed you can plant a Vestige Seed at. It is highly recommended to plant one in this flowerbed as we'll be using this one as a checkpoint and point of reference often in the coming sections.
Boss: Crimson Rector Percival
Rest at the Vestige Seedling to return to the Axiom if you're in the Umbral, then roll through the wooden crates and turn right. Keep following the path until you reach a scene of four Raw Manglers in combat against some Avowed and Marksmen. Defeat the victors of the battle, then prepare yourself for a boss fight.

When you enter through the wooden gates, you'll initiate a fight against Crimson Rector Percival. Percival is a holy knight featuring the basic moveset of a swordsman - a series of sword swings and slashes. The moves you'll want to mainly look out for are when he imbues his sword with holy power, knocking back and damaging anyone nearby, and when he evades backwards, creating a clone that can attack up to two times.

This boss isn't as difficult as the main bosses and will drop the Ring of Brilliant Protection, a Vestige Seed, and a piece of the Crimson Rector Set when defeated. Further in the boss arena, you'll find a chest containing Bloodlust and two Regular Deralium Nuggets on the floor next to it. Opposite to where Percival spawned, there are a set of stairs leading into a tower. Take the elevator inside upwards and you'll find yourself back at Skyrest Bridge. Grab the two Regular Deralium Nuggets from the ground, then unlock the gate to open up a shortcut back.

Don't Look Down
Make your way back to the Umbral Flowerbed we planted a Vestige Seedling at in Fitzroy's Gorge, either by running back or teleporting back. As you move forward from the Umbral Flowerbed, opposite the wooden crates you rolled through previously and then head to the only path you haven't taken yet, to the left. Heading to the left immediately puts you at odds with a Rhogar Hound near some wooden barricades. A Raw Mangler will also try to surprise you from behind a barricade on your right further along the ridge. If you chose not to cleanse the Radiant Beacon yet back at the Forsaken Fen, or any beacon for that matter, and you've spoken to Damarose the Marked both at Pilgrim's Perch Ascent and Pilgrim's Perch Descent, you'll find her here on this mountain ridge, before the wooden barricades. You can speak to her here to progress her Questline. She'll talk about Adyr's penchant for a survival-of-the-fittest way of ruling.
Moving forward, if you look to the left toward the cliff you'll notice a Stigma where the moths are gathered. Transition to Umbral here and Soulflay it for a scene where it seems like Andreas of Ebb kicks someone off the cliff for her supplies.
You'll get two Umbral Scourings for listening in. Keep moving forward along the ridge and grab the Holy Salts from the dead body by the cliff. Another Rhogar Hound will come straight at you as you step forward, covered by a Trapper on the elevated ground, so be careful not to fall off the cliff. Past the elevated ground are four Small Deralium Fragments on another corpse by the cliff. Use your Umbral Lamp to bypass the succeeding gates, picking up the two Regular Deralium Nuggets in between.
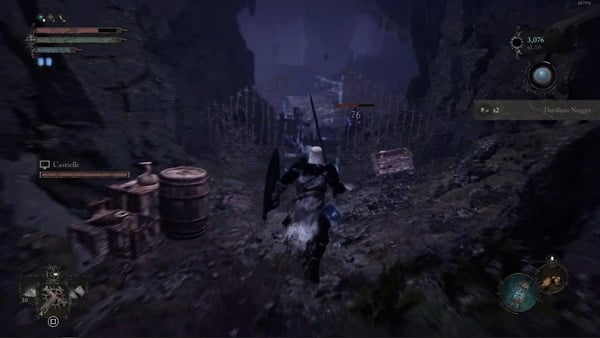
Brother to the Rescue
When you get to the large cavern, a Trapper will start firing at you from the other side. Head up along the path to your right to reach an Emergence Effigy you can use to transition back to Axiom if you've been in Umbral. Across the effigy is a Ring of Radiant Preeminence on an impaled corpse. Ahead of you will be a circular path where a Raw Mangler and another Rhogar Hound will be waiting for you. The loot on the left part of the circular path is a Ravenous Fascinator so Soulflay it instead of picking it up for a Charmed Paw and a Vestige Moth. On the other side of the path is Fitzroy's Sword on another impaled corpse.
Move forward and cross the broken bridge by holding up your Umbral Lamp. Once across, you can head down the path to your left. Shortly as you do you'll find a ladder behind a bit of raised ground to your right, which leads to a short little detour. If you keep heading down to the left you'll find another Ravenous Fascinator luring you in Soulflay it for Items again. Near it should be a ladder going down. Jump down the platforms to your left to reach an Emergence Effigy if you need to use it. Right before the end of the platform are four Small Deralium Fragments on the corpse you can pick up. When you drop down from here, you'll be greeted by some Raw Manglers and Rhogar Hounds.
Down here, if you turn around first and head up the path you'll find the Trapper that was shooting at you when you first entered the cavern. Near him is another corpse on which you can pick up an Ammunition Satchel and a Manastone Cluster. If you transition to Umbral here, you can Soulflay a target on the other side to extend a platform toward you. This gives you a shortcut out of the cavern if you need it. Head back down toward the ladders. Both the next long ladder on the wooden platforms and the downward path on your left lead down to the same circular area. For now, head back up the ladder and go back to the detour you ignored a while ago.
When you climb down the ladder, you'll meet Drustan, a fellow lampbearer with a spring in his step, considering all that lampbearers face. He'll speak of a famous knight named Melchior, his brother, who seems to have been kidnapped. He's on a quest to rescue him. A few platforms below Drustan will be an Umbral Flowerbed where you can use a Vestige Seed to plant a Vestige Seedling if you want to rest and transition back to Axiom. At the end of the path below the ladder is a Cracked Rune Tablet.

Dropping down from here leads to a circular area with Rhogar Hounds. This is that circular area where both the long ladder and the downward path in the previous section lead down to. If you're still in Umbral, be careful as the area can be easily filled with Umbral Enemies, including Remnants, Umbral Eggs, and a Womb of Despair or two. To the left from where you'll land will be the path leading to the long ladder leading back up to the wooden platforms. There's a semi-hidden corner to the right of the ladder where you can pick up the Hallowed Knight Shield.

Head back to the circular area, and you'll find an Animated Vigor Skull near some breakable barrels. The path on the right from there leads outside of the cavern back to another mountain ridge. Outside, the path to the right stops at a wall for now. Following the path to the left here leads to a wide bridge full of destroyed carriages, and two Fire Wards on a corpse. When you're ready, set foot on the bridge to start a Boss fight against the Ruiner.
Out of the Cavern, into the Ruiner
This can be a difficult fight because of the battlefield you'll have to do it in. The Ruiner is a large opponent clad in armor that produces fire in his wake. He'll charge and rush you which can be difficult to work around on the bridge. Fitting its huge stature, its attacks are pretty slow so they should be easier to dodge. The last hit in his basic combo is a strike, if you safely dodge, will have fire come at you from the ground, traveling from the point of contact, so be ready to dodge a subsequent time. He does another version of this where it's just one big swing after jumping up. It can also summon effigies that will explode with fire after a period of time, making the narrow field even harder to navigate. Nevertheless, this fight shouldn't be as hard as colossal Bosses, so just be patient and hit him in between attacks and he'll go down.

Detour to The Shrine of Adyr
Defeating the Ruiner rewards you with the two random pieces of the Ruiner Set, and a Vestige Seed. In the middle of the bridge is another Umbral Flowerbed you can plant a Vestige Seedling into if you want to. Right before the Umbral Flowerbed should be an Umbral Tumor. To destroy it, you'll have to Soulflay two targets. Transition to Umbral and then move forward along the bridge a little bit and look to your left to find the first one, a little bit below you. The other one will be past the large doorway at the end of the bridge. Turn around and it'll be above you to the left.

Head back toward the now-disintegrated Umbral Tumor but pick up the Nohuta Ritual Hammer first on a narrow ledge on the side of the bridge opposite the tumor. Go to the other side now, jump down to the newly accessible platform below you, and hop onto the next ones until you'll need to Soulflay a target to get across to a platform filled with Umbral Eggs. Ahead of you will be another target to Soulflay which destroys another Umbral Tumor and brings out a bridge for you to cross to your left. Head up the ladder here and climb up the stairs to an Emergence Effigy. If you head along the path to the right there'll be a corpse to your immediate right with two Regular Deralium Nuggets. Further on will be a ladder you can push down giving you a shortcut back down to where the path stopped to a wall when you exited the cavern.
Head back to the other path up this time to be greeted by a Raw Mangler and a Rhogar Hound near some breakable crates and barrels. Continue forward to another Rhogar Hound, and two Raw Manglers led by a Trapper at the entrance of a desecrated doorway. If you go upstairs and head inside you'll find and be able to activate the Vestige of Betrayed Eliard.

If you head further in, you can interact with the bloodied shrine to access the Shrine of Adyr. Interacting with it for the first time will give you the Crimson Ritual Fervour Gesture. Much like the Shrine of Orius and the Shrine of the Putrid Mother, you can purchase various Armour Tincts and Equipment here in exchange for Severed Hands, which you gain by engaging in one of the facets of the game's multiplayer system. Across the shrine is a large opening where you can find three Charred Fingers amidst a pile of corpses.
If you progressed Damarose the Marked's Questline earlier at the mountain ridge, you'll find her here with her hood down, revealing her head and face. She'll be standing right before the large gap on the wall across the Shrine of Adyr. If you speak with her, she'll ask you to get the Adyr-Worshipper's Saw which you'll be able to find while exploring the Cistern. After handing it over to her, she'll then ask you to bring her three pieces of Rhogar flesh. You may not have them yet by then, because you'll need to defeat the Infernal Enchantress, Spurned Progeny, and The Lightreaper to get them. After you do defeat them at Lower Calrath, Upper Calrath, and either further ahead in Fitzroy's Gorge or Upper Calrath B respectively, submit them to her one by one and she'll eat them. You'll next be able to find her and continue her Questline at Bramis Castle.
Crossing the Bridge
Use the shortcut you made when you kicked down the ladder to get back on the bridge and fully cross it this time. Past the wooden barricades will be the Orian Preacher Hammer on a corpse to your right. Follow the path down in this direction to find yourself at odds with a Trapper, Raw Manglers, and Rhogar Hounds. Past them will be a gate to a large open area. To the right of the gate are some Minor Holy Salts, Smite Salts, and Bleed Salts. Further to the right is a Ravenous Fascinator you can Soulflay for Items again, posing as an item orb. The open area past this gate is an arena for an optional Boss fight but we'll come back to it.
For now, head all the way back up and then go through the breakable carriage on your right to reach some Weighted Bolts under some more breakable crates. If you turn around and look to the right, just before the corpse where you found the arrows, there should be a path you can take in Umbral. When you transition to Umbral here, be ready as a Bringer of Stillness can come out and engage you.

After you deal with it, Soulflay the target across from you and use the moving platform to get across. There's a Trapper far on the left that might be able to reach you with its crossbow so be wary of it. Once across, you can hop onto the platform on the left to get to it and get on the bridge. There's a Raw Mangler patrolling inside the tower as well. On the other side of the bridge, there's a Snake Oil Grenade on a corpse by the bars. Inside the tower, the path up is blocked so head down instead. One floor down, you'll find another Bringer of Stillness guarding an Umbral Belly here on a small balcony. When you're in the clear, Soulflay the Umbral Belly to get the Umbral Eye of Hooded Antuli.

When you turn back around you can find and use an Emergence Effigy on your right to transition back to Axiom. Back in Axiom, you can now head back to the tower and head up the stairs to the top. Be careful of the two Raw Manglers waiting for you above. At the top landing, there's an Animated Vigor Skull on the corpse near some breakable objects. Across from it should be a tiny gap on the wall to your right. Outside, you can proceed on a narrow path to keep heading up the tower through a ladder at the end. Carefully cross the wooden beam to another ladder up. At the top, you're rewarded for your climb with a chest containing Fitzroy's Helm, Fitzroy's Armour, Fitzroy's Gauntlets, and Fitzroy's Leggings. Across from it is a Stigma you can Soulflay if you transition to Umbral again. This one will be of a lone warrior trying to fend off multiple foes at the edge of the tower. As usual, you'll get two Umbral Scourings for doing so.
Head back down the tower, going all the way down the stairs this time. Outside, you'll be on a wide path going down to a gate guarded by a Raw Mangler, two Rhogar Hounds, and a Trapper. If you make a U-turn first back up toward the tower, you'll find two Magic Wards on a corpse by some broken stairs. If you need to transition back to Axiom, there's an Emergence Effigy at the foot of the statue to the right of the gate down the path.

The path on the left leads to a gap in a wall that you can't go through from this side. The gate itself is actually not interactable. If you head through the doorway beside it, you'll find some Corrupted Pilgrims near some headstones and graves. Past the next doorway will be more of them, along with a Seething Vigor Skull on the gravestone on your right. Just a few steps between this gravestone and the doorway is an Umbral Flowerbed you can make a Vestige Seedling on if you want to. It's recommended you do so in preparation for the fights ahead.
Rematch Against The Lightreaper
If you head back to the first doorway and the closed gate and head to the last unknown path, to the left. It will lead you to a large open field where The Lightreaper will engage you in another fight. This is the large open area we skipped temporarily a little while ago. This fight is optional but will give you some rewards if you're able to beat him. Since you're stronger now, you'll actually stand a chance this time around. While he's riding on the Lightreaper's Shadow, just keep dodging its attacks. You'll have to time this well as the attacks are able to hit wide areas. When he comes down to fight you himself, you'll have your chance to deal some damage to him in between his attacks. Having a co-op party member will come a long way, as with most Bosses, so he can direct his aggression at someone else while you try and get some hits in.
As he was before, he'll be nimbler than most bosses. He rests quicker than most Bosses after unleashing his onslaughts, so don't be greedy with stringing your combos together. When he calls for his Shadow again and gets back on it, you can repeat the same strategy and just keep dodging until he comes back down. Keep being patient with your attacks to eventually defeat him. As mentioned previously, this fight seems to be optional as even if you can't defeat him here, you'll be able to progress and move to the next Locations from the recent Umbral Flowerbed. It's important to note that if you fail to defeat The Lightreaper here, you won't encounter him again even if you return to this open area, so you only have one chance, at least for this round. If you are able to defeat him, you'll be rewarded with a Vestige Seed, the Lightreaper Flesh, The Lightreaper's Umbral Parasite, and a whopping twenty-five Umbral Scourings.
Departing the Gorge
Past the flowerbed will be an open area with some more Corrupted Pilgrims. There'll be a large archway ahead of you, and a path up to your left. The path up leads to a circular section with a large tree in the middle, guarded by a Proselyte in Axiom. On the other side is a hanging corpse carrying two Faint Vigor Skulls. When you're ready, transition to Umbral here to fight a minor version of the Mendacious Visage. Defeating it may reward you with the Mask of Wrath, a Briostone Trio, a Vigor Moth, and a Vestige Seed. Soulflay the Umbral Belly on the large tree to claim a Saintly Quintessence. There's an Emergence Effigy near the entrance of this section if you want to transition back to Axiom.
Head back down and a Trapper might greet you coming from the archway, along with a Rhogar Hound or two. As you cross the archway, there might be another Rhogar Hound to your immediate right, waiting to blow flames into you as you enter. The path to the left circles around back to the gap in the wall in the previous area, giving you a shortcut back, along with another Animated Vigor Skull on a corpse. Head back to the other path through another archway. In this section there'll be some stairs to your left moving forward, and another archway to your right which a Proselyte is patrolling. There are some Unripe Berries for you to pick up in the corner to the right of the stairs.
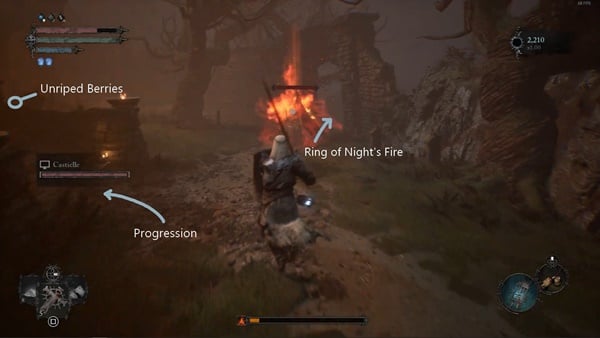
Head out the archway to the right to find some more Enemies to clear up. If you move forward you'll find a closed gate. In front of it is a grave with a corpse from which you can pick up the Ring of Night's Fire. When you're ready to progress, follow the path up the stairs to a ladder. Head up the ladder and then keep moving forward until you get to some stairs leading down to the Taxidermist's Hammer in a room with some barrels stacked together. Enter the doorway here to reach Lower Calrath.
Fitzroy's Gorge Map
Fitzroy's Gorge Videos
Videos Related to this Location
Lords of the Fallen Walkthrough Quick Navigation (Part 3)
Click to be redirected to the specific location walkthrough
Fief of the Chill Curse is one of the Locations in Lords of the Fallen (LotF). A distinct Location in the game where players will go through the snowy region of Mournstead, filled with secret areas and interconnected paths. In Lords of the Fallen (LOTF), players will get to explore a vast, interconnected world where they will journey across the worlds of the living and the dead. This page covers a full walkthrough and helpful guides for the Defiled Sepulchre location in Lords of the Fallen.
- Please visit the Walkthrough page for Lords of the Fallen (LotF) for a detailed guide on the main story.
- You can also check our Game Progress Route page for Lords of the Fallen (LotF) for a summarized progression path.
- Visit the Fief of the Chill Curse Map for a visual aid in finding all Items, Shortcuts, and relevant markers.
General Information
- Previous: Cistern
- Next: Revelation Depths
- Bosses:
- Griefbound Rowena
- Kinrangr Guardian Folard
- The Hollow Crow
- No. of Vestiges: 2
- Vestige of Svornil
- Vestige of Loash
Fief of the Chill Curse Map

NPCs in the Area
Bosses
Enemies
- Griefbound
- Kinrangr Guardian
- Kinrangr Hound
- Kinrangr Hunter
- Mendacious Visage
- Pilgrim
- Raw Mangler
- Remnant
- Rhogar Hound
- Umbral Egg
- Ravenous Fascinator
- Umbral Parasite
- Womb of Despair
- Shrouded Sparrow
- Shrouded Remnant
Items
Weapons
- Beast Axe
- Bow of the Mutilated
- Kinrangr Guardian Axe
- Kinrangr Leader's Axe
- Kinrangr Rebel's Hammer
- Pestilent Blade
- Putrid Child Sword
- Putrid Polearm
- Udirangr Shaman Bow
- Sunken Beseecher
- Talon
Shields
Armor
- J'deyl Skull Helm
- J'deyl Bone Armour
- J'deyl Bone Gloves
- J'deyl Trousers
- Kinrangr Guardian Armour
- Kinrangr Guardian Trousers
Accessories
Spells
Runes
Items
- Ammunition Satchel x7
- Enhanced Lacerating Knife
- Fire Salts x1
- Frost Arrows
- Frostbite Cure x6
- Frostbite Resistance Balm x2
- Large Manastone Cluster x2
- Manastone Cluster x4
- Minor Wither Salts
- Vestige Seed x1
Upgrade Materials
- Animated Vigor Skull x2
- Antediluvian Chisel
- Deralium Chunk
- Large Deralium Shards x4
- Umbral Scouring x2
- Saintly Quintessence
- Small Deralium Fragment x8
- Rebirth Chrysalis
- Regular Deralium Nuggets x10
- Umbral Scouring x2
Key Items & Others
Enemy Drops
- Ammunition Satchel
- Briostone Trio x3
- Kinrangr Guardian Axe
- Kinrangr Hunter Bow
- Kinrangr Hunter Helm
- Regular Deralium Nuggets x3
- Ruq x2
- Vigor Moth
- Vestige Moth
- Large Manastone Cluster x2
- Purifying Balm
- Wooden Cross
- Tumul x2
- Xiax
Full Fief of the Chill Curse Walkthrough
Locating the Fief of the Chill Curse Bell Door
Fief the Chill Curse is one of the iconic levels in Lords of the Fallen. This level in particular is covered with snow and players need to overcome a harsh terrain and interconnected structures and pathways. To formally start your journey, you need to have the Fief Key and this will be given to you by Andreas of Ebb who later can be found in Skyrest Bridge after defeating The Congregator of Flesh. Simply talk to him and he will provide the key that you need. After having the Fief Key, warp to the Vestige of Marco the Axe, and the Bell Door that leads to Fief of the Chill Curse is not far from your location.
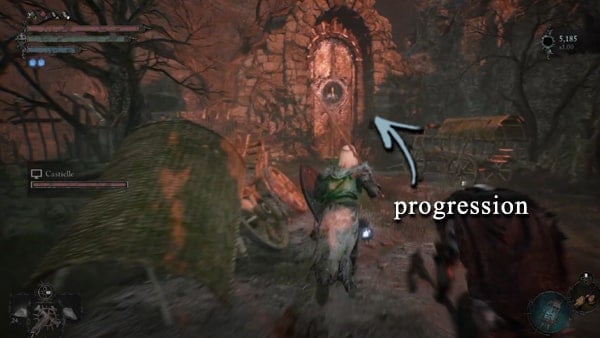
Explore the early sections
Past the Bell Door is a pathway that leads to a cave and a Raw Mangler and a Pilgrim will bid you welcome. After dealing with the enemies in the area, notice that there is a loot near the entrance of the cave. Pick it up and receive x1 Map of the Fief of the Chill Curse. Not far from your location, a well is located, head there and pick up the loot to get an x1 Splitting Axe. Head inside the cave and follow the straightforward path. Use your Umbral Lamp to get rid of the Umbral Entity blocking the path. Notice that there are barrels in the area, destroy them, and find a hidden loot which is x3 Frostbite Cure. Heading further inside the cave you will encounter an Emergence Effigy. Use it if you transferred to Umbral. Continue following the path and eventually, you will find yourself in a wide area and ready yourself for a boss battle.

Defeat Kinrangr Guardian Folard
This boss fight will give you a warm-up for the upcoming battle. Kinrangr Guardian Folard is equipped with an axe and relies on melee combination attacks. Has the capability to release an ice shockwave that has a decent range. He tends to use this if his target is trying to avoid melee combat. His attacks are slow so you can use this to your advantage. The main threat in this battle are his Kinrangr Hounds. You can easily be ganked when not paying attention. Eliminate the hounds first and then focus on Kinrangr Guardian Folard and this fight will end in no time. After the battle ends, receive the following rewards, x1 Frostbite Salts, x1 Kinrangr Guardian Axe, x1 Kinrangr Guardian Armour, x1 Kinrangr Guardian Trousers, and x1 Vestige Seed. Access Umbral and you will notice that there is an Umbral Belly near your location. Soulflay it and receive an x1 Antediluvian Chisel. Head to the slope that will eventually lead you outside the cave. Outside the cave, you will eventually find yourself in a castle or outpost ruins. Activate the nearest Vestige which is the Vestige of Svornil.

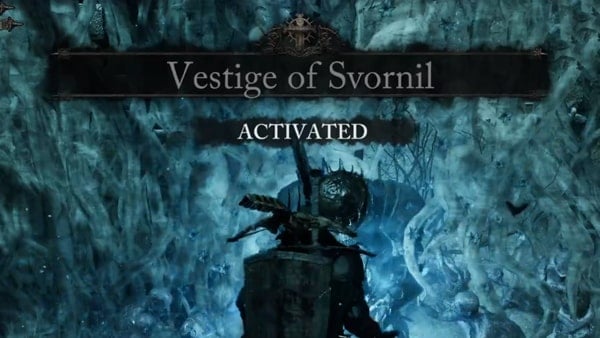
Dark Crusader Class Side Quest Remarks
Useful information here before we move on. If you are currently doing the side quest of unlocking the Dark Crusader Class which will require you to do specific steps like soulflaying hidden Stigmas in the game. The Dark Crusader Stigma near the Vestige of Svornil is one of the key Stigmas that you need to Soulflay to advance this questline. Just make sure to do it before moving on and the second Stigma that we need to soulflay is in the area as well.
Witness The King's Stigma
To proceed, access Umbral and Soulflay the Stigma near your location. it seems that it is a praying Dark Crusader Stigma. Receive x2 Umbral Scouring. Access the nearest to reach the upper platforms. Pick up the x1 Ammunition Satchel and x2 Large Manastone Cluster. Follow the slope and it will eventually lead you to a long road, filled with carriage wreckages. Follow the road and be cautious as Kinrangr Hounds will ambush you along the road. In one of the wreckage here, pick up x1 Lawless. Proceed by following the road and eventually, you will encounter a Stigma situated in another wreckage. Receive x2 Umbral Scouring. After the Stigma event, Kinrangr Hunter will spawn. Deal with and proceed accordingly.
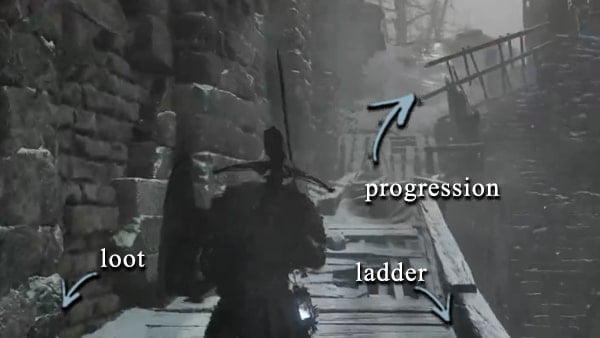
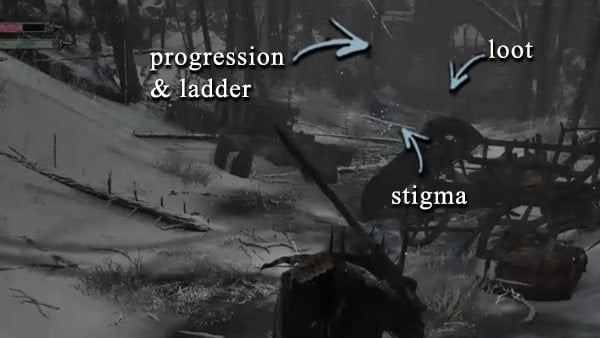
Defeat Griefbound Rowena
There is a gate near your location however it is barricaded. Pick up the loot near the gate which is an x1 Enhanced Lacerating Knife. Use the ladder near the gate to access the upper platforms so you can pass through to the other side. Jump to the lower area and you will notice that the next Sentinel Beacon is not far from your location. Head through the beacon's direction by following the road. Eventually, you will encounter a broken stone bridge. Pass the broken stone bridge is another wooden bridge with loot. Pick it up and receive x3 Frostbite Cure. Note that a Kinrangr Guardian and a Hunter will spawn in the area and deal with them accordingly. When the area is safe to explore, pass the wooden bridge near the stone bridge, Umbra Rift and you will notice that the cliff near you will be extended. Head to the additional platforms that surfaced and eventually you will find a handful of loot that you can pick up. In this area get the following items, x1 Enervated Vigor Skull, x1 Seething Vigor Skull, x1 Replete Vigor Skull, x1 Animated Vigor Skull.
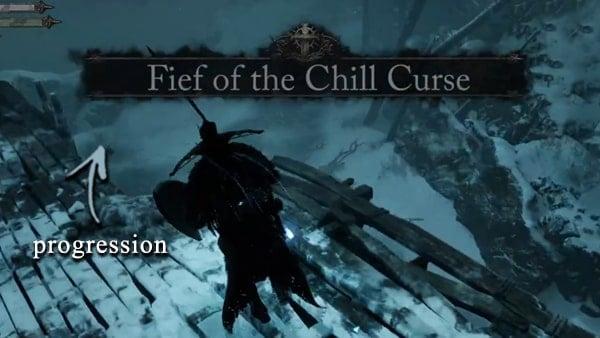

After picking up the said items, head back to the wooden bridge. Head straight by following the cliff and you will find an Emergency Effigy. Access it to return to Axiom. There will be another Kinrangr Hunter in here so proceed with caution. Near your location, head to the nearest cave and pick up the x2 Fire Salts. Head outside the cave and turn a sharp turn to the left to proceed. Near a cliff, another loot can be picked up. Receive x2 Frostbite Resistance Balm. You will notice a ruined church near a wooden bridge. Head inside and we will be taking down a mini-boss. Assuming you are in Umbral, there are a lot of Remnants that you need to take care of. Griefbound Rowena will appear and it will start throwing ice elemental projectiles on you. Avoid being hit while thinning the herd. This boss is not much of a challenge since it relies on its range attacks. After a series of blows, this mini-boss will be defeated in no time. There's an easily missed Umbral Belly in the wall behind where the boss spawns, which can be Soulflayed to drop the Umbral spell, Misery Missile.

Unlock the Iron Gate
After dealing with Griefbound Rowena, head outside the building take a sharp turn to the left, and notice that there are platforms that you can Soulflay and use to get across near the outpost. There is a treasure chest that you can open here. Do so and receive the following items, x1 Shield of Thunder, x4 Small Deralium Fragment, and x2 Regular Deralium Nuggets.

You will notice that below the platform, there is a section where you can jump off. Use the platform so you can be close to it before actually jumping on it. An Umbral Belly is waiting for you here and Soulflay it and receive x1 Saintly Quintessence. To proceed, head to the nearest opening and you will find yourself back in the outpost where the Vestige is located. Activate the lever to unlock the iron gate and pull down the ladder shortcut nearby to unlock the shortcut.

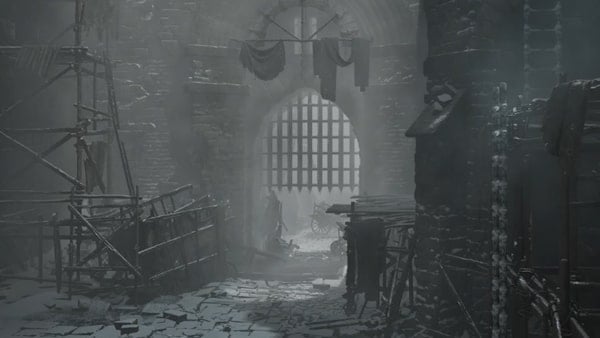
Talk to Drustan
Head to the iron gate and past it, you will find yourself in a ravine. Follow the path here and there will be a loot situated near a carriage. Pick it up and receive a x1 Fire Salts. Not far from your location, another loot can be picked up. Receive x2 Frostbite Resistance Balm. Access the Umbral Rift and continue following the ravine until you reach the end where you need to jump to the lower area. Pick up x1 Udirangr Shaman Bow on the ground. At the center of the area, there's an Umbral Belly that you can Soulflay. Receive x1 Sunken Beseecher as a reward. Beware of the Mendacious Visage lurking in the area. Eliminate it to proceed. Head to the slope and return to Axiom by accessing the nearby Emergency Effigy. Follow the platform and notice that there is an item hanging on a wooden contraption in here. Hit it with a ranged weapon or a spell. Receive a x3 Regular Deralium Nuggets.

Also, there is an available Umbral Flowerbed that you can use here. Follow the platform and you will notice that there is a house nearby, pull down the ladder to unlock the shortcut. Get an x1 Kinrangr Rebel's Hammer from a dead body nearby. Head to a nearby cave and eventually you will reach a section where the icicle deposits will fall. If you get caught up with it, you will die. In Umbral, you will be able to cross the debris by accessing the platform. Pick up the Halting Gesture and there will be a Griefbound in the area, so deal with it accordingly. Exit the cave and notice that there is a settlement nearby. Head there and another Kinrangr Hunter will appear. After dealing with it, head to the gate and use your lamp so you can get past it. One of the houses here is where Drustan is located. Talk to him and he will tell you that he can't stand the cold.


Witness the Experiment Stigma
Transfer to Umbral and you will notice that there is an umbral belly near the gate. Eliminate the Mendacious Visage in the area and Soulflay the belly. Receive x1 Pestilent Blade for doing so. Take the nearest wooden staircase that will lead you to the lower area where a Kinrangr Hunter and Guardian are waiting. You will be in ruins of previous quarters and pan your camera on the upper part of the ruins and you will notice that there is hanging loot. Shoot it and receive x1 Errant for doing so. Not far from your location, there are x2 Regular Deralium Nuggets, hidden in one of the ruined foundations.

To proceed, head to the pathway under the bridge and you can also set up a Vestige Seedling in here since there is a flowerbed. Pass the bridge, and you will find yourself in an open area. Head to the nearest broken bridge ahead of you and get the x1 Glacier Ring situation on a supporting pillar at the end of the bridge.

Past the bridge, follow the pathway ahead, leading to the ruined castle that you can easily see from here. Head to the entrance and there will be two Kinrangr Guardians guarding the area. After dealing with them, obtain the nearest loot which is a x2 Manastone Cluster and x1 Ammunition Satchel. Transfer in Umbral and near the shed, you will notice that there is a ladder that you can use to access the castle gate's ramparts. Get x1 Frost Arrows. To proceed, head down and get past the gate by entering the broken wall near the iron gate. Access the nearest Emergence Effigy to return to Axiom. You will find yourself traversing the roofs of the nearby houses. Head to the lower area and follow the pathway leading further into the inner section of the area. You will find another iron gate that is tightly shut with a Kinrangr Guardian's dead body. Loot it and receive x1 Ancestor's Sword.

Near your location, take the slope that will lead you to the residential district of this area. However, this area is flooded so you will need to access Umbral for you to traverse safely. I will be using the town square's monument as a point of reference since this area has a lot of entry points for walkthrough sake. Head into the Town Square and find the statue. Soulflay the Umbral Belly situated on the statue and receive x1 Putrid Child Sword. From the statue look for the wide path that leads to an empty area with long intact stone fences. There is an Umbral Belly in here that you can soulflay. Receive a x1 Putrid Polearm upon doing so. Head back to the statue and look for a small alleyway that you can go through. At the end of this alleyway, get an x2 Large Deralium Shards.

Near the statue, look for an area where there are planks that will let you access the upper area. Follow the rubbles and this will lead to the nearest house' attic where there is an Umbral Flowerbed that you can use. Erect a Vestige Seedling and rest here or do your upgrades. Near the flowerbed, there is a treasure chest for you to loot. Open it and receive the following rewards, a x1 Bow of the Mutilated, x4 Small Deralium Fragment, x3 Regular Deralium Nuggets, and x3 Ammunition Satchel. Follow the debris and it will lead to the nearest ruined house. Get x1 Animated Vigor Skull here. The path that lies ahead is pretty straightforward. Follow it and you will encounter the ladder shortcut. Pull it down to unlock it and transfer to Umbral to Soulflay the stigma situated inside the nearest ruined house.
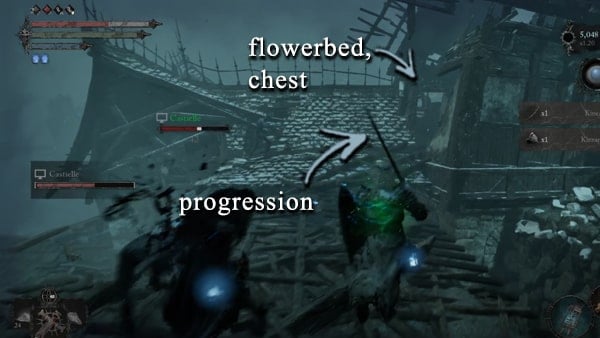

Activate the Vestige of Loash
There is a wooden bridge that you can use to access the nearby roofs. There is a loot nearby situated on a roof. Pick up the x3 Ammunition Satchel and a x2 Large Manastone Cluster. Head to the lower area and get the x1 Animated Vigor Skull. Head to the ladder shortcut to access the upper areas where the Stigma is located. Access the bridge once again and take the rubbles that lead further to the town square. You are in the right direction if an Emergency Effigy is available nearby. Access it to return to Axiom. Follow the floating debris and it will lead you to an almost fully intact roof that has a x1 Talon on it. Head back to where the stigma is located and head back to the location where you opened a treasure chest. If you are in Umbral you can use the Emergency Effigy here to return to Axiom. Notice the opening that you can get through and eventually, you will find yourself on the other side of the previously iron gate. You are in the right direction if the area looks like the upper section or area of the residential district.


Continue following the stairs and eventually, you will encounter a treasure chest. Open it and receive the following items. x1 J'deyl Skull Helm, x1 J'deyl Bone Armour, x1 J'deyl Bone Gloves, and x1 J'deyl Trousers. Near your location, there is a broken outpost that has a loot inside. Use your Umbral Lamp to get past through the wooden Barricade. Get the x3 Frostbite Cure. Access the nearest stone staircase that leads even further to the upper section of the area. Not for long, you will notice that a Vestige can be activated. Activate the Vestige of Loash and rest. Do your upgrades before moving forward. We will be dealing with the Colossal Boss in this area.
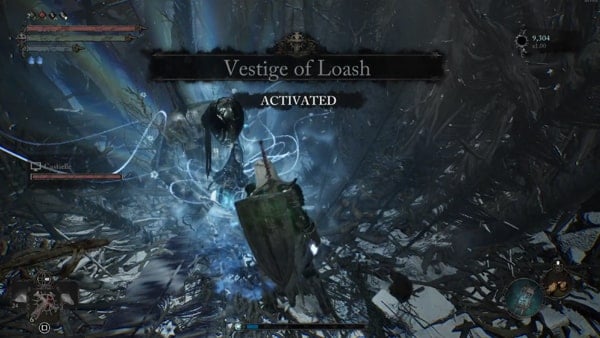
Defeat The Hollow Crow
The Hollow Crow's battle is one of the gimmick fights in the game. The difficulty of this fight varies greatly depending on how fast can you clear its summoned minions. Technically, you will be fighting two bosses in here. Lucy, The Hollow Crow's companion, and him. When the fight starts, transfer to Umbral and you will see that Lucy can be perceived when in this realm. By dealing damage to Lucy, you also deal damage to The Hollow Crow. Once you depleted Lucy's HP, she will retire from the battle momentarily and The Hollow Crow will throw ice breaths with icicles at you or release a homing ice stalagmites.

You can easily dodge this by paying attention to the floor if it glowing. Once Lucy returns to the battle, she will summon more Umbral entities and Kinrangr Hounds. Deplete Lucy's HP and once she's down, the summon enemies will purged as well. Rinse and repeat and in no time, Lucy will encounter her demise, dying for good. Once Lucy has been taken care of, The Hollow Crow will be staggered and you can interact with it to deal the final blow. Get x1 Vestige Seed and x8 Umbral Scouring after the fight.

Kukajin's Questline Remarks
Note that if you progressed Kukajin's Questline and she already offered her services to aid you, you can summon her before fighting The Hollow Crow. After the fight, players need to pay her 6000 Vigor.
Soulflay The Hollow Crow's Stigma
Not far from your location, there is a tunnel that you can access and along the way, The Hollow Crow's Stigma can be Soulflayed. Get x2 Umbral Scouring and x1 Remembrance of the Hollow Crow as a reward.
Cleanse the Beacon
Follow the tunnel and there is an Emergence Effigy nearby, use it to return to Axiom. Get the x1 Kinrangr Leader's Axe near the Effigy. Access the nearest ladder and you will find yourself on a straightforward rampart that will lead to the tower beacon. Upon entering the tower, leave the nearest ladder and access the wooden staircase that will lead you to the top of the tower. Eventually, you will reach the beacon and get the treasure chest first near it and receive the following rewards, x1 Deralium Chunk, x2 Large Deralium Shards, x3 Regular Deralium Nuggets, and x4 Small Deralium Fragment.


Confront The Lightreaper
To proceed, remember the ladder that we skipped when we entered this tower? Access it and it will lead to an open area with a broken bridge. Get the nearest loot which is a x1 Animated Vigor Skull. Not far from your current location, get the x1 Yorke's Ring. In this area, The Lightreaper will spawn and you will be forced to fight him. However, this is not going to be the final encounter with The Lightreaper thus, if you die here, he will leave the area and the fight will no longer continue. This is more of a theming fight to set the stage later on for the final bout. Just get the items in this area and move on. If you would like to know more about The Lightreaper or you are eager to know how to locate him to settle the score, head to our Bosses page or Bramis Castle Walkthrough. Head back to the wooden bridge and access Umbral so you can traverse the lake. Head to your right first and notice that there is an Umbral Belly that you can Soulflay. Do so and get a x1 Aelstrix Take a sharp turn to the left and follow the lake.

Past the bridge, you will be encountering submerged residential houses. There is an Umbral entity blocking the path here. Soulflay it and proceed. You will find yourself in an area where an Umbral Entity is blocking the path and you need to find the entity that is controlling the tumor. Follow the alleyway here and you will notice that there is an Umbral Entity situated on the top of a nearby house that you can Soulflay. Do so and get an x1 Minor Wither Salts and an x1 Xiax. Follow the alleyway and you will get a x1 Beast Axe from a dead Kinrangr Guardian.
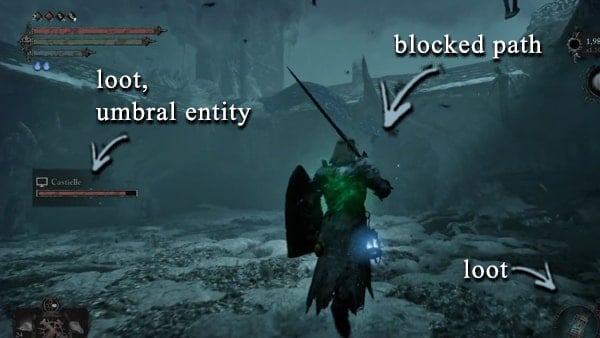
Head back to the area and notice that there is another path blocked path that you can Soulflay. Do so and proceed to the next area that looks like a nest. Clear the area and there is an Umbral Belly that you can Soulflay to get a x1 Rebirth Chrysalis. Not far from your location, you will notice the Umbral Entity that controls the tumor, blocking the first path we noticed in this area. Soulflay it and it will be unlocked. This area will be festered with enemies like Mendacious Visage. Be cautious and clear the area. Soulflay the Umbral Belly nearby and get an x1 Saintly Quintessence.

Now that we are done here, head back to the lake and follow it until you find a Stigma that of a dying man. Soulflay it and you will receive x2 Umbral Scouring. You will find yourself on a series of slopes that will lead you further in the upper area past the lake. There is an Emergence Effigy that you can use to return to Axiom.
Dark Crusader Class Side Quest Remarks
Note that this is one of the required Stigma to progress the Dark Crusader Class side quest. If you are following this guide, this is the second Stigma in this area that you need soulflay so you can move on to the next.

Upon following the slope, you will realize that this is a shortcut back to the original outpost or camp which the Vestige of Svornil. That goes for this area and we pretty much covered everything that it has to offer. Access the Vestige and prepare to head out to the next area.
Useful Umbral Ending Remarks
It is worth noting that if players aim to acquire the Umbral Ending, the Fief of the Chill Curse area should be revisited once again. After acquiring and giving the Rune of Adyr to a non-hostile remnant in Mother's Lull, it will transform into the Withered Rune of Adyr. After defeating the Iron Wayfarer in front of Bramis Castle gates, and also defeating The Sundered Monarch in the castle's throne room, the following steps must be followed to progress and acquire the Umbral Ending. Players need to use the Umbral Seedpod on Melchior's body. After doing the said step, head to Fief of the Chill Curse so we can look for the Iron Wayfarer's presence in the Umbral Realm. To find him, from the Vestige of Svornil, access the ladders to reach the upper platforms. You will soon find yourself on the same road that we used when we first traversed this area.
This is the pathway filled with carriages and barrels. Follow the long road and eventually pass the wooden bridge, you will reach a barricaded gate where a ladder is situated near it. Access the ladder and the banner of the area will be displayed. Access the nearest stairs and transfer to Umbral. Follow the cliffs and eventually, you will find the Iron Wayfarer. Interact with him and use the Withered Rune of Adyr. This will end him and grant the player Harkyn's Umbral Parasite. This is a key item that is required to further progress the Umbral Ending.
Fief of the Chill Curse Map

Fief of the Chill Curse Videos
Videos Related to this Location
Lords of the Fallen Walkthrough Quick Navigation (Part 4)
Click to be redirected to the specific location walkthrough
Pilgrim's Perch - Belled Rise is one of the Locations in Lords of the Fallen (LotF). Pilgrim's Perch is a ramshackled town built onto a cliff face and is inhabited by various Pilgrims. In Lords of the Fallen (LOTF), players will get to explore a vast, interconnected world where they will journey across the worlds of the living and the dead. This page covers a full walkthrough and helpful guides for the Pilgrim's Perch location in Lords of the Fallen.
- Please visit the Walkthrough page for Lords of the Fallen (LotF) for a detailed guide on the main story.
- You can also check our Game Progress Route page for Lords of the Fallen (LotF) for a summarized progression path.

General Information
Pilgrim's Perch
- Previous: Skyrest Bridge
- Next: Forsaken Fen
- Bosses: Gentle Gaverus, Mistress of Hounds, Scourged Sister Delyth
- No. of Vestiges: 2x Vestiges
- Vestige of Chabui
- Vestige of Blind Agatha
Belled Rise
- Previous: Revelation Depths
- Next: Path of Devotion/Manse of the Hallowed Brothers
- Bosses: The Sacred Resonance of Tenacity
Pilgrim's Perch Map
NPCs in the Area
Bosses
Enemies
- Ardent Penitent
- Crimson Rector
- Marksman
- Penitent
- Pilgrim
- Pureblade
- Radiant Hound
- Ravenous Fascinator
- Remnant
- Umbral Egg
- Umbral Parasite
- Womb of Despair
Items
Weapons
- Bloodletter
- Bloody Glory
- Broken Bucket
- Condemned Set
- Devotion's Might
- Hallowed Bow
- Hallowed Praise
- Hammer of Holy Agony
- Partisan Crossbow
- Perdam Falchion
- Reject's Blade
- Scourged Sister Flail
- Thorned Crimson Rector Sword
Shields
Armor
- Antique Hallowed Sentinel Set
- Ardent Penitent Head Cage
- Condemned Set
- Orian Preacher Set
- Penitent Trousers
- Sacred Resonance Set
Accessories
- Brawn Ring
- Cleric's Benediction
- Defaced Ring
- Defiance Ring
- Holy Blood Ring
- Relic of Perpetuation
- Slinger's Ring
- Warrior's Claw
Spells
Runes
Items
- Ammunition Pouch x10
- Bleed Cure x4
- Bleed Resistance Balm x6
- Bleed Salts x3
- Bloody Hatchet x1
- Empyrean Grenade x1
- Enhanced Bloody Hatchet x1
- Faint Vigor Skull x2
- Holy Ward x5
- Lacerating Knife x1
- Lucky Paw x2
- Minor Fire Salts x6
- Minor Wither Salts x3
- Poison Resistance Balm x3
- Pulsing Arrows x1
- Radiant Bolts x1
- Radiantburst Parchment x1
- Small Manastone Cluster x10
- Smite Cure x2
- Umbral Scouring x4
- Umbral Vertebrae x6
Upgrade Materials
- Large Deralium Shards x6
- Saintly Quintessence x1
- Small Deralium Fragment x22
- Regular Deralium Nuggets x3
Key Items & Other
- Bloody Aspergillum
- Book of Sin
- Bowl of Revelations
- Common Orian Prayer
- Hallowed Sentinel Scripture
- Map of Pilgrim's Perch Ascent
- Map of Pilgrim's Perch Descent
- Pridebound
- Umbral Eye of Iorelo the Cursed Knight
- Umbral Eye of Rosamund
Enemy Drops
- Ammunition Pouch
- Ammunition Satchel (Boss Drop)
- Ardent Penitent Arm Chains
- Bell Staff
- Large Manastone Cluster (Belled Rise)
- Marksman Crossbow
- Pilgrim Bandages
- Pilgrim Hood
- Prison Cell Key
- Pureblade Trousers
- Regular Deralium Nuggets (Belled Rise)
- Sacred Resonance Hammer (Boss Drop)
- Scourged Sister Set or Scourged Sister Flail (Boss Drop)
- Sin-Pierced Sleeves (Boss Drop)
- Sin-Pierced Sword (Boss Drop)
- Small Deralium Fragment
- Small Manastone Cluster
- Vestige Seed x3(Boss Drop)
Merchant Wares
- Adyr's Rage x1
- Charred Finger x5
- Corrupted Pilgrim Bandages x1
- Corrupted Pilgrim Cape x1
- Corrupted Pilgrim Hood x1
- Corrupted Pilgrim Trousers x1
- Fist of Insight x1
- Raw Mangler Axe x1
- Raw Mangler Sleeves x1
- Raw Mangler Cape x1
- Raw Mangler Trousers x1
Full Pilgrim's Perch - Belled Rise Walkthrough
Tackling the Locked Doors
This section of Pilgrim's Perch covers the areas behind the locked doors requiring the Pilgrim's Perch Key. This key can be bought from Stomund, Captain of the Fidelis at Skyrest Bridge, and comes with a complimentary Map of Belled Rise. Though the key and the areas locked behind it can be obtained and reached as soon as you get to Pilgrim's Perch for the first time, it is intended to be tackled at a higher level, after completing Revelation Depths.
Teleport to the Vestige of Blind Agatha and unlock the door opposite to it, in the area where you first met Byron. Enter the area and behind the pillar immediately in front of you, you'll find a Pureblade and a Marksman. After defeating them, look left from the pillar to find a Thorned Penitent sitting in front of a wooden gate. After defeating the enemy, take your Umbral Lamp out and shine it at the gate to reveal a path forward.

Pass through the gate and ignore the item directly to your left, as it's a Ravenous Fascinator lure. Also be careful of shining your Umbral Lamp out in this room as it is filled with Remnants, Umbral Egg, and Womb of Despair waiting to ambush you. Follow the curve of the room to the right, and you'll emerge out onto some wooden platforms overlooking some lower platforms. Defeat the Marksman at the end here, then jump down onto the lower platform ahead and defeat the three Marksmen and Avowed.
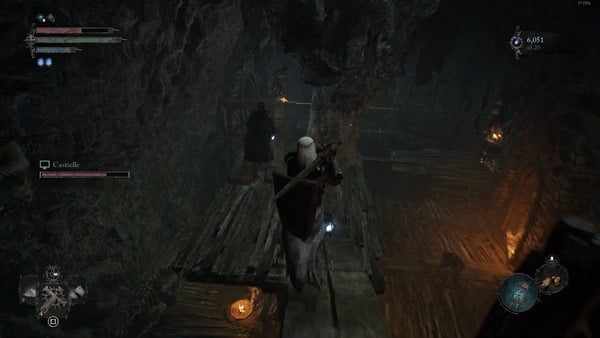
If you look back towards where you came from, you'll see that there's an item we missed in the water below the lower platforms. With the threat of the Marksmen now dealt with, walk across the lower wooden platforms back until you reach the platform with a statue of a woman. When you walk onto small planks of wood connecting this platform and the next, the platforms will collapse and you'll get ambushed by the three Ardent Penitents in the water. You can make the jump across to the next platform without falling through, but before you do, there are a couple things to note. If you look ahead and to the right, you'll find a ladder you can climb to get back up to the lower platforms. Use it after running and grabbing the item, or if you fall into the water by mistake. If you want to fight the three Ardent Penitents, use your Umbral Lamp to soulflay the Umbral Parasite in the middle of the water first. You can do so from the platforms here. Either way, grab Devotion's Might from the water, then climb back up to the end of the wooden platforms.

There are now two ways to proceed forward - to the right, into a red-hued room, or to the left, into a blue-hued room. Go right to progress. If you have any ranged capabillites, defeat the Pilgrim on the other side of the room. Afterwards, take your Umbral Lamp out and soulflay the Umbral Parasite in the hole. You can now jump down and defeat the Crimson Rector, after which the Brawn Ring next to it can be freely looted. Approach the double gates in the area and open them. You can find an Umbral Flowerbed just outside.

At the Umbral Flowerbed, again there will be two ways to go - one path going directly forward from the gate and the other going left. If you follow the path going left. You'll find a Pilgrim and two Thorned Penitents on a wooden walkway. If you enter the Umbral here, you'll eventually get back to the earlier split in the path leading back to the red room. You can find an Emergence Effigy to take you back to the Axiom by the entrance of the red room if you decide to explore this loop.

At the Umbral Flowerbed, head straight forward from the gate, taking the slope curving right. You'll get to the Pilgrim's side of the room that you defeated from range earlier. Head through the narrow passageway at the top of the path, and it'll lead back outside. When you exit through the doorway to try and defeat the Pilgrim ahead, another Pilgrim to the right will shove you. Deal with both Pilgrims and enter the Umbral.
Continue forward and before you hop onto the bone bridge ahead, look to the left and carefully make your way across the thin wooden beam to find the Hammer of Holy Agony. After crossing the bone bridge, defeat the Pilgrims and Shrouded Remnant. You'll find a doorway to your left, but before you head through, continue down to the end of the wooden walkway to find an Umbral Belly. When soulflayed, it drops the Umbral Eye of Iorelo the Cursed Knight.

Head back and go through the doorway we passed by earlier. In this small cavern, you'll find another Umbral Flowerbed, as well as two Large Deralium Shards behind the ladder. If you decide to plant a Vestige Seed here, you can return to the Axiom by resting. Climb up the ladder when you're ready to proceed, and up the slope you'll find a Pureblade and Radiant Hound. Continue up the slope and at the top, you'll emerge into what looks to be some holy hideout.

Two Ways Forward
From here, you can either go down the stairs to the left, or through a doorway on the right. Going through the door on the right leads to the Path of Devotion and going down to the left leads to the Manse of the Hallowed Brothers. Avoid going down to the left for now as that starts up a boss fight. Start by heading through the doorway on the right. Deal with the Pureblade praying by the altar, then approach the stairs going up and avoid the rolling barrel. Ascend the stairs and when you turn the corner, avoid the next rolling barrel. At the top of these stairs, you'll find an Ardent Penitent and Marksman. Deal with them, then continue going upwards. At the top, you'll be in a cavern occupied by three Radiant Hounds, an Arden Penitent, and a Pureblade. In the far left corner, you can pick up the Bloody Glory.

When you exit the cave here and get back outside, you'll find yourself on the Path of Devotion, a brightly lit pathway surrounded by eye-shaped totems. The Path of Devotion is a stand-alone optional area when you can find several pieces of equipment and useful upgrade materials. When you're done with the Path of Devotion, return here to continue through Belled Rise and progress through the game.
Boss: The Sacred Resonance of Tenacity
After completing the Path of Devotion, head back to Belled Rise by entering the cave near the Vestige of Dieter. Return downstairs to the room where you found a Pureblade praying. Exit the room and go down the stairs towards a gazebo-looking structure. Circle around to it's entrance and you'll start the fight against The Sacred Resonance of Tenacity. Try and defeat the Pilgrims in the area first to avoid getting overwhelmed. To do so, you'll have to soulflay the Umbral Parasite in the middle of the gazebo.

The Sacred Resonance of Tenacity is a Receiver of Sacred Resonance, highly regarded 'saints' of the Hallowed Sentinels wielding large hammers. This boss has a fairly simple moveset made up of a variety of hammer swings, but it's attacks can build up Bleed and Smite. One move to look out for in particular is when the boss imbues it's hammer with Smite. A few seconds later, a large shockwave is released from it, knocking you down and dealing heavy damage. You can dodge into the shockwave to avoid the attack.

When defeated, it'll drop the Sacred Resonance Hammer and a Vestige Seed. You can also pick up a Radiantburst Parchment from within the gazebo. Exit the cave back outside on the balconies of Pilgrim's Perch, where there'll be an Umbral Flowerbed nearby. Turn left as you exit to find two Large Deralium Shards. Do a 180 and go down the wooden walkway the other way. You'll find an Enhanced Bloody Hatchet on a corpse by the wall on the right.
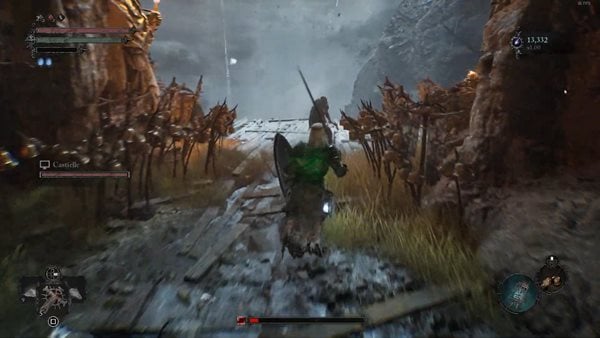
Onto the Manse
Take your Umbral Lamp out and shine it on the broken bridge to reveal an Umbral path leading to the other side. There'll be a ladder on the right up ahead, but before you go up, an Ardent Penitent will jump out from behind it. Remember where this ladder is, and continue down the wooden walkway. You'll have to take out your Umbral Lamp again or just enter the Umbral to get up to the next platform. Defeat the Pilgrim up here then enter the doorway on the right. There'll be an Umbral Flowerbed directly on the left, and a chest containing four Small Deralium Fragments, three Regular Deralium Nuggets, and two Large Deralium Shards. If you continue to the end, you'll get to a ladder you can knock down to open up a shortcut back to the cavern lake next to the Vestige of Blind Agatha. If you entered the Umbral earlier you can take this opportunity to return to the Axiom at the Vestige.

Return up the shortcut ladder and make your way back to the ladder an Ardent Penitent was hiding behind. Climb up this ladder and take the stairs up to find a Pilgrim. Up the next two set of stairs, you'll find two Avowed and a Marksman. Take the ladder at the end upwards, where you'll find two more Marksmen and a Pureblade guarding a large elevator. Before hopping onto the elevator, open the door on the opposite side to find a Crimson Rector next to the Bloodletter. As you exit this room, there'll be a ladder going upwards to your right. When you reach the top, be careful of the Pilgrim behind the wooden barricades on the right, as they will push you off the platform, killing you. Further ahead, past a wooden plank bridge, defeat the other Pilgrim and enter the doorway on the right.

Keep following the cave, until you get to a doorway leading back outside. Here, you'll find a Marksman, a Pureblade, and a Crimson Rector. Lure them back into the cavern to avoid getting knocked off the platform to your doom. After defeating them, go back outside and head up the ladder on the right. You can defeat a Marksman up here and pick up the Slinger's Ring from the corner. Head back down the ladder, then descend the next ladder ahead. Waiting for you at the bottom are three Pilgrims and an Avowed. To the right of the ladder, you can find two Bleed Resistance Balms. Through the doorway on the right halfway across the platform, you'll find a congregation of about seven Thorned Penitents and two Pilgrims. Before they can be defeated, you'll need to soulflay the Umbral Parasite in the middle of the room. Afterwards, the corpse on the throne at the top of the stairs can be looted for Cleric's Benediction, two Holy Wards, two Smite Cures, and two Bleed Cures.
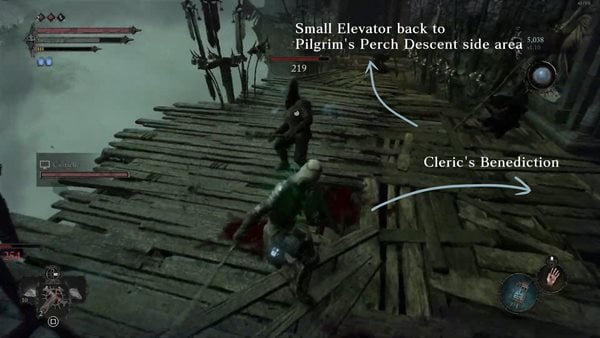
Exit the room and turn right to find a small elevator. This brings us back to the balcony with Pridebound that leads back into the side room where you obtained the Antique Hallowed Sentinel Set, reached through the Umbral by wading in the lake next to the Vestige of Blind Agatha at Pilgrim's Perch Descent. Now that you've levelled up significantly, you can jump down to the area if you skipped it last time. Here, you'll find a Pureblade, two Ardent Penitents, three Pilgrims, and a few Penitents. After clearing the area, you can grab the Hallowed Sentinel Scripture from the cage at the top of the stairs in the middle of the other side of the platform. Enter the Umbral, and on the right side of the platform, you'll find a hanging cage with a Stigma you can soulflay for two Umbral Scouring. The wooden plank going to the right leads back down to sections of Pilgrim's Perch Descent. Instead, head up the ladder back to the upper balcony, and you can return to the Axiom using the Emergence Effigy here.
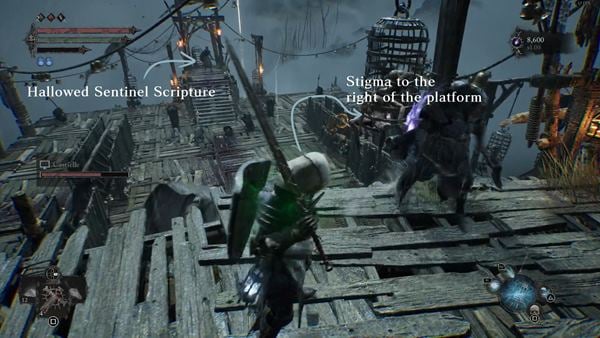
Go back up the small elevator and backtrack back to the large elevator. Taking it will bring you up to the Manse of the Hallowed Brothers.
Optional Doors
There are two other locked doors in Pilgrim's Perch that can be unlocked with the Pilgrim's Perch Key, though they are entirely optional and only contain loot behind them. One such door can be found to the left of Gerlinde's prison cell. Return to the Vestige of Blind Agatha, and take the elevator down. Descend down the ladder on the right and in the right side of this lower area, you'll be back at Gerlinde's cell. Further in will be the locked door requiring the Pilgrim's Perch Key. Out the door and on the balcony, you'll find two Pilgrims, two Marksmen, a Thorned Penitent, a Pureblade, and a Crimson Rector, all protected by an Umbral Parasite. After defeating them, you can find the Warrior's Claw on the right side of the platform

Pilgrim's Perch Belled Rise Map
Pilgrim's Perch Videos
Videos Related to this Location
Lords of the Fallen Walkthrough Quick Navigation (Part 5)
Click to be redirected to the specific location walkthrough
Abbey of the Hallowed Sisters is one of the Locations in Lords of the Fallen (LotF). Abbey of the Hallowed Sisters serves as the female counterpart to the Manse of the Hallowed Brothers. Female members of the Hallowed Sentinels call the Abbey of the Hallowed Sisters home. Prior to the events brought about by the Rune of Adyr, the Sisters of the Abbey were not allowed to cohabitate or mingle with the Brothers of the Manse, and vice versa. In Lords of the Fallen (LOTF), players will get to explore a vast, interconnected world where they will journey across the worlds of the living and the dead. This page covers a full walkthrough and helpful guides for the Abbey of the Hallowed Sisters location in Lords of the Fallen.
- Please visit the Walkthrough page for Lords of the Fallen (LotF) for a detailed guide on the main story.
- You can also check our Game Progress Route page for Lords of the Fallen (LotF) for a summarized progression path.

General Information
- Previous: Tower of Penance
- Next: The Empyrean
- Bosses: Abbess Ursula, Rapturous Huntress of the Dusk
- No. of Vestiges: 1
- Vestige of Rosamund
Abbey of the Hallowed Sisters Map
NPCs in the Area
Bosses
Enemies
- Abbess
- Abbess Ursula
- Ardent Penitent
- Bringer of Stillness
- Holy Bulwark
- Pilgrim
- Radiant Hound
- Rapturous Huntress of the Dusk
- Receiver of Sacred Resonance
- Remnant
- Sanctified Huntress
- Scourged Sister
- Shrouded Remnant
- Shrouded Sparrow
- Sin Piercer
- Thorned Penitent
- Umbral Egg
- Umbral Parasite
- Womb of Despair
Items
Weapons
- Abbess Staff
- Animated Vigor Skulls
- Heretical Sentinel's Hammer
- Multi-Shot Crossbow
- Sanctified Huntress Spear
- The Toll
Shields
Armor
Spells
Accessories
Runes
- None
Items
- Ammunition Satchel
- Large Deralium Shards
- Large Manastone Cluster
- Replete Vigor Skull
- Seething Vigor Skull
- Wither Salts
Upgrade Materials
Key Items & Other
- Enhanced Accusing Spirit
- Enhanced Grenade
- Enhanced Poison Javelin
- Hallowed Sentinel Prayer
- Umbral Eye of Blind Agatha
- Umbral Scouring
- Vestige Seed
- Weighted Arrows
Enemy Drops
- Abbess Staff
- Ammunition Satchel
- Bleed Cure
- Bleed Resistance Balm
- Briostone Pair
- Enervated Vigor Skull
- Large Manastone Cluster
- Mhakev
- Minor Holy Salts
- Rapturous Huntress Helm
- Sanctified Huntress Spear
- Scourged Sister Flail
- Vestige Moth
- Vestige Seed
- Weeping Abbess Mitre
Merchant Items
- Angel's Aegis
- Avowed Mace
- Blackfeather Ranger Set
- Bleed Cure
- Burn Cure
- Exiled Stalker Dagger
- Exiled Stalker Set
- Fungal Bowman Dagger
- Frostbite Cure
- Holy Bulwark Mace
- Ignite Cure
- Large Deralium Shards
- Lucky Paw
- Minor Fire Salts
- Minor Holy Salts
- Minor Wither Salts
- Pointed Stick
- Poison Cure
- Regular Deralium Nuggets
- Ruiner Axe
- Shuja Warrior Spear
- Sin-Piercer Bow
- Skinstealer Knife
- Small Deralium Fragment
- Smite Cure
- Trapper Crossbow
- Udirangr Warwolf Set
Stomund, Captain of the Fidelis
- Ammunition Pouch
- Blackfeather Ranger Axe
- Briostone
- Church of Orian Radiance Greatshield
- Flail of Holy Agony
- Hallowed Knight Set
- Hallowed Knight Sword
- Holy Grenade
- Mirror of Protection
- Mournstead Infantry Set
- Mournstead Infantry Shield
- Mournstead Infantry Spear
- Olandi
- Old Mournstead Large Sword
- Old Mournstead Pike
- Orian Preacher Shield
- Orian Sorcerer's Ring
- Partisan Set
- Partisan Shield
- Pilgrim's Perch Key
- Poacher's Ring
- Radiant Purifier Polearm
- Ring of Duty
- Ring of Eternal Faith
- Royal Council Ring
- Sovereign Protector's Ring
- Small Manastone Cluster
Lords of the Fallen Full Abbey of the Hallowed Sisters Walkthrough
Breaking the Rules
After clearing Tower of Penance, you can now go back to the Manse of the Hallowed Brothers and head to the little garden where you can find Stomund, Captain of the Fidelis. If you haven't talked to him before yet, he'll say a thing or two about how men were forbidden to enter the Abbey of the Hallowed Sisters, at least before the whole ordeal began to occur that shook up Mournstead. He'll say he'll have to break the rules now, as he has faith that Judge Cleric is not aware of the sacrilegious acts of the rest of the Hallowed Sentinels, and so must be appraised and consulted to put an end to the madness. If you chose to be male for this playthrough, so will you.
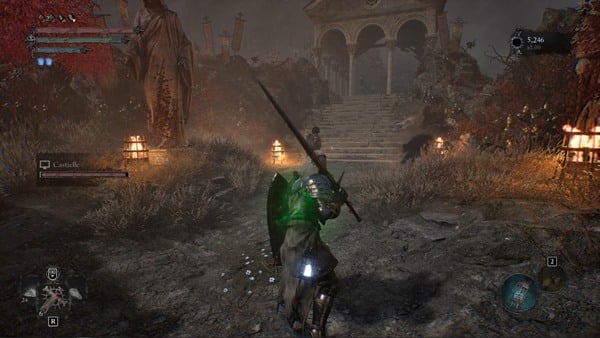
Head up the stairs to the broken bridge, and then proceed on the path below. When you emerge out of the long tunnel, you'll find a Sin Piercer patrolling with her Radiant Hounds. The path in front of you ends with a Seething Vigor Skull. Up the stairs to the left will be a Stigma you can Soulflay in after transitioning to Umbral. You'll witness a sentinel turning away someone seeking refuge, in the name of Judge Cleric herself. Keep going up past some Thorned Penitents to officially enter the Abbey of the Hallowed Sisters.
Turned Away by Abbess Ursula
You'll immediately find yourself in a large courtyard guarded by Abbess Ursula, possibly the very sentinel you witness in the Stigma. Immediately, she'll be firing Radiant lasers at you from the get-go, as long as she can see you. You'll want to rush and get to her as quickly as possible to try and nullify this long-ranged attack. After getting some hits in, expect her to teleport and reappear elsewhere in the courtyard.

She's not without some melee attacks though, so expect some swipes from her large staff. She'll also start to let loose some Radiant thorns that curl and grow through the ground. You'll want to anticipate those and steer clear but also look closely for opportunities to get string some combos in and deal damage. This fight shouldn't be too hard as she's generally frail and will stagger easily if you're able to hit her consecutively. When you defeat her, you'll be rewarded with the Abbess Staff, Weeping Abbess Mitre, and a Vestige Seed.
Head up the stairs and transition to Umbral if you aren't already to Soulflay and Umbral Belly for an Enhanced Accusing Spirit. Continue up the stairs to the next landing and pick up the Large Manastone Clusters and Ammunition Satchels guarded by a lone Radiant Hound. Continue further up the stairs to the next landing where you can find and activate the Vestige of Rosamund. Right beside it will be Thehk-Ihir. Talk to him to get a short history lesson about the Abbey of the Hallowed Sisters, and then you'll be able to peruse his wares as necessary. You'll find two Large Deralium Shards behind the wall to the right of the Vestige, under some breakable objects.
The large gate to the right of Thehk-Ihir is impassable. When you're ready, enter the doorway past Thehk-Ihir to the left and move forward. Right as you enter, expect an attack from an Ardent Penitent waiting on your left. You can pick up two Animated Vigor Skulls from the corpses by the barred door. Continue forward and up the stairs to find an Umbral Parasite-empowered Sin Piercer and her Radiant Hound. Transition to Umbral to Soulflay the target behind her to get rid of the vines.

The tunnel past it will be filled with Remnants and Shrouded Remnants, as well as large red bulges that will explode with proximity. Navigate safely through and find your way out of the long tunnel. When you emerge out of the rubble, you'll find a path up some stairs ahead of you, and a path going down to the right. There's an Emergence Effigy at the foot of the left statue on the first landing of the stairs ahead of you if you need it. The path down leads to the large gate past the Vestige of Rosamund and will yield more Ammunition Satchels and Large Manastone Clusters. You can pull the lever on the left to raise the gate and open a shortcut back to the Vestige should you need it.

Head back up the path and then climb the stairs this time. If you haven't dealt with them already, there'll be another Sin Piercer and her Radiant Hound patrolling here. At the next landing, you'll be facing another such pair, in addition to a Scourged Sister. The breakable stacks of barrels behind her are hiding a Seething Vigor Skull. Continue up the stars to find a chest containing Weighted Arrows and more Ammunition Pouches. Be ready for the Ardent Penitent waiting to charge you at the top of the stairs past the chest. The gate it was guarding can't be opened from your side for now so continue into the structure to the left.
As you head down you'll find yourself in another large courtyard. This one will be filled with multiple Enemies, led by a Receiver of Sacred Resonance. When it's safe to do so, you can transition to Umbral and Soulflay the Stigma near the tree to witness someone giving a speech as she's initiated into the Hallowed Sentinels. You'll get two Umbral Scourings for doing so. Nearby, you can find the Hallowed Sentinel Prayer Gesture on the ground under the tree, near the foot of the stairs you came down on.

If you head out the side of the courtyard that looks like a terrace, you'll find a chest on the far left containing another two Ammunition Pouches and an Enhanced Grenade. On the other side will be a closed door you can bypass if you're still in Umbral. After you enter it and turn right, you can find a platform on the left that extends past the terrace. Following the ledge to the right, you'll find a ladder beside a large hanging bell. At the top, head to the right and look down to Soulflay a target that'll bring out another platform back in the lower level. Head back down and move forward to get on the platform on your left past the terrace fence. Look above you both on the right and left sides and Soulflay both targets to bring out a bridge on the upper level. Head back up there through the previous ladder and cross it. Be careful of the Womb of Despair that may ambush you as you do.
Across, head down the ladder that's a bit easy to miss. Get back on the path of the terrace and continue forward. Soulflay the Umbral Belly to get the Putrid Child Arm Wrappings, Putrid Child Robes, Putrid Child Mask, and Putrid Child Leg Wrappings. Follow the path all the way back to the courtyard to find an Emergence Effigy right as you step foot in it. Run along the walls of the courtyard on your left to find the stairs to progress forward.

At the top, you'll essentially be on the upper floors around the courtyard. There's a path on your right blocked by breakable objects. The path itself is also littered with breakable objects. At the start of the path is an Umbral Flowerbed you can use. As you follow the path, you'll find Stomund, Captain of the Fidelis again, in the middle. If you talk to him, he'll tell you the story of the large tree in the middle of the courtyard. There used to be an important banner that hung on it, and he'll ask you to return any pieces of it that you can find. You can give him the Damaged Standard which you found in the Manse of the Hallowed Brothers, as well as the Tattered Banner which you can find as a drop after killing an Abbess here in the Abbey. You can look at his wares for any new Items and Equipment he might be selling. At the end of this path, there's another Ardent Penitent waiting to attack you behind some breakable objects to your right. At the end of the hall is the Heretical Sentinel's Hammer.
Head back to the Umbral Flowerbed now and take the other path. At the top of the stairs, you'll find another Scourged Sister-Sin Piercer duo. After dealing with them, you can break the breakable objects here and follow the path it opens up down to two Wither Salts in a bucket. Transition to Umbral here to find a gap in the corner of this rooftop. Before dropping down, look up toward the next building and Soulflay the target to bring out a platform above you. Drop down to the next rooftop and then turn left. Cross the vine of thorns to a narrow ledge and follow the path around to a ladder. Move forward at the top through the ledges and eventually hop onto the platform you brought out. You'll eventually get to a rooftop with some Shrouded Sparrows guarding the Unbridled Focus. Turn around and head to a platform on your left, opposite the item. Drop down onto another rooftop and then onto the path leading back to the Umbral Flowerbed. If you've planted a Vestige Seedling there, you can use it to rest and transition back to Axiom if you'd like.

Head back up to deal with the Scourged Sister-Sin Piercer duo again if you've rested. This time move forward and head down the stairs on your right first to pick up two Large Manastone Clusters and three Ammunition Satchels. At the foot of the stairs, you can unlock a shortcut gate, which was the locked gate behind an Ardent Penitent you couldn't open previously. Head back up and then climb the narrower stairs up this time. The gate won't be passable but you can transition to Umbral again to find a ledge to go around it. Be careful here 'cause an Abbess will be shooting radiant lasers at you from way farther up. On your right is another Wither Ward amidst the breakable objects, as well as a Soulflay target ahead of it that can bring out a bridge so you can have a little shortcut to flank all the Enemies on the other side if you want to. When you climb up the ladder, look to your right and Soulflay the target to bring the platform to you. Soulflay the next one as well to ride it across. On the other side, Soulflay the Umbral Belly to get the Enhanced Poison Javelin.
If you choose to head up the stairs to the left instead, you'll face a Sin Piercer first. On the next landing will be a Womb of Despair leading a couple of Remnants, Umbral Eggs, along with some Thorned Penitents. After you clear them out, you can pick up the Consecrate Spell from the shrine. The next section will have an Ardent Penitent and a Scourged Sister to deal with. Afterward, you can pick up The Toll from this altar in turn. Continue your way up to the bloodied fountain to deal with Radiant Hounds led by another Sin Piercer perched atop the stairs. When you get up there, you'll find two Large Deralium Shards in a crate. Move forward along the hall to finally get to the spot where the Abbess was shooting lasers at you from. The chest nearby will have the Multi-Shot Crossbow for you to claim.

At the end of the path, you'll be able to turn right into a structure. If you're still in Umbral, you'll also see some targets so Soulflay ahead of you. Do so on the target on the right to bring the platform to you, and then hop to the rooftops on your left first. Be careful of Umbral Enemies. From here, Soulflay the target that replaced the previous one you Soulflayed to bring out a short bridge. Afterward, Soulflay the target on the platform you moved previously to connect to the bridge and put the whole thing within your reach. Jump to it and follow the path to the Impious Nohuta's Ring guarded by a Bringer of Stillness. After picking the ring up, turn around and head down the path going down on your right. Keep going straight onto a rooftop with an Umbral Belly. Soulflay it to pick up the Umbral Eye of Blind Agatha.
Find your way back to where you started Soulflaying targets and head into the structure this time to find an Umbral Flowerbed you can use to plant a Vestige Seedling. Rest up and transition out of Axiom if you want to. The large gate ahead of you is closed off for now. When you're ready, head through the candle-lit doorway. Open the door following the bloody trail into a large hall. At the end of the hall, you'll find the Rune of Adyr. Interact with it to begin a Boss fight against the Rapturous Huntress of the Dusk, which The Iron Wayfarer will join you for, depending on whether or not you've progressed his Questline.
Two Against One with the Rapturous Huntress
This fight is honestly one of the easier ones. The Rapturous Huntress of the Dusk has a basic moveset of thrusts, swipes, and forward hits with her spear and shield combo. She can be nimble as she repositions but she can be interrupted easily whenever you can time your attacks in between hers. If you have The Iron Wayfarer with you in this fight, she succumbs quite easily to staggering in between onslaughts let loose by the two of you.
At about sixty percent health, just like Scourged Sister Delyth, she'll empower herself with Radiance and gain a halo around her head. Her attacks become more powerful and have a wider range. When she repositions, she now teleports instead of dashing, before throwing a Radiance-empowered spear. Fortunately, as long as you get to her and start her staggering with your attacks, her weaknesses evidently stay the same. Keep piling on the hits together with The Iron Wayfarer if he joins you. This effect is essentially tripled if you have a co-op partner; you can make it so that she has almost no chance to attack in between staggering, getting hit, or being made prone. Defeating her rewards you with the Sanctified Huntress Spear, Rapturous Huntress Helm, and a Vestige Seed. If The Iron Wayfarer joined you in the fight, he'll be taking the Rune of Adyr. Otherwise, you'll be able to obtain it yourself. An Umbral Flowerbed will be there in front of the spot where the Rune of Adyr used to sit.
To The Empyrean
On the left side facing the bloody statues, you'll find some stairs heading up to the upper floors of this hall. At the top, there's a Replete Vigor Skull on the corpse hanging on the ledge behind the divider on your left. Head the other way circling around the hall. The first opening you'll find on your right leads to an outside area where you'll encounter a Sin Piercer and her pack of Radiant Hounds. The item orb you'll find swaying if you turn left immediately as you exit will be a Ravenous Fascinator so Soulflay it instead of picking it up. Follow the stairs down to a Scourged Sister empowered by an Umbral Parasite. Transition to Umbral to bypass the small gate and then Soulflay the Umbral Belly to pick up a Saintly Quintessence.
Head back up now to the upper levels of the previous hall. If you need it, there's an Emergence Effigy on a corner to your left before you head back into the doorway. Turn right as you enter to head straight into a staircase heading further up. You should encounter another Sin Piercer and her Radiant Hounds. At the top of the stairs, you'll find the Lacerating Weapon Spell in front of a bloodied mural. There will also be an Umbral Flowerbed here on the floor across from that mural.
Head out the small doorway to an outside section to face a Holy Bulwark and a Sin Piercer. Follow the path down to some stairs and grab the two Large Deralium Shards on a corpse. Ignore the doorway on your right for now and climb down more steps to the left, past some Thorned Penitents, to two more Holy Bulwarks guarding a large gate. This large gate is actually the large gate past the Umbral Flowerbed right before the hall where you fought the Rapturous Huntress of the Dusk. When it's safe, pull the lever to raise the gate and create a little shortcut for yourself. Near the lever is a chest containing the Shield of Piercing Light.
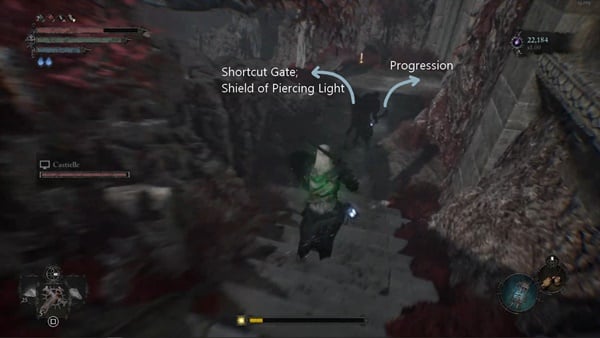
Head back up the stairs and then enter the doorway this time. Keep heading up until you encounter another two Holy Bulwarks accompanied by another Sin Piercer. The item orb on the left is a Ravenous Fascinator so Soulflay it and don't pick it up. Continue up past some more Thorned Penitents and into a cavern leading to a tunnel. There's a Replete Vigor Skull by the statue at the entrance.
You'll eventually find a Stigma to Soulflay so transition to Umbral and do so. You'll witness Pieta arguing with a sentinel about going to see Judge Cleric about the devastation that the corruption has wrought on everyone in Mournstead. You'll get the usual two Umbral Scourings for doing so. Get through the tunnel past the Stigma to finally enter the singular lower floor of The Empyrean.
Abbey of the Hallowed Sisters Map
Abbey of the Hallowed Sisters Videos
Videos Related to this Location
Lords of the Fallen Walkthrough Quick Navigation (Part 6)
Click to be redirected to the specific location walkthrough
Bramis Castle is one of the Locations in Lords of the Fallen (LotF). Bramis Castle is situated near Skyrest Bridge where players will traverse an enormous castle filled with interconnected areas and hidden rooms. As usual, locked gates and ladder shortcuts on the other hand will help the Lampbearer traverse this location effectively. In Lords of the Fallen (LOTF), players will get to explore a vast, interconnected world where they will journey across the worlds of the living and the dead. This page covers a full walkthrough and helpful guides for the Bramis Castle location in Lords of the Fallen.
- For this walkthrough, it follows the Radiance Ending. Please visit the Endings page to learn more.
- Please visit the Walkthrough page for Lords of the Fallen (LotF) for a detailed guide on the main story.
- You can also check our Game Progress Route page for Lords of the Fallen (LotF) for a summarized progression path.
- Visit the Bramis Castle Map for a visual aid in finding all Items, Shortcuts, and relevant markers.

General Information
- Previous: The Empyrean
- Next: New Game Plus
- Bosses:
- The Lightreaper
- Andreas of Ebb
- The Iron Wayfarer
- Damarose The Marked
- The Sundered Monarch
- Adyr, The Bereft Exile
- No. of Vestiges: 1
- Vestige of Bloody Pilgrim
Bramis Castle Map
NPCs in the Area
- None
Bosses
- The Lightreaper
- Andreas of Ebb
- The Iron Wayfarer
- Damarose The Marked
- The Sundered Monarch
- Adyr, The Bereft Exile
Enemies
- Husk
- Infernal Enchantress
- Mendacious Visage
- Raw Mangler
- Ravenous Fascinator
- Remnant
- Rhogar Hound
- Ruiner
- Umbral Egg
- Umbral Parasite
- Womb of Despair
- Shrouded Sparrow
- Shrouded Remnant
- Skinstealer
Items
Weapons
- Andreas of Ebb's Sword
- Bartholomew's Hammer
- Damarose's Cleaver
- Drustan's Hammer
- Eviscerating Spear
- Executioner's Axe
- Grinning Axe
- Lord Axe
- Lord Catalyst
- Lord's Bite
- The Iron Wayfarer's Hammer
- Sword of the Flayed
Shields
Armor
- Andreas of Ebb's Sleeves
- Andreas of Ebb's Leggings
- Drustan's Glove
- Drustan's Garb
- Drustan's Leggings
- Grace of Adyr Loincloth
- Grace of Adyr Mask
- Grace of Adyr Scalp
- Lord Mask
- Lord Armour
- Lord Gauntlets
- Lord Leggings
Accessories
Spells
Runes
Items
- Animated Vigor Skull
- Ammunition Satchel x7
- Briostone Trio x3
- Bleed Salts x3
- Enhanced Forceburst Parchment
- Enhanced Cursed Effigy
- Explosive Bolts
- Fire Salts
- Fire Ward x5
- Heavenly Vial
- Holy Salts
- Large Manastone Cluster x12
- Minor Holy Salts
- Minor Wither Salts
- Vestige Seed x8
- Seething Vigor Skull x2
Upgrade Materials
- Deralium Chunk
- Large Deralium Shards x3
- Regular Deralium Nuggets x3
- Saintly Quintessence x2
- Small Deralium Fragment x8
- Umbral Scouring x47
Key Items & Others
- Andreas of Ebb's Book of Lineage
- Charred Letter
- Lightreaper Flesh
- Map of Bramis Castle Barbican
- Remembrance of the Lightreaper
- Remembrance of the Sundered Monarch
- Rune of Adyr
- Swaddling Cloth
- The Lightreaper's Umbral Parasite
- Umbral Eye of Lydia the Numb Witch
- Umbral Eye of Lost Berescu
Enemy Drops
- Briostone Pair
- Conflagrant Seer Helm
- Conflagrant Seer Staff
- Conflagrant Seer Sleeves
- Conflagrant Seer Robes
- Conflagrant Seer Skirt
- Dhalwe x2
- Despair's Burden
- Despair's Grasp
- Large Deralium Shards
- Large Manastone Cluster x3
- Minor Fire Salts x3
- Raw Mangler Sleeves
- Regular Deralium Nuggets x2
- Rhogar Heart
- Vestige Seed
- Wither Salts
Full Bramis Castle Walkthrough
Heading to the Outskirts
Bramis Castle is an enormous area to cover and before proceeding, make sure you allot an ample amount of time. We will be traversing the castle's outskirts and then its inner section. We will start from Skyrest Bridge and eventually will access Upper Calrath. It is worth noting that if tried to access Bramis Castle coming from the Vestige of the Forgotten Guardian, you will fail to do so since the wooden door is blocked. The players are expected to travel across Skyrest Bridge and then Upper Calrath. From the Vestige of Ethryg head to the location where you first fought Pieta, She of Blessed Renewal, remember the area where there is a huge gate that is locked and a small door near it? The smaller door is now opened and you can head through there. After heading through the door, you will find yourself in an area with a spiral staircase. Access the stairs and reach the upper parts of the area. Once you reach the upper parts, follow the straightforward path here that leads to a closed door with an Umbral Flowerbed in front of it. Near the flowerbed, there is a ladder that you can take to access the lower area that will lead you to an open gate and eventually through the castle's outskirts. Upon arriving in the area, you will notice the Beacon situated in the castle from this location.


Upper Calrath Section & Andreas' Stigma
Head through the plaza and you will notice that a Skinstealer is patrolling the area. Eliminate it and proceed to the next parts of the area. Head along to the plaza and you will notice there's a pathway to the right that leads you further. You are in the right place if you encounter A Raw Mangler, Infernal Enchantress, and Rhogar Hounds. Upon proceeding, you will notice that the path ahead is blocked by Umbral roots. Note that you can unblock it by soulflaying it later on.

Head to the tunnel first and it is advisable to plant a Vestige Seedling in here so you will have a checkpoint in this area. Access Umbral Rift and notice that to reach the blocked path or tunnel ahead, you need to soulflay a hidden platform for you to get across the hole. After doing so, soulflay the Umbral Roots blocking the huge tunnel ahead. Past the tunnel, you will notice that there set of stone staircases that you can cross to reach the lower area and find the Stigma. Soulflay the Stigma and witnessed the event where Andreas of Ebb was trying to investigate Rhogar Artefacts. After the event, receive x2 Umbral Scouring.

Converse with Andreas of Ebb
After the Stigma event, there's an Umbral Belly near the stigma. Soulflay it as well and receive an x1 Melted Dark Crusader Sword. Notice that there is also a platform that you can activate so you can reach the loot situated in the upper area. Near your location, there's a loot on the ground that you can pick up and receive a x2 Wither Salts. Since you've activated the platform, access the stone staircase once again and there is an opening that you can through and use the said platform and get an x1 Graveyard Fog. Head back to the Vestige Seedling you activated. We will now be traversing the tunnel. There is another Stigma in the tunnels. After soulflaying the Stigma it seems that a Dark Crusader was trying to force his way and killed a lot of civilians. The tunnel path will split into two, get the x1 Xiax lying on the ground and head to the path that leads you further into the tunnel.
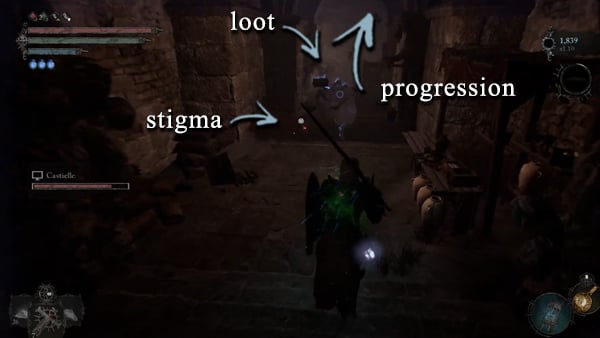
The path will now split again into two and the other path leads to a dead end. A closed door that cannot be opened. Umbral Rift and you will notice that an Umbral Belly can be found. Soulflay it and receive an x1 Cursed Dart. Head to the other pathway that will lead you into an alley with a Stigma. Soulflay the Stigma and it turns out a man pleads with his life against an enemy. After witnessing the Stigma event, head to the nearest Emergence Effigy to return to Axiom. Talk to Andreas and he will mention that he is a man of his word. He will aid you in the upcoming battle. After talking to him, head to the nearest door and you will find yourself in a boss arena.
Unlocking Dark Crusader Class Questline Remarks
If you are on the quest to unlock the Dark Crusader class then it might be best to die on purpose on your first attempt. You have to summon the help of Paladin Isaac as the final step to complete it. Dying on purpose will not fail Andreas Ebb's quest.

Defeat The Lightreaper
It is time to settle the score with The Lightreaper. Players need to defeat this boss before they can proceed and enter Bramis Castle. The Lightreaper may be a challenging enemy for general players due to multiple phases that further increase his prowess. The Lightreaper is a tenacious foe, and it could require some time to bring this foe to submission. Like any other Boss in this game, he can be beaten by just studying his movesets and careful planning and timing. The Lightreaper resembles a regular Skinstealer and most of its attacks have similarities. He relies on this melee combination of attacks that are imbued with fire when on foot along with shockwaves that can inflict Ignite on his enemies. This enemy has a lot of movesets so taking your time studying this foe is advisable. Even though the Lightreaper looks intimidating at first, he is beatable. Most of these melee attacks have a slow wind-up time that you can exploit to inflict damage. When mounted, the Lightreaper will use his dragon to breathe fire upon you from mid-air. You can easily avoid this attack by simply knowing which direction the dragon will go and running in the direction that the trail of fire will not hit you.

The most challenging part of this battle is his ability to deal more damage after lowering his HP under a certain threshold. When you successfully lower his health under 70 to 80%, he will buff himself and his attacks will hit harder. However, lowering his health to under the 50% HP threshold, he will imbue his swords with the Fire element. His normal attacks will now deal Fire damage while his shockwave attacks will still inflict Ignite on his targets. Beating the Lightreaper as mentioned is no easy task however not far from impossible. As mentioned, almost all of his attacks suffer from a slow wind-up time and this is the best chance for you to deal damage to him. For example, when he mounts his dragon, after doing the fire breath attacks from mid-air, he will use his dragon to slam the ground. Time in your rolls and this attack will you ample amount of time to deal at least 2 to 4 swings. When on foot, be mindful of his delayed attacks and premature rolls can lead you to death. Be patient, observe what attack he will do, and go from there. Do not be greedy as it will not work here. If you are having difficulties defeating this boss, we have prepared a dedicated Bosses page. This page has a lot of useful information on how to defeat certain bosses.

Kukajin's Questline Remarks
Note that if you progressed Kukajin's Questline and she already offered her services to aid you, you can summon her before fighting The Lightreaper. After the fight, players need to pay her 8500 Vigor.
Soulflay Lightreaper's Stigma
Assuming that you have defeated this foe, it is time to Soulflay his Stigma and reap rewards like what we do to the other bosses. After beating the Lightreaper, receive the following rewards, x4 Vestige Seed, x25 Umbral Scouring, x1 Lightreaper Flesh, and x1 The Lightreaper's Umbral Parasite. Not far from your location, Lightreaper's Stigma is located. Do an Umbral Rift and soulflay the Stigma. It will grant you x2 Umbral Scouring and x1 Remembrance of the Lightreaper.
Defeat Andreas of Ebb
You will notice that the entrance of the Bramis Castle lies before you however skip it for now. On the other side of the arena, there is an alleyway. There is an Emergence Effigy in this area, use it to return to Axiom. After doing so, you will eventually notice that Andreas is waiting for you at the end of the alleyway. This is going to be a regular NPC fight so taking him out wouldn't be an issue but do not let your guard down. Andreas tends to deal with multiple attack combinations along with sword thrust. The only issue that we are seeing here is the tight space that you are in. Don't let him corner you. After trading blows with him and successfully beating him, receive the following rewards. x1 Andreas of Ebb's Sword, x1 Vestige Seed, x1 Andreas of Ebb's Book of Lineage, x1 Andreas of Ebb's Ring, Andreas of Ebb's Leggings, and x1 Andreas of Ebb's Sleeves.

Defeat the Iron Wayfarer
After beating Andreas, let's proceed by heading to the entrance where Andreas was located. Follow the pathway until you see a stone bridge that leads to a barricaded door. Before confronting the next boss, notice that there is an Umbral Tumor blocking the door that leads to the Vestige of the Forgotten Guardian. Access Umbral first and Soulflay the Umbral Entity to unlock the door. Now you can access the bell lift again that leads to Cistern or access the Vestige to recuperate. Approaching the bridge will trigger a battle with The Iron Wayfarer. Yes, another mini-boss that we should take care of. Same thing with Andreas, this is an NPC battle so eliminating the Iron Wayfarer is not hard to do. His main attacks are hammer combos imbued with fire. Be cautious of getting caught by his attack combinations. He can also rush towards his target so take note of this. After beating The Iron Wayfarer, receive the following rewards, x1 The Iron Wayfarer's Hammer, x1 Vestige Seed, and x1 Rune of Adyr.

Boss Remarks
After acquiring and giving the Rune of Adyr to a non-hostile remnant in Mother's Lull, it will transform into the Withered Rune of Adyr. Upon defeating The Iron Wayfarer at Bramis Castle's gates and The Sundered Monarch in the inner section of the castle, The Iron Wayfarer will move into Fief of the Chill Curse. Access Umbral and after locating the NPC, interact with him and use the Withered Rune of Adyr. This will end him and grant the player Harkyn's Umbral Parasite. This is a key item that is required to further progress the Umbral Ending.
Defeat Damarose The Marked
After defeating the Iron Wayfarer, you will given the option to unlock the huge gate in front of you. Go ahead and unlock it and a cutscene will play, showing Bramis Castle's premise. We will be traversing Bramis Castle's outskirts still however we are about to enter the castle formally shortly. In this area, you will notice two shortcuts right away, one is the wooden ladder and the other one is the locked gate. Head to the nearest stone staircase to proceed. There is going to be a Proselyte guarding the staircase so deal with it. Upon entering the next area, you will notice that for you to cross, you need to traverse the wooden planks available in the area, however, it will collapse once you step on it. Access Umbral by rifting and notice there are two platforms that you can Soulflay then you can use these platforms to get across. Be careful as this area is festered with Umbral enemies such as Remnants and Womb of Despairs.
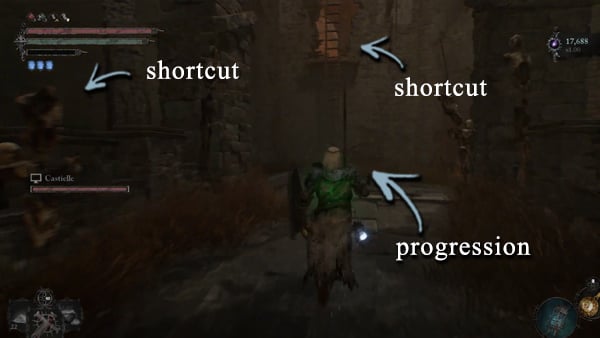
After dealing with the enemy, you can now unlock the locked gate so you can circle back and access the platforms. Access the stone staircase again, and use the platforms you activated to be able to cross. Pick up the x3 Smite Salts along the ground and head to the nearest door. You will notice that the wooden ladder shortcut can be pulled down so you can unlock it. There is also an Emergence Effigy in the area. Access it to return to Axiom. Open the treasure chest nearby and receive a x1 Executioner's Axe. If you wish to erect a Vestige Seedling, there is a nearby Umbral Flowerbead. Rest, and do your upgrades as there are a lot of battles ahead of us. To proceed, head back to the Effigy's location. The path is pretty straightforward however there is a Proselyte guarding the area. Deal with it, and take care of the Rhogar Hound as well. After defeating the enemies, proceed and not for long, stumble upon a x1 Seething Vigor Skull. Ready for battle as we will be engaging another mini-boss in this area.

We are going to fight another NPC in this game thus it shouldn't be too much of an issue to Damarose out. Her main gimmick is the runes that she can summon. She can summon multiple runes at a time and these runes can cast fire magic projectiles around her. Roll or run away from her when the rune glows. Aside from that, she imbues her weapon with Fire. Her melee attacks are rather slow so take this to your advantage. In a short amount of time, she will fall and receive the following rewards, x1 Damarose's Cleaver and x1 Vestige Seed.

Boss Remarks
It is worth noting that players can only fight Damarose in Bramis Castle if they do not use Damarose Seedpod on her when trying to get Umbral Ending. If Damarose died previously due to the Seedpod, this fight will be inaccessible for that certain playthrough.
Head to the inner Section of Bramis Castle
Head out from the boss arena where castle ramparts are, then access Umbral Rifting. In Umbral, you will notice that there is a platform that you can soulflay to reach the nearest Umbral Ladder. After climbing the ladder, a lot of enemies will spawn. Clear the enemies especially the Mendacious Visage that will wreak havoc in the area. After the battle, Soulflay the Umbral Belly in here and get a x1 Saintly Quintessence. Access the ladder that you used and upon reaching the lower platform, pan your camera below the platform that you are currently on and notice that there is a wooden platform below with an item, that you can jump on to. Do so and pick the item and receive a x1 Enhanced Forceburst Parchment.
Jump to the lower area and use the wooden ladder that you have unlocked. Access the Vestige Seedling if you wish to rest or do upgrades. Head to the area where you fought the Damarose and there is debris that you can use to access the upper parts. Upon reaching the upper area, you will notice yourself in a straightforward hallway. Follow it and along the way, pick up x1 Map of Bramis Castle Barbican. Proceed by following the hallway and eventually, you will reach a door. Head through the door and the Bramis Castle location banner will appear. The inner section will start from here.
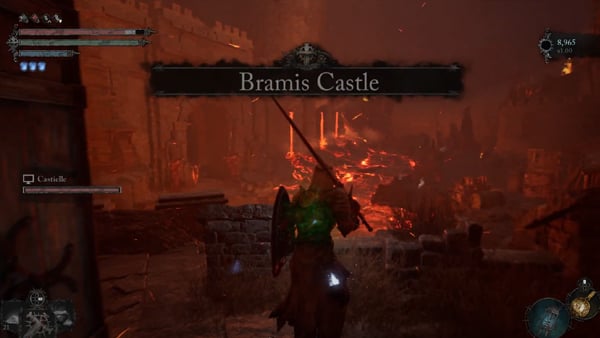
Witness Drustan's Stigma Event
The area will start with a straightforward path however very distinct because of its lava terrain. Head further and you will be dealing with a Raw Mangler and a Rhogar Hound. Along the way, notice that there is a nearby storage house with barrels in it. Destroy the barrels and receive a x1 Fire Salts. Head further and Rhogar Hounds and an Infernal Enchantress will block your path. Deal with them and proceed by heading in the direction where it will lead you to a broken tunnel that has a loot nearby. Get it and receive a x1 Sellsword. Head outside the broken tunnel and there is an available Umbral Flowerbed. Plant a Vestige Seedling if you wish to. Past the flowerbed, you will notice that the path is leading to the castle's ramparts. Head there and notice that there is a loot being guarded by a Rhogar Hound. Pick it up and receive an x1 Animated Vigor Skull. Notice that there is a broken tower nearby. Head there and pick up the loot to receive an x1 Enhanced Rhogar Oil Flask.

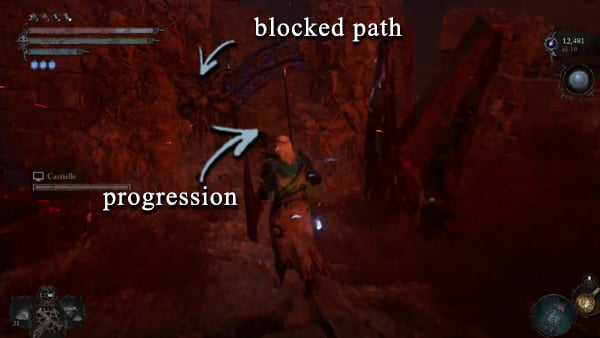
Notice that there is a lower area that we need to explore near the lava area. Upon heading through the area, notice that there is a broken structure that is blocked by fire. Transfer to Umbral so you can pass through it. You will be dealing with a Shrouded Remnant. After taking it out, search for the nearest platform and soulflay it for you to get across. Eventually, you will find yourself in a broken tower with a stigma in it. Soulflay the Stigma to witness the event and receive x2 Umbral Scouring. There is a loot nearby the Stigma but do not pick it up since a Ravenous Fascinator will ambush you do so. Pick up the other loot that was placed near an exit or opening. Receive the following rewards, x1 Drustan's Hammer, x Boar's Head Shield, x1 Melchior's Ring, x1 Drustan's Glove, and x1 Drustan's Garb and x1 Drustan's Leggings.
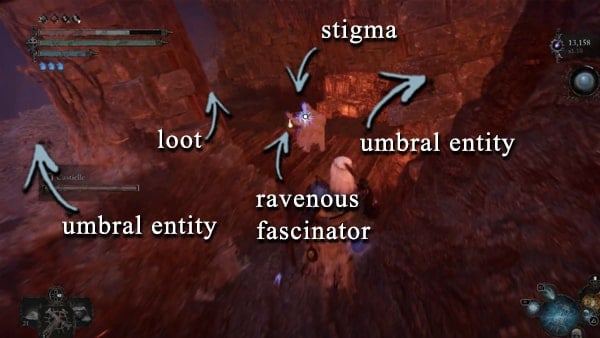
Destroy the Umbral Entity Blocking The Path
From where you pick up the Drustan's items, head to the nearest cliff but watch your step here as you might fall. What we need to do here is head to your right and you will find an Umbral Entity that you can Soulflay. Do so and head to the next available path that leads you into a tunnel near Drustan's Stigma. Past the tunnel, you will find yourself in an open space once again, and the second Umbral Entity that you need to Soulflay. To return to the previous area, Soulflay the nearest platform and you will be able to return to the area where the structure is blocked with fire once again. You will notice that after you deal with the Umbral Entities, the Umbral Entity blocking the path is no longer there. Proceed to the next area by heading through the transparent door.
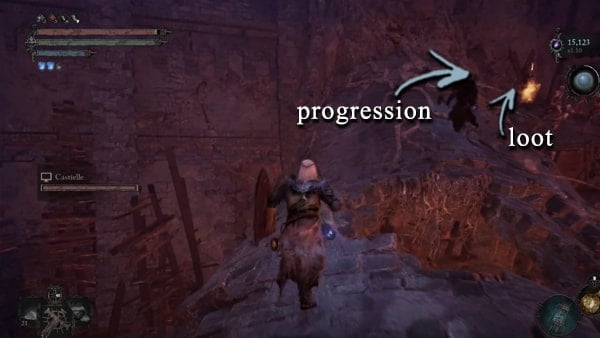
Witness the Couple Stigma Event
You will find yourself traversing a broken tower and at the end of this pathway, you will notice that there is an item for you to pick up situated on a staked body. Pick the item up and receive an x1, Infernal Slash. Pass the item, there's a long wooden platform that you can use to get across. At the end of the platform, an Emergence Effigy is available. Use it to return to Axiom. Follow the platform and you will encounter a Proselyte that guards the area. Eliminate it and proceed. At the end of the platform, notice the locked gate shortcut near the elevator. Take note of it and proceed by accessing the elevator and it will lead you to the lower area. If you are in Umbral you will notice that you can jump to an opening while riding the elevator. Pass the opening, and get an x1 Enhanced Cursed Effigy. Pan your camera in the lower area and you will notice that you can use the platform to safely reach the lower area. There's a nearby balcony that has an Umbral Flowerbed that you can use.

Erect a Vestige Seedling so you can rest and do upgrades. We do have a straightforward path to follow to proceed. Follow the stone staircases that will lead you to the upper areas. You will encounter a Proselyte again and two Rhogar Hounds. Deal with them and proceed. After the next set of stone staircases, a Trapper is waiting for you. Eliminate it and transfer to Umbral and witness the Couple Stigma Event. Receive x2 Umbral Scouring after doing so.
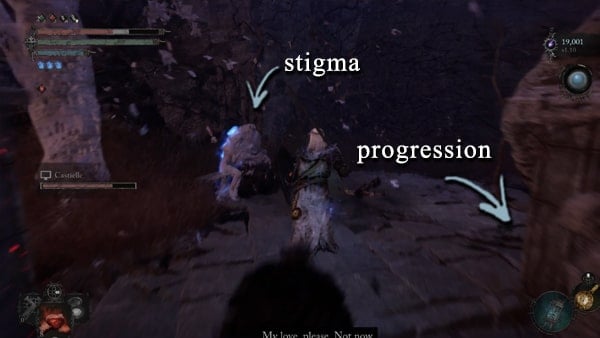
Activate the Vestige of Bloody Pilgrim
Proceed by heading to the nearest staircase that leads further to the upper area. Along the way, there's a loot that you can pick up. Do so and get x1 Charred Letter. Follow the laid path here and eventually, you will find yourself in a room where an Umbral Entity is blocking the path and also another locked gate. You need to find the Entities controlling it to proceed. Follow the extending roots and this will give you a clue where is the Entity located. You can also erect a Vestige Seedling in here, do so for you to have a checkpoint nearby. Head to the exit where the roots are leading you and you will reach the area that looks like a rampart. Head to the nearest loot lying on the ground and pick it up. Receive x2 Large Manastone Cluster and an x3 Ammunition Satchel. A Skinstealer will break the nearby structure and charge at you. Prepare and deal with it accordingly.

If you are in Umbral, there is a platform nearby that you can Soulflay so that the platform can move towards you. Transfer to the platform you activated and Soulflay the other platform connected to the wooden ladder. The platform that you are in will be drawn to it. Get off the platform and climb through the wooden ladder. Clear the enemies as soon as you get off from the ladder. Notice that the entity that we are looking for can be found here, situated on the statue. Soulflay it and it burns the roots connected to the blocked pathway. Before proceeding, remember where the Skinstealer appeared in this area and destroyed a wooden structure before engaging you? Head there so you can explore it. Once you are there pass the huge hole in the ground, and a Infernal Enchantress protected by an Umbral Parasite will be waiting. Deal with them and proceed by destroying the wooded barricade nearby. Notice that there is a staircase that you can use to reach the lower area. After reaching the lower floor, open the chest nearby and receive a x1 Grinning Axe. Unlock the nearby gate and notice that this is the locked gate near the elevator you used previously.

Now that we are done exploring the area, Head back to the blocked pathway and you will now be able to cross. But before doing so, return to Axiom. Follow the stairs and you will eventually find yourself on a rampart once again. Enemies like Rhogar Hounds and Shrouded Sparrows. After clearing the area, pick up the nearby loot located on a dead body which is a x1 Lord Axe. Follow the stairs and you will reach an area that looks like a courtyard. A Conflagrant Seer is waiting for you. Clear the hounds first and then eliminate the Conflagrant Seer. Head to the broken bridge straight ahead where the arc structures are located. Pick up the loot under the said arc and receive a x1 Ring of Infernal Devotion. Not far from this loot's location is the Vestige of Bloody Pilgrim. Activate it so you can rest and do upgrades. From here, continue up the stairs and further up on the left. Take the stairs up and go through the left doorway up the path to reach the large hall with the tall spiral stairs. Take the stairs up all the way to reach a library. On the desk to the right, you can pick up the Shrunken Skull Pendant.
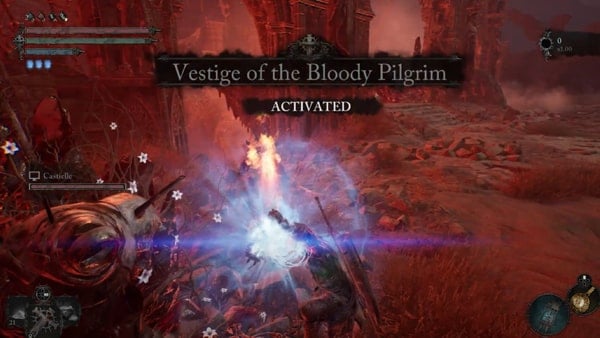
Reach the Painting Room
We will be exploring the area as there are a lot of grounds to cover. First, from the Vestige, notice a stone staircase that leads to a locked iron gate. Head there and you will notice an area where there are a lot of crystals spawned from the ground where gas emits from the ground. Go to that area and a Ruiner is guarding this section. Deal with it so you can explore the area safely. Head back to where the Ruiner originally was located and pick up the following items around. x1 Ignite Salts, x1 Burn Salts, and the x1 Infernal Weapon Magic Spell hidden in the gas concentration here.

Head back to the locked iron gate and notice that near the lava deposits, there is a stone staircase that you can access. Head through there and follow the path. You will reach an area with a trapper and notice as well that there is an unlocked ladder shortcut in here. Pick up the x1 Explosive Bolts near the ladder. Follow the stone staircase and eventually, you will arrive in an area with Raw Mangler and a Trapper that guards an area. After dealing with the said enemies head through the area where a broken spiral stone staircase is located. In the next room, there is an Umbral Flowerbed that you can use to erect a Vestige Seedling. You can rest here and level up if you wish to do so. Near the flowerbeds, get the x1 Map of Bramis Castle. In this area, there is a wooden ladder shortcut that is currently locked so take note of this area.
Return to the broken spiral stone staircase and you will notice there's a small pathway that leads to another stone staircase. Proceed further and you will stumble upon a stone spiral staircase and this one is intact that you can use to reach the upper area. Before doing so, get the x2 Purifying Balm. Head to the upper area and there's a raw mangler waiting at the end of the spiral staircase. Deal with it and proceed following the path that will eventually split into two. On your right, is a locked door that will serve as a shortcut later on, and on to the left, there's Skinstealer that you need to take out. Pick up the nearest loot which provides an x1 Minor Holy Salt. Head back to the lock door and notice that you can hop onto the stone railings and jump on lower castle roofs. Follow the castle roofs here and along the way, pick up the x2 Large Manastone Cluster and x3 Ammunition Satchel. You will notice that you will end up on a dead end if you are following the roofs. However, notice that there are broken railings near you. Transfer to Umbral and a platform will appear. Use the platform to get across and reach the lower roofs. A loot is available for you to pick up and receive an x2 Wither Salts, x1 Vestige Moth, and x1 Vigor Moth. Use the platform to safely reach the ground area.
Witness the Queen's Escape Stigma Event
Now that we have explored this section, we will be going back to the broken stone staircase. Just in case you forgot where this location is, remember where you obtained the Bramis Castle Map near an umbral flowerbed. After returning to this location, near the ladder shortcut, notice that you can jump to the lower area where the paintings are located. Follow the stone staircase and eventually, you will notice a loot located near the staircase. Pick it up and receive x3 Ignite Salts. Proceed by taking the only available for us. You will find yourself in a huge area that looks like a grand hall. A Ruiner is guarding the area so deal with it quickly. Get the x1 Eviscerating Spear from a dead body located in the center of the area. Not from your location, there is a door that you can go through. Behind this door is the Queen's Stigma. Soulflay it to witness the event. Receive x2 Umbral Scouring as a reward. Before you leave this area, pull down the ladder to unlock the shortcut.


Interact With The Spiral Staircase Lever
After unlocking the shortcut, head to the grand hall and do not take the stairs leading to the upper area. Along this area, find the entrance that leads to a long hallway where you can find a x3 Briostone Trio as a loot. You are in the correct area if a Ruiner is present. Take it out and proceed. Along this hallway, you will find a waiting area with a chest nearby. Open it and receive the following rewards. x2 Large Deralium Shards, x3 Regular Deralium Nuggets and x8 Small Deralium Fragment. Proceed by following the hall and at the end of it, there is a room blocked with an iron door, use your Umbral Lamp to get past through the door. Get the nearest loot and receive a x1 Smouldering Ring. Exit the room and a Conflagrant Seer guards the spiral staircase Lever. After dealing with the Seer, interact with the lever and you will notice that the spiral staircase on the other side where you've been through will move and align itself.

Unlock the Iron Gate Shortcut
After activating the lever, head to the other side of the grand hall and notice that there's a wooden barricade that you can easily destroy. Past it is a wooder door that leads long storage area where a Raw Mangler is located. Pick up the x1 Heavenly Vial along the way. Follow the hall and exit through the nearest opening. An Infernal Enchantress is guarding the area so take care of it before proceeding. Follow the hall and you will find yourself in a small library. Get x1 Seething Vigor Skull near the shelves. Proceed by heading back to the lever, there is a stone staircase that you can access in the lower area of the grand hall. You are in the right area if you encounter a Proselyte. You will notice that there is an opening that leads you to a long staircase beneath the grand hall. At the end of the stone staircase, the path will split into two. However, before proceeding, plant a Vestige Seedling as there is an available Umbral Flowerbed in this hallway. Rest and recuperate. If you are in Umbral, return to Axiom.
After resting, head to the nearest dead end where the loot is located. Receive x2 Holy Salts. Head to the other direction and this hallway will lead further down to an area with some kind of intricate machinery. Be careful as this place is crawling with enemies such as Rhogar Hounds, Proselyte, and Infernal Enchantress. Transfer to Umbral to get the loot situated on a separate platform which is x1 Lord's Bite. We are done here head back to the grand hall and notice that there is a huge door in here that you can open. This will lead to the huge iron gate shortcut in the area where the Vestige of Bloody Pilgrim is located. Before unlocking the shortcut, get the x1 Seething Vigor Skull near the lever and then pull the lever to open the gate.
Obtained the Royal Key
After activating the shortcut, head back to the waiting area where you will find the chest that contains upgrade materials. This is the side of the grand hall where you fought a Ruiner. Instead of heading to the spiral staircase, the nearest opening here will lead you to an area with a staircase and paintings. Remember this area and there is a door here where you will use the Royal Key later on. Head back to the spiral staircase and we will explore the upper levels of the castle. Beware as the upper levels of the castle are crawling with enemies. Proselytes and the like and Rhogar Hounds as well. Head to the first opening that you will encounter when traversing the spiral staircase. A Proselyte is guarding the area along with Husks.

After clearing the enemies, enter the nearest opening that will lead you to a room with a treasure chest. Open it and receive the following, x1 Lord Gauntlets, x1 Lord Armour, and x1 Lord Leggings. Exit the room and head to the direction where a Trapper is located. There is a door behind the Trapper and open it after dealing with this enemy open the door and it will lead you to a wooden ladder shortcut that you can unlock. Pull down the ladder and this leads to the storage area that you explored previously. There is also a flowerbed in the area just in case you need rest. Near the ladder, shortcut is another door shortcut that you can reach by using the Umbral Lamp, unlock it and you will notice that this is the previous area you explored leading to the broken stone staircase. After unlocking the door, get the loot nearby from a dead body and receive a x2 Large Manastone Cluster and x3 Ammunition Satchel.
After unlocking the two shortcuts, return to the upper level of the castle and head to the bridge leading to the other side. You will notice that there are bookshelves here containing loot. Which is a x1 Royal Key. Get it before proceeding. Follow the hallway and eventually, you will encounter two Rhogar Hounds. There is a door nearby and use your Royal Key to open it. Transfer to the Umbral Realm and notice that there is an Umbral Belly that you can only reach by accessing the platforms. Soulflay each platform so they will be aligned towards the Umbral Belly. Watch your step slowly transfer between platforms. Soulflay the Umbral Belly and you will receive a x1 Saintly Quintessence.

Witness The King's Stigma
Now that you have explored the majority of the upper area, head to the lower floor again and remember the door that I told you that you will use a Royal Key to open it. Now is the time to do so. If you are lost, access the spiral staircase and head down to the grand hall. This is the path that is being blocked by a fire. You can pass through it by accessing Umbral. Past the paintings, use the Royal Key to open the door and this will lead you to the dining hall. Follow the pathway and you will notice that there are sets of treasure chests placed near the hallway. The other two chests are empty, open the one on the left and receive a x1 Minor Wither Salts, x1 Shield of the First of the Beasts, and x1 Hilvit.
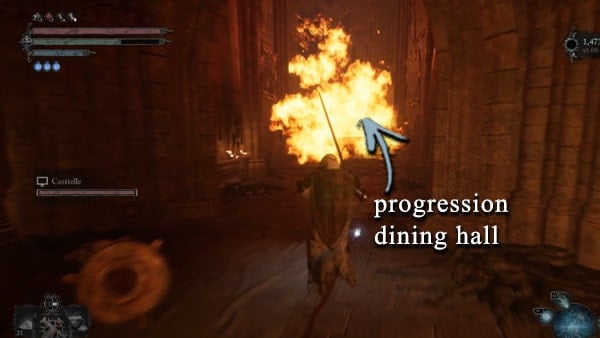
Follow the hallway and there's a loot placed on an altar with a painting which is a x3 Bleed Salts. Return to the dining hall and past the long table, notice that the King's Stigma is located on his table. Activate it and receive a x2 Umbral Scouring. At the back of the Stigma, get the x1 Sword of the Flayed. Head to the door that will lead you to an open area from the dining hall. There is a Skinstealer waiting. Deal with it and get the x1 Pendant of Infernal Oblation. There is also an Emergence Effigy that you can access. Past the Effigy is a wooden barricade that you can destroy. Unlock the wooden ladder and it will serve as a shortcut to the previous areas.

Explore the Dining Hall Area
To proceed, transfer to Umbral and activate the lift but do not hop on it yet. There is an Umbral Belly that you can Soulflay and get an x1 Saintly Quintessence from it. Pull the lever again so recall the lift. Use it this time so you will be able to reach the upper area. After reaching the upper area, get off the lift and use your Umbral Lamp to get through the iron gate and get past the broken stone bridge. You do not need to use the lamp if you are already at Umbral. Get the x1 Vigor Moth at the end of the bridge.
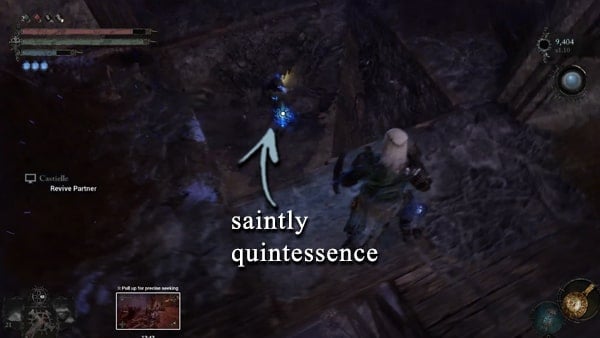
In this section, you will notice that you can access the lower area by jumping into the hole. Do it slowly, one level at a time. You will land on the upper parts of the dining hall. If not in Umbral, you can progress in this area by carefully traversing the wooden platforms and wooden support pillars. While in Umbral, there are solid rock formations in here that you can take advantage of. While in Umbral notice that there are hanging loot items placed in this area. Two in total. Shoot these with a ranged weapon or a magic spell so items will fall to the ground. Get the following rewards if you acquire both. x1 Grace of Adyr Mask, x1 Grace of Adyr Loincloth, and x1 Grace of Adyr Scalp.

Reach the King's Throne
This time, we will be heading to the upper areas of the castle again by accessing the spiral staircase once again in the grand hall. Head to the highest point that the stairs can bring you and there will be a door at the end of the stairs. Use the Royal Key to open it and you will find yourself in a room full of pieces of furniture. This serves as a study room. You are in the right section if there is a huge statue in the middle of the area. Follow the circular path here and you will eventually stumble upon a treasure chest that contains x1 Lord Catalyst and x5 Large Manastone Cluster. Head to the upper area by taking the stairs and follow the circular path once again. At the end of the path, you can loot an x1 Animated Vigor Skull. Proceed by accessing the set of stone staircases leading to the outer ramparts of the castle. You are in the right place if you are seeing the supporting pillars in the area. Erect a Vestige Seedling on the flowerbed here for you to have a checkpoint.

Follow the straightforward pathway and past the wooden platform that will break when you step on it are two Ruiners guarding the area. Before you confront them, get the x1 Large Deralium Shards along the way. This is going to be a tough fight so be patient while dealing with these two. After dealing with the Ruiners, pick up the x3 Frostbite Salts on the ground. Head to the nearest entrance in the area and it will lead you to the king's bedroom. Get the x1 Swaddling Cloth placed on the baby's cradle. While getting the x1 Lord Mask placed on the bed. Locate the nearest balcony. Access Umbral and Soulflay the nearest platform. Jump on it and reach the item placed on the crystal. Receive x5 Fire Ward head to the inner section by following the pathway made of crystal. Once you reach an arc head through it you will eventually reach an area where a Ruiner is guarding. Deal with it and not far from your location, a Conflagrant Seer is waiting.
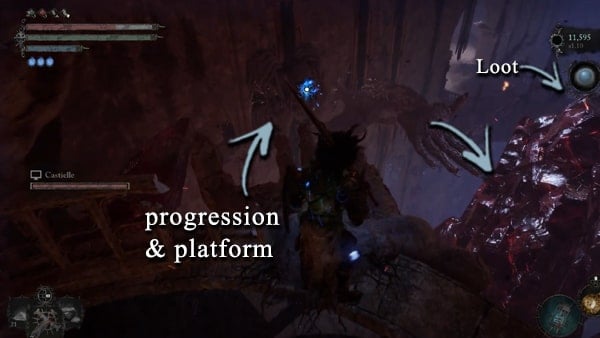
After dealing with the enemies, look for the wooden barricade that you can destroy. You will notice that you can jump on a broken pillar below you. Jump on it and acquire the loot which is a x1 Deralium Chunk. Jump to the stone staircase below get the loot and receive a Bartholomew's Hammer.
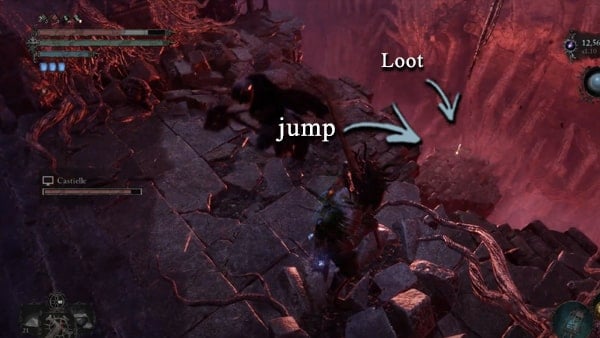
There is an Umbral Flowerbed here and it is suggested to erect a checkpoint in here. We will be fighting the final boss shortly. Access the upper areas by following the wide stone staircase and eventually, there is another wide space to cover at your right-hand side. Soulflay the Umbral Belly and receive x1 Umbral Eye of Lydia the Numb Witch. Near the location of the Umbral Belly, there is another loot however this is a trap. It is a Ravenous Fascinator so skip it for now. Not for long, you will find yourself in a wide arena and a cutscene will play.


Defeat the Sundered Monarch
No wonder the arena has an ample amount of space. The Sundered Monarch is the next Colossal Boss that we need to defeat. This boss can be intimidating most of the time due to its size. Its size is one of its great strengths however its greatest downfall as well. Capable of dealing with wide-swiping attacks and can slam players into the ground. Even though it is slow The Sundered Monarch can close its gap in its target by leaping. its main weapons are its body and bare fist. Also, it is capable of throwing projectiles at its target. However, when the player manages to lower The Sundered Monarch's health below 80%, it will equip itself with the head of the stone statue that it used to gaze upon in the cutscene.

From here on out, its attacks will have a point-blank AOE shockwave that can easily hit its targets. When The Sundered Monarch reaches below 50% it will buff itself and it is now capable of releasing a rain of swords from its body that can hit its target in the surrounding area. As mentioned, its biggest downfall is its speed. Even though it can cover a wide range when dealing with tremor attacks, one can simply master the timing and completely dodge these attacks. Be patient and be mindful of its delayed attacks. Untimely rolls may cause death or severe damage to your character. Always check its body as well if it glows, this means that it will release its AOE sword projectiles. On the other hand, you will notice right away if it will throw projectiles at you if it pauses for a short amount of time and cover its face with its arm. For more information about this boss, we have a dedicated page for all the Bosses in the game just in case you want a much detailed guide on how to defeat certain bosses. After defeating The Sundered Monarch, receive the following rewards. x1 Vestige Seed and x8 Umbral Scouring. Access Umbral and Soulflay The Sundered Monarch's Stigma and receive the following rewards, x2 Umbral Scouring and x1 Remembrance of the Sundered Monarch.

Boss Remarks
Be reminded that players need to defeat The Sundered Monarch so The Iron Wayfarer will move to Fief of the Chill Curse. By accessing Umbral, players can then find him and use the Withered Rune of Adyr that kills him and it will grant players with Harkyn's Umbral Parasite.
Kukajin's Questline Remarks
Note that if you progressed Kukajin's Questline and she already offered her services to aid you, you can summon her before fighting The Sundered Monarch. After the fight, players need to pay her 9000 Vigor.
Confront Adyr, the Bereft Exile
To proceed, there is a stone staircase near the throne. Head to the upper area and notice that there is a stigma that you can Soulflay. Witness the event and receive x2 Umbral Scouring. Adyr, the Bereft Exile will try to converse with you and your actions will matter and alter the destiny of this realm. Note that if you are following this guide from the start, the guide was set to follow the normal ending path, the Radiance path. This game has three endings for you to explore and you are welcome to check our Endings guide for more information on how to get the other endings. After conversing with Adyr select " Enter the Rhogar Realm. "


Upon entering the Rhogar Realm, it is time to settle the score with Adyr. This fight is more of a gimmick fight compared to the other bosses in the game. Your objective is to find Adyr's slaves who bear his runes. There are a handful of slaves in the boss arena but you can easily identify one since the slave's body is glowing and marked by Adyr's rune. Kill every slave that you encounter with the rune and this will damage Adyr slowly.

After depleting Adyr's HP, the fight will end, and enjoy the Radiance ending. Congratulations on finishing the game and we are hoping that you find this guide helpful as well. However, our adventure is far from over and we still have two more endings to collect.
Boss Remarks
Note that players can only confront Adyr and get his exclusive rewards by pursuing the Radiance Ending. After defeating this boss, it will trigger this specific ending.
Bramis Castle Map
Bramis Castle Videos
Videos Related to this Location


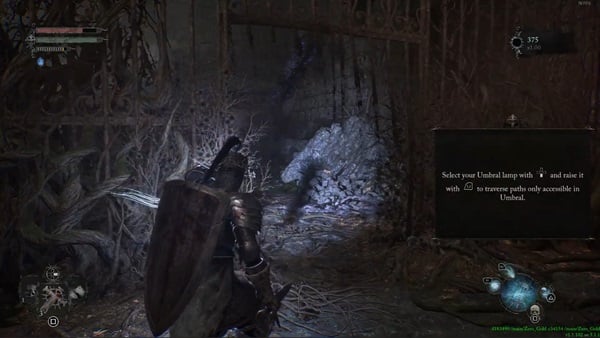


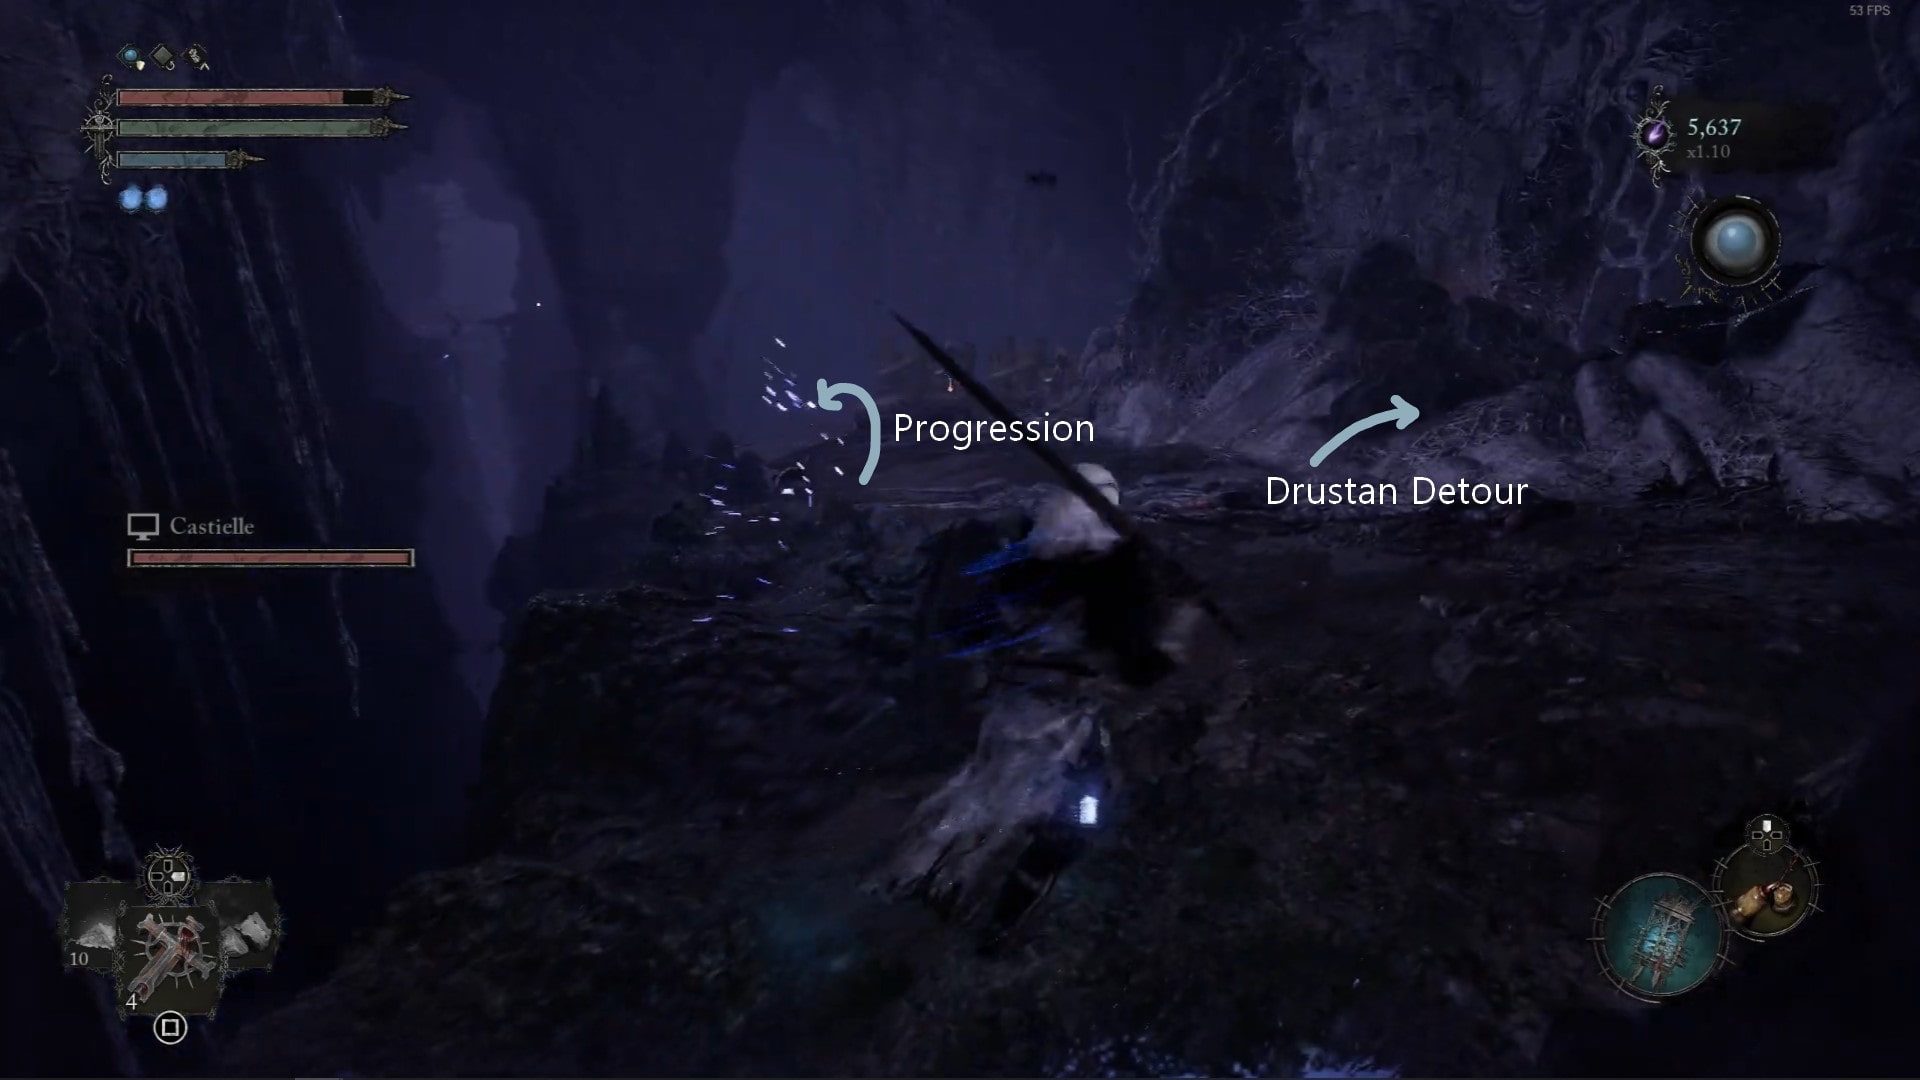
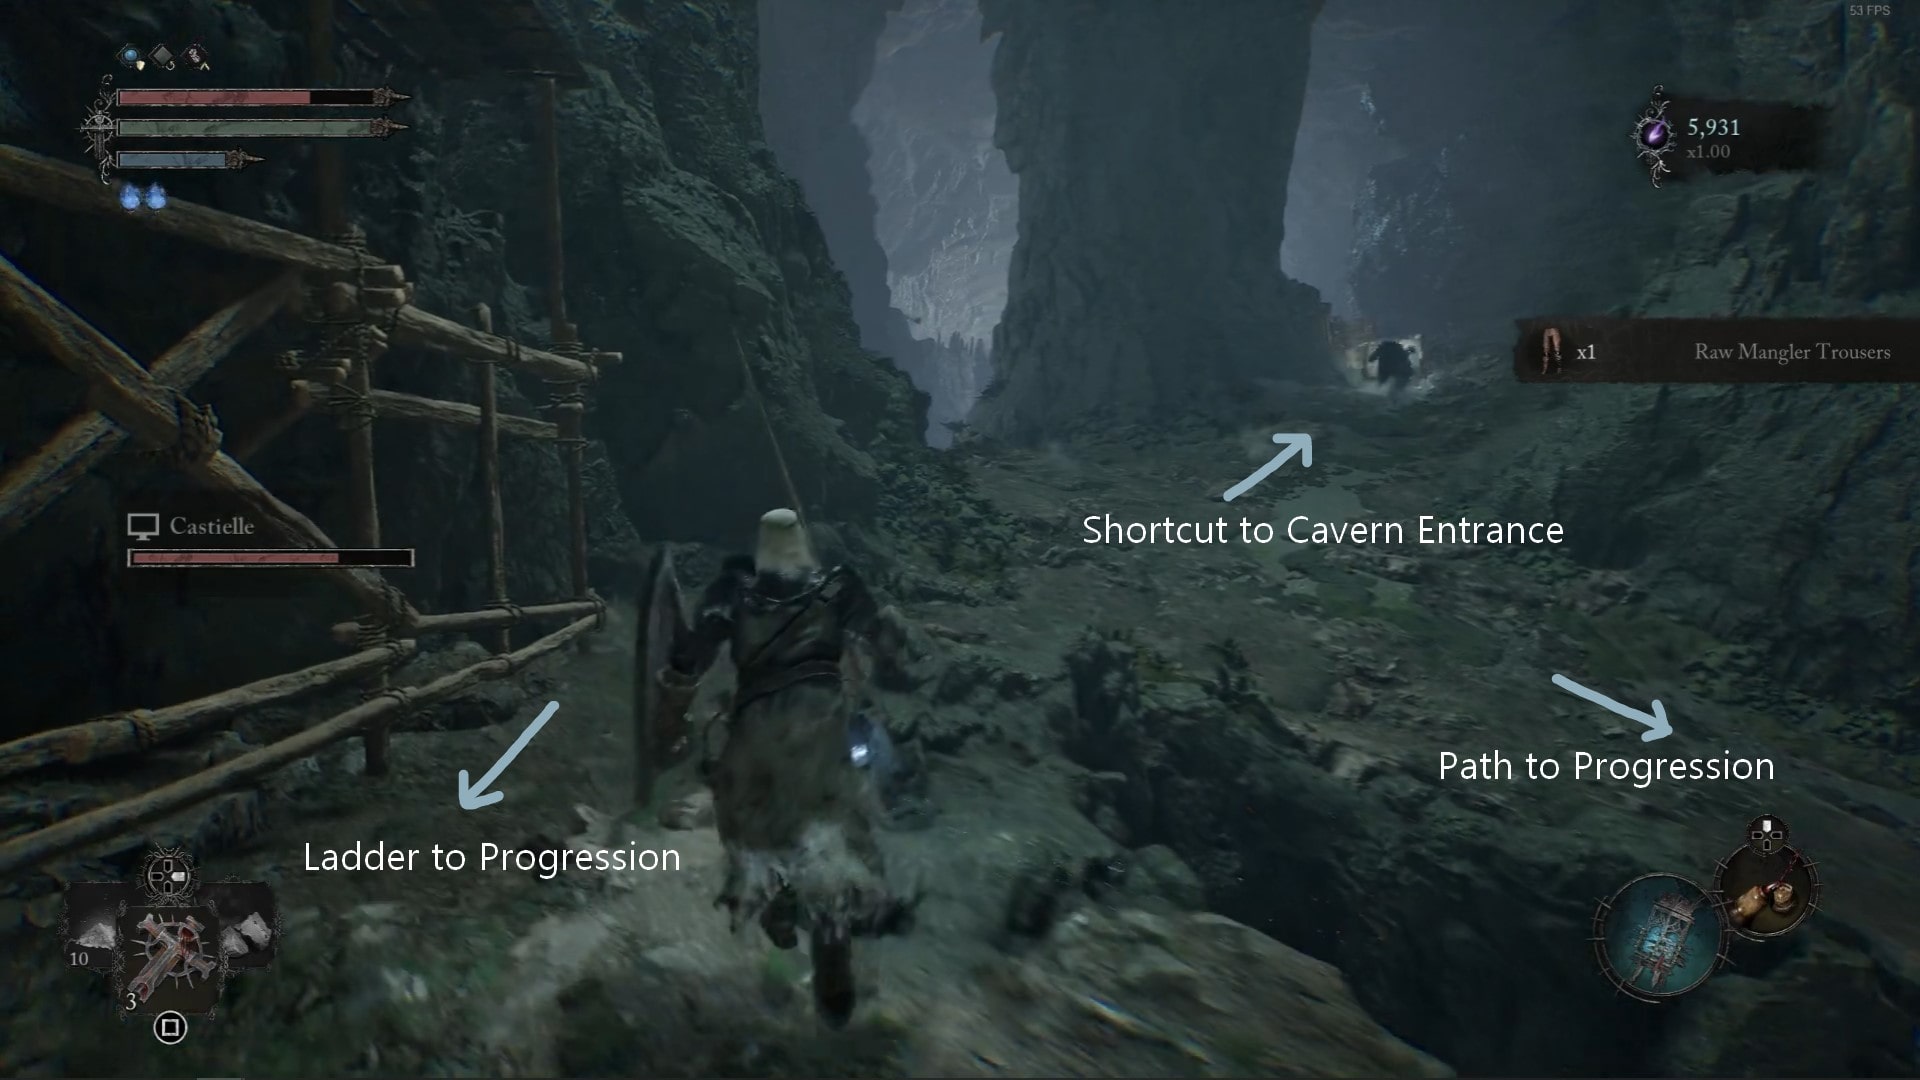


there's alot of stuff in this guide that incorrect lore wise such as "dark crusader fighting his way through and killing civilians" that's not the dark crusader, that's the iron wayfarer
2
+10
-1