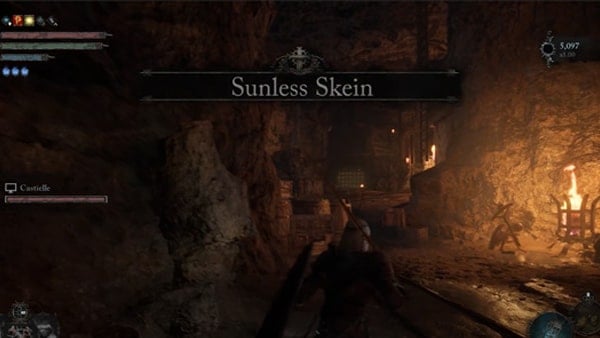
Sunless Skein is one of the Locations in Lords of the Fallen (LotF). The Sunless Skein is the ninth Location in the game where players will traverse a series of interconnected tunnels and caves. This location may be difficult to traverse due to its intricate layout and the majority of the areas were designed with tight spaces. Locked gates and ladder shortcuts on the other hand will help the Lampbearer traverse this location effectively. In Lords of the Fallen (LOTF), players will get to explore a vast, interconnected world where they will journey across the worlds of the living and the dead. This page covers a full walkthrough and helpful guides for the Sunless Skein location in Lords of the Fallen.
- Please visit the Walkthrough page for Lords of the Fallen (LotF) for a detailed guide on the main story.
- You can also check our Game Progress Route page for Lords of the Fallen (LotF) for a summarized progression path.

General Information
- Previous: Upper Calrath A
- Next: Cistern
- Bosses: None
- No. of Vestiges: 2
Sunless Skein Map
NPCs in the Area
Bosses
- None
Enemies
- Corrupted Penitent
- Corrupted Pilgrim
- Mendacious Visage
- Proselyte
- Raw Mangler
- Remnant
- Rhogar Hound
- Shrouded Remnant
- Trapper
- Umbral Egg
- Womb of Despair
Items
Weapons
Shields
Armor
- Mask of Wrath
- Sovereign Protector Armour
- Sovereign Protector Gauntlets
- Sovereign Protector Helm
- Sovereign Protector Leggings
Accessories
Spells
- None
Runes
- Nartun
- Tumul
Items
- Animated Vigor Skull x4
- Ammunition Satchel
- Burn Salts
- Briostone Trio
- Cursed Effigy
- Devoted Chopper
- Ignite Salts
- Manastone Cluster x2
- Poison Cure x2
- Poison Salts x3
- Putrefaction
- Umbral Scouring x4
- Vestige Seed
- Vigor Moth
Upgrade Materials
Key Items & Others
Enemy Drops
Full Sunless Skein Walkthrough
Unlock the First Shortcut
In this section, we will be exploring the Sunless Skein area, filled with interconnected paths leading to a difficult area layout. After moving forward from the gate deep within the noble's house in Upper Calrath A, you'll already be entering the tunnels of the Sunless Skein. Keep going until you reach a fork. The path to the left leads to a door that you'll need the Sunless Skein Key to open. Turn right instead to find and activate the Vestige of Hooded Antuli on some raised ground. From the Vestige of Hooded Antuli, follow the straightforward ahead of you, this is the nearest tunnel with cart tracks. After following the path, you will find yourself in the first area of the Sunless Skein lies, you will be greeted by multiple enemies like Corrupted Penintents and Pilgrims. You will not have a hard time dealing with them. This area is a series of interconnected mines and caverns so pay attention to the directions.
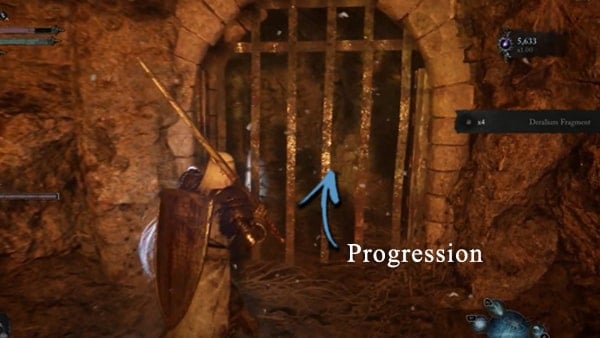
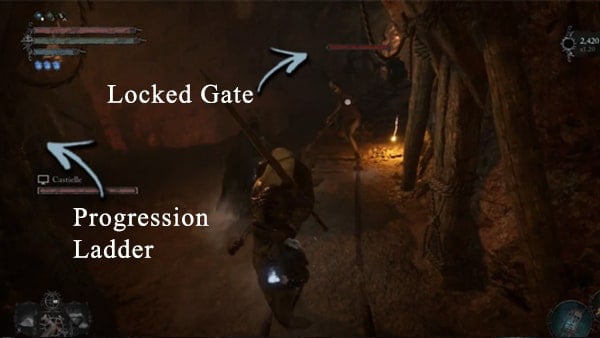
Near the locked gate, notice a loot lying on the ground. Acquire it and receive x4 Small Deralium Fragment. Pass the locked gate, head straight, and take a sharp turn to the left so you will access the elevated area where the Pilgrims are located. head back to the and take the nearest wooden stairs. It will lead you to another tunnel with Corrupted Penitents lurking. Notice that along the way there are barrels that you can destroy to access the hidden space where you can get another x4 Small Deralium Fragment. After clearing the enemies, notice the nearest opening has iron bars, blocking the path. Use the Umbral Lamp to get through and follow the tunnel.
The path will split into two and head straight first and find a dead end with an item. Get it and receive a x2 Poison Cure. Head back and access the other path this time. You will find yourself on a straightforward path once again be careful traversing this section a rolling barrel will try to hit you. Let it pass and take care of the enemies here. Near the end of the pathway, a Pilgrim will throw magic projectiles on you. The wooden pathway here will be destroyed once you step on it. You will fall into a dark pit. Do not worry as you will not suffer any damage from the impact. After the fall, Remnants will try to ambush you so deal with them accordingly. There will be one path available in this area and you will still be dealing with remnants along the way. Follow the tunnel and you will notice that in Axiom, you cannot proceed further due to the path being cut off.
Perform an Umbral Rift and you will notice that in the Umbral you can cross over by traversing a clip to reach the other side. Siphon the exploding rocks along the cliffs to pass safely. Head inside to the nearest tunnel on the other side of the cliff. While Umbral Rifting, in the next area, you will determine a Stigma of the falling men from a collapsing staircase. Soulflay it and get x2 Umbral Scouring. Take the nearest Emergence Effigy to return to Axiom. Take the nearest wooden staircase that will lead you to the upper area. Once you reach the broken parts of the staircase, you will notice that you jump from the broken part of the staircase to access the previously inaccessible area below where the stigma is located. In this small area, get an x1 Devoted Chopper.
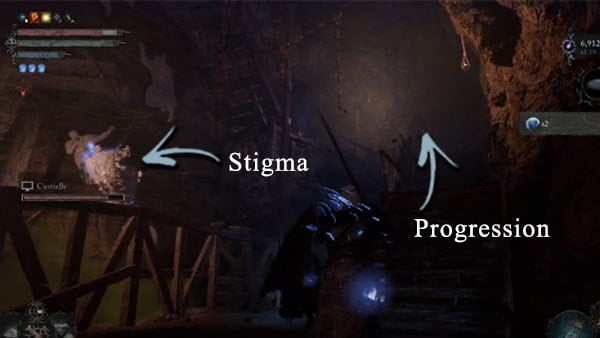
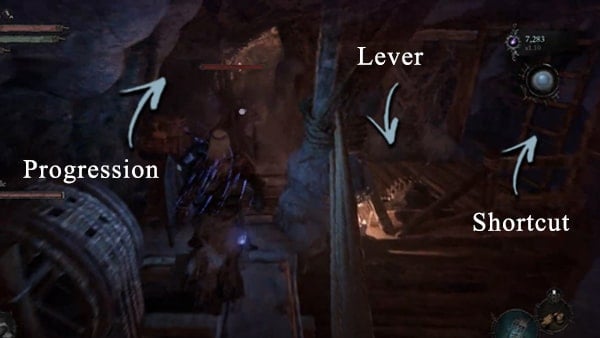
To proceed, head to the wooden staircase once again and pass the broken section, heading towards the nearest tunnel would be the next step. Following the tunnel, there is a wooden barricade that you can easily destroy. Pass the barricade there is a loot on the ground. Acquire it and receive a x1 Ring of the First of the Beasts. Follow the only straightforward path that lies before you and you will find yourself in the upper parts of the first area you accessed in this level. At the end of the wooden platforms, you will notice a ladder that you can pull down to unlock the shortcut. Near the ladder shortcut, there is a lever as well that you can pull to unlock the previously locked gate that you encountered when you first came into this area. Proceed by not taking the wooden ladder and instead, head to the other pathway that you haven't access. You will notice that at the end of the platform, you can jump on a lower ledge to get an x1 Enhanced Fire Grenade. From this point, you can head to the Vestige of Hooded Antuli and rest before proceeding.
Head to the First Iron Gate
Proceed to the gate you just opened and you will find yourself in a long straightforward tunnel. After exiting the tunnel, clear the enemies and head first on the nearest wooden ladder that you can access. Climb the ladder and follow the tunnel. Upon exiting this tunnel you will find yourself in an area with a huge wooden cogwheel. If you access the stairs that lead to the upper section of this area, you will find x1 Basic Bolts. You will notice that you are on the other side of the hole you fell into. Head back to the huge wooden cogwheel and notice that there is a loot nearby. Take it and receive x1 Ammunition Satchel and x2 Manastone Cluster. Not far from your location, head to the area where there are a lot of candles lined up to light the place. You will also notice an over-extending platform where there are items that you can pick up. Receive the following rewards, x1 Pointed Stick and an x1 Edict's Aim. Head back to the large cogwheel and notice that before you head and proceed, there's a plank that you can jump onto to reach the tunnel. Do so and follow the path and eventually, you will find the x1 Fulvirano Shield, situated on a dead body.
To proceed, head back to the gate you unlocked to access this area, and instead of climbing the ladder, head further and follow the straightforward path. You are in the right direction if you stumble upon the locked gate. This is going to be the second shortcut in this area. To proceed, facing the locked door, turn to your right and find a tunnel that will lead you to an opening blocked with an iron bar. Proceed by using your lamp and find an Umbral Flowerbed after the iron bars. Activate it if you wish to do so just in case you want to access a checkpoint. The succeeding areas will be complicated to traverse since the area consists of interconnected areas. We will try our best to guide you through this. We will set short goals starting from here that you can easily follow or take these goals as a checklist to determine if you are in the right direction.
Witness the Mining Stigma Event
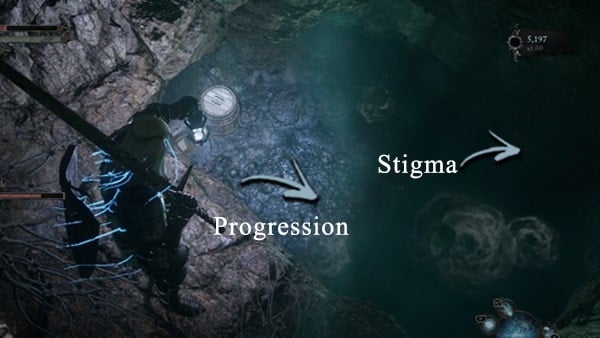
Proceed by using the Umbral Lamp to the next exit blocked with iron bars. You are in the right direction if you find a huge hole that you can jump into. Activate the Umbral Rift and head down to the lower area. You will notice that there's a blocked path that you can Soulflay. Do so and you will find the Mining Stigma. Soulflay it to witness the event and get x2 Umbral Scouring. Also before heading out, get the x2 Enervated Vigor Skull and x2 Regular Deralium Nuggets.
Obtain the Miner's Pendant
To proceed, head out from the hole where you found the stigma. Heading straight, the path with split into two. Turn to your right, follow the path here, and pick up the x1 Shield of Whispers along the way. This path leads you to an area with a lot of enemies. You are in the right direction if the enemy pack has a Womb of Despair enemy among them. Take out all of the enemies and get the x1 Putrefaction lying on the ground. After clearing the area, follow the uncharted path ahead and find a series of wooden staircases. If you go to Umbral, there is an Emergence Effigy in between these stairs. Follow the path and once again, the tunnel will split into two once again. Take a sharp turn to the left and you will find a ladder that you can use to climb down. At the end of the path of the lower area, get the Miner's Pendant.

Unlock the Locked Gate Shortcut
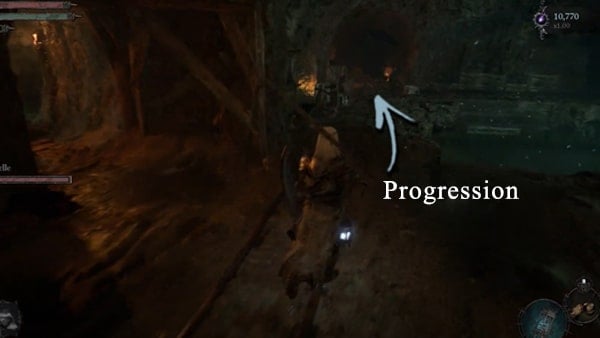
Head back to the last area where the path splits into two and instead access the other path that you didn't take. Not far from your location, is the locked gate shortcut that we need to unlock. Along the way, clear the enemies and pick up the x4 Small Deralium Fragment on the ground. Head to the shortcut and unlock it. Near the gate, pick up another x4 Small Deralium Fragment. Since the shortcut is unlocked, you can rest in the nearest vestige if you want to.
Activate Vestige of Catrin
Head back to the area you went through before and notice that the lower area is flooded so to progress, access Umbral Rift to access the lower area. From here, we will be covering this area with lots of loot to get. Start Soulflaying the nearest Umbral Belly that will drop x1 Nartun and x1 Enervated Vigor Skull. There are going to be a lot of enemies in the area since you are in Umbral thus, take them out one by one and proceed with caution. Note that along with the Remnants, a Mendacious Visage will spawn. Time in your attacks and clear all the enemies as much as possible. After clearing all the enemies, notice the platform that is blocking the ladder.
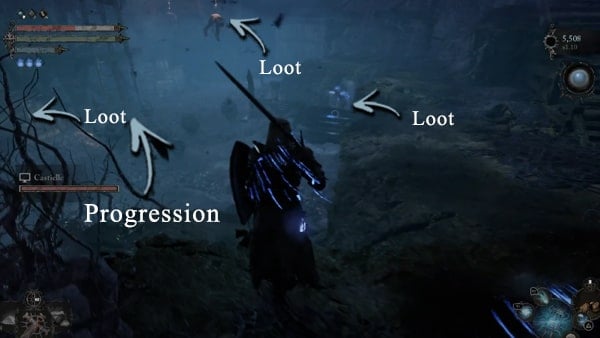
Soulflay it so you will be able to climb through it later. Not far from your location, near a tunnel entrance, get a loot and get the following items, x1 Mask of Wrath, x1 Tumul x1 Vigor Moth, x1 Vestige Seed, and x1 Briostone Trio. Head back to the ladder and pick up the x2 Animated Vigor Skull. Access the nearest ladder and climb on it. Not far from here, you will be able to notice the Vestige of Catrin. Rest if you desire. After interacting with the Vestige, talk to Byron and he will tell you a story of how Catrin and him had a relationship and how Catrin left this world. He will also tell you that Catrin's memento is missing. Received x1 Bemoaning Gesture after talking to Byron.
NPC Byron Questline Remarks
In this section where you reach the Vestige of Catrin, it is worth noting that you can continue Byron's Quest Line. Byron can be found near the Vestige of Catrin and he will inform the Lampbearer of the history of the Vestige. He tells the Lampbearer a story that the Vestige of Catrin's location is the place where Catrin fell. Aside from this, he will inform the Lampbearer that Catrin and him had a relationship in the past. Where both of them served as hollowed sentinels and eventually fell in love. He will then ask you to report to him if you find a pendant to continue his questline. Players will also get the Bemoaning Gesture after speaking to him. The next part of this quest will be covered in our Cistern Walkthrough Section or Guide.
Unlock the Second Iron Gate
Now that the Umbral side has been explored, head back to the Vestige of Catrin and rest. We will be exploring the Axiom side of this area. To proceed, return to Axiom and head out to the flooded area once again. Take a sharp turn to the left and notice that there is a lever and a locked shortcut in the form of a bridge. Focus on the lever first and activate it. the nearby floodgate will be open and the water will be released. Now that the lower area is explorable, head there through the nearby ladder. Near the ladder, there's a dead body that you can loot. Acquire an x1 Ring of Bones. Near the body's location head to the floodgate, notice a loot that you can pick up, and receive a x1 Animated Vigor Skull. Head to the upper area and notice that you can circle around to unlock the nearby shortcut which is the wooden bridge. Along the way, pick up another x1 Animated Vigor Skull. Interact with the wooden bridge to unlock the shortcut.
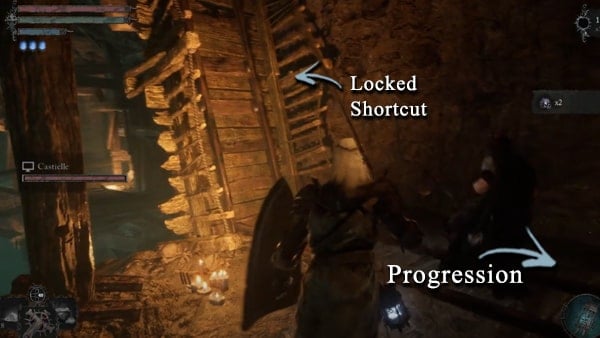
To proceed, notice that there is a tunnel that you can go through. In this long straightforward tunnel, prepare to battle a Rhogar Hound and a Proselyte. This is going to be a tough battle due to the space that you have especially if you are a melee fighter. Deal with the Rhogar Hound first and then take out the Proselyte. After taking the enemies in this area, head to the next one and find a Trapper and another Rhogar Hound. Take them out and there's a nearby treasure chest hidden behind the barrels and crates here. Open it and get the following equipment. Receive x1 Sovereign Protector Gauntlets, x1 Sovereign Protector Leggings. x1 Sovereign Protector Armour and x1 Sovereign Protector Helm. After getting the Sovereign set, notice that there is another locked gate in here, head to the stairs pass the gate and you will find yourself in a long tunnel once again. Use the Umbral Lamp to get past the iron bars that block the path and traverse the wooden staircase. This will lead you to an area where Emergence Effigy is located. Take out the Pilgrim so you can explore the area safely. You will be facing another Proselyte so be cautious.
After dealing with the Proselyte, the path with split into two before heading to the nearest tunnel, pull down the ladder first, located at the end of the platform. Before heading into the tunnel, notice that there is a lower platform with a loot near the tunnel entrance. Transfer in Umbral so you can pass through the iron bars blocking the platform. Get an x1 Saintly Quintessence as a reward. Head to the tunnel entrance pick up loot from a dead body and receive x3 Poison Salts. Follow the tunnel and you will end up on a ladder, climb through it, follow the platform, and head straight to find a loot which is a x1 Cursed Effigy.
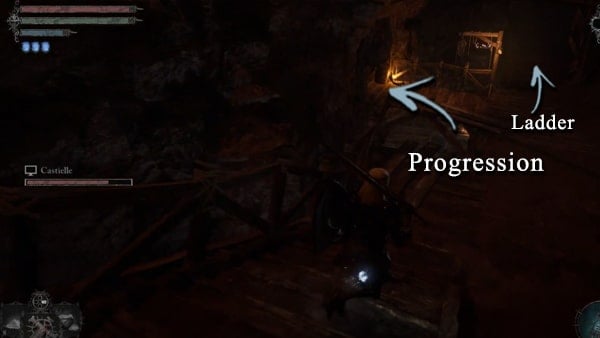
You will notice that there is a hole that you can drop into. Jump on it and take care of the Rhogar Hound that will ambush you once you land. Take the x1 Berinon's Ring from a dead body lying in the corner near where you stand. Notice that a lever is situated on a bridge near your location. Head there and pull the lever so you can unlock the second iron gate. You can now return to the previous area if you wish to. Like visiting the Vestige of Catrin.
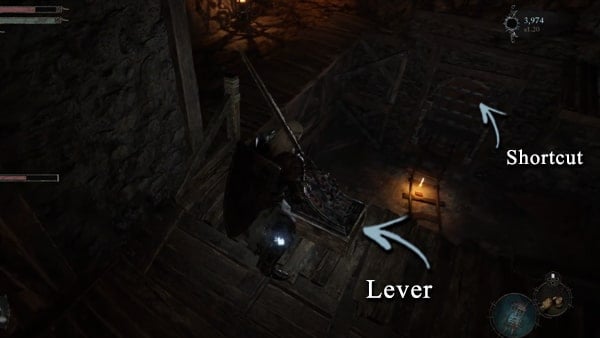
Unlocked the Second Locked Gate Shortcut
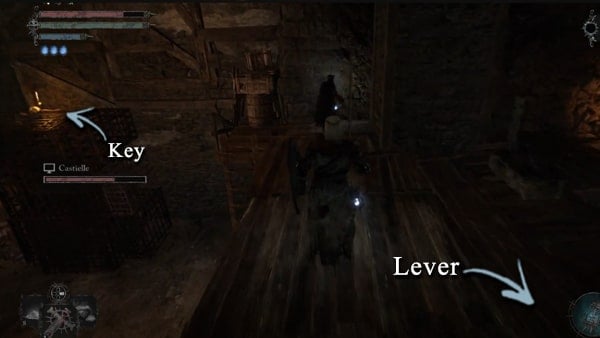
After unlocking the Second Iron Gate while facing the lever, notice that there's a loot located on top of one of the cages in this area. Reach it by using your Umbral Lamp to unveil a root bridge connecting the platform where you in and the cage. Pick the loot and get a x1 Sunless Skein Key. Sunless Skein does not have Bosses or Colossal Bosses and upon unlocking the second locked gate shortcut, this is where the area concludes. In the next section, we will be exploring Cistern so make sure to come prepared. It is worth noting that the Sunless Skein Key can be used to unlock the locked door near the Vestige of Hooded Antuli and it will lead you to Lower Calrath.
Sunless Skein Map
Sunless Skein Videos
Videos Related to this Location
 Anonymous
Missing item: Before unlocking the first gate where you drop down (after the floor breaks) once you land there is the Ancient Armor Tinct behind you in the area where you land.

 Anonymous
Ummm? This page just kinda ends, doesnt say where to go to get to cistern

 Anonymous
Whoever writes these really should make sure you grab all items before telling you go back and grab the sunless skein key

 Anonymous
You missed a saintly quintessence in the room with the last proselytite before heading into the cistern. It's behind a gate that you can drop down to in the umbral. You can just barely drop onto the ledge.


I love this area, honestly. Reminds me of good 'ol Stonefang.
1
+10
-1