Forsaken Fen is one of the Locations in Lords of the Fallen (LotF). The Forsaken Fen is a treacherous swamp bearing traces of a long-lost society. Here, players will find the first of the Hallowed Sentinels' beacons. In Lords of the Fallen (LOTF), players will get to explore a vast, interconnected world where they will journey across the worlds of the living and the dead. This page covers a full walkthrough and helpful guides for the Forsaken Fen location in Lords of the Fallen.
- Please visit the Walkthrough page for Lords of the Fallen (LotF) for a detailed guide on the main story.
- You can also check our Game Progress Route page for Lords of the Fallen (LotF) for a summarized progression path.
- Visit the Forsaken Fen Map for a visual aid in finding all Items, Shortcuts, and relevant markers.

General Information
- Previous: Pilgrim's Perch
- Next: Fitzroy's Gorge
- Bosses: The Congregator of Flesh, Mendacious Visage, The Hushed Saint
- No. of Vestiges: 3x Vestiges
- Vestige of Olleren
- Vestige of Valade
- Vestige of the Pale Butcher
Forsaken Fen Map
NPCs in the Area
Bosses
Enemies
- Avowed
- Brogid
- Fetid Sacrifice
- Holy Bulwark
- Marksman
- Pilgrim
- Ravenous Fascinator
- Remnant
- Shrouded Remnant
- Shuja Warrior
- Shuja Strider
- Umbral Egg
- Umbral Parasite
- Womb of Despair
Items
Weapons
- Angel's Axe
- Kukajin's Sword
- Pale Butcher's Blade
- Pyric Cultist Staff
- Resh-Mesah's Sword
- Shuja Warrior Spear
- Wilmarc's Catalyst
Shields
- None
Armor
Spells
Accessories
- Bloodbane Ring
- Cursewyrm Ring
- Panoptic Ring
- Pendant of Burden
- Pendant of Induration
- Shuja Harmony Hoop
- Verdure Ring
Runes
- None
Items
- Ammunition Pouch x4
- Animated Vigor Skull x1
- Briostone Trio x2
- Burn Salts x3
- Faint Vigor Skull x3
- Forsaken Grenade x1
- Forsaken Grenade x1
- Lucky Paw x1
- Manastone Cluster x2
- Minor Fire Salts x9
- Poison Arrows x1
- Poison Cure x2
- Poison Javelin x1
- Poison Resistance Balm x8
- Poison Salts x4
- Precision Arrows x1
- Purifying Balm x2
- Small Manastone Cluster x2
- Smite Cure x2
- Umbral Burrower x1
- Umbral Scouring x4
Upgrade Materials
Key Items & Other
- Beckoning (NPC reward)
- Exemplar
- Harbinger
- Map of Forsaken Fen
- Umbral Eye of the Pale Butcher
- Vanguard Barros' Rosary
Enemy Drops
- Ammunition Pouch
- Briostone Pair
- Regular Deralium Nuggets
- Despair's Burden
- Enervated Vigor Skull
- Holy Bulwark Gauntlets
- Large Manastone Cluster
- Marksman Gloves
- Mask of Wrath
- Poison Cure
- Precision Hammer
- Remembrance of the Congregator of Flesh x1 (Boss Drop)
- Remembrance of the Hushed Saint x1 (Boss Drop)
- Root Clump
- Shuja Warrior Set
- Shuja Warrior Spear
- Umbral Scouring x20 (Boss Drop)
- Vestige Seed x3 (Boss Drop)
Merchant Items
- Avowed Mace x1
- Blackfeather Ranger Hat x1 (2nd encounter)
- Blackfeather Ranger Armour x1 (2nd encounter)
- Blackfeather Ranger Gloves x1 (2nd encounter)
- Blackfeather Ranger Trousers x1 (2nd encounter)
- Bleed Cure
- Burn Cure
- Small Deralium Fragment x10
- Exiled Stalker Dagger x1
- Exiled Stalker Headscarf x1 (2nd encounter)
- Exiled Stalker Garb x1 (2nd encounter)
- Exiled Stalker Wrappings x1 (2nd encounter)
- Exiled Stalker Trousers x1 (2nd encounter)
- Frostbite Cure
- Ignite Cure
- Lucky Paw
- Minor Fire Salts
- Minor Holy Salts
- Minor Wither Salts
- Pointed Stick x1
- Poison Cure
- Shuja Warrior Spear x1 (2nd encounter)
- Smite Cure
- Udirangr Warwolf Hood x1 (2nd encounter)
- Udirangr Warwolf Armour x1 (2nd encounter)
- Udirangr Warwolf Sleeves x1 (2nd encounter)
- Udirangr Warwolf Trousers x1 (2nd encounter)
Lords of the Fallen Full Forsaken Fen Walkthrough
A Familiar Face
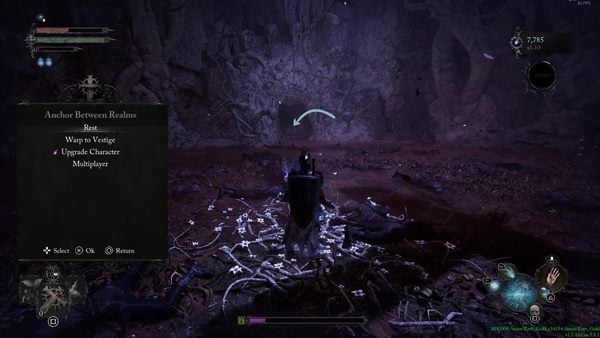
After defeating Gentle Gaverus, Mistress of Hounds, go through the lit tunnel opposite to where you entered the arena initially. Climb down the ladder and up ahead to the right, you can pick up three Poison Resistance Balms from the ground. Further ahead, you'll be able to interact with the Vestige of Olleren. When you exit the tunnel, you'll emerge back outside and in the Forsaken Fen.

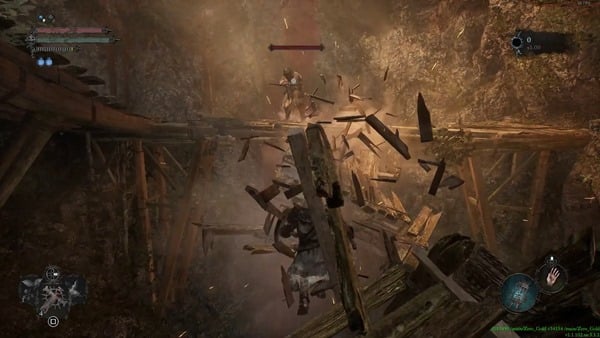
Turn right and up ahead you'll find Thehk-Ihir. He'll inform you of his newfound purpose of being a travelling merchant and give you the Beckoning gesture. He mainly sells a variety of Consumables, but also sells three Weapons and some Small Deralium Fragments. Continue past Thehk-Ihir down the slope and you'll get to some flimsy wooden platforms. Brace yourself as when you attempt to walk over the wooden planks, you'll drop down below and initiate a boss fight.
Boss: The Congregator of Flesh
After a gruesome cutscene, you'll fight against The Congregator of Flesh. It'll start the fight with a loud roar, knocking back players that are too close to it. This boss has slow, sluggish movement and fairly telegraphed attacks, however to compensate, it's moves are far reaching, tend to have wide arcs or large AoEs, and most of them can knock the player down.

You'll want to position yourself on the creature's right side, where it doesn't have an arm. Staying here will allow you to avoid most of it's front-facing attacks, as well as long arm swipes, and force it to rotate to face you, giving you some time for free attacks during it's slow rotations. If you die during the boss fight and come back to it's boss area, you'll be able to summon one of the following NPCs to aid you during the fight - Pieta, The Iron Wayfarer, and Stomund. When defeated it drops a Vestige Seed and eight Umbral Scouring. You can witness it's Stigma by swapping over to the Umbral if you're not already in it, after which you'll be rewarded with the Remembrance of the Congregator of Flesh and two more Umbral Scouring.
Continuing through the Forsaken Fen
There's an Umbral Flowerbed that appears in this boss arena. If you have some Vestige Seeds to spare, you may consider using one here for convenience. To continue forward, go through the hole in the wall leading into a tunnel. Cut down the vines blocking your way with your weapon and you'll emerge outside into an area filled with torches. Note that the enemies in this area can inflict Poison, so keep track of how many Poison Resistance Balms and Poison Cures you have on yourself.
Get to the end of the short wooden walkway to find three Poison Resistance Balms, then head into the Umbral to be able go forward. You'll find that you can now walk through the river that was blocking your way earlier. Take care of the Remnants and Shrouded Remnant in the area, then go between the two wooden walkways to pick up three Minor Fire Salts.

When you get to the other side, go right, under the wooden platforms to find two Poison Resistance Balms. Take a hard left here and you'll find the Vestige of Valade to the left of the path. You'll find cave next to it, housing a shortcut that cannot be unlocked from this side. Instead, follow the path to find the man you met earlier in Pilgrim's Perch. When you exhaust his dialogue, he'll finally introduce himself as Byron.

Before continuing up the path, go to the right of the path while still in the Umbral. A Remnant will be waiting for you, but at the end, you can pick up a bundle of Poison Arrows. You can now return to the Vestige to rest up and return to the Axiom. Make your way up the path, where on your left you'll find two Ammunition Pouches and two Small Manastone Clusters. Defeat the two Swamp Dead in the vicinity, then cross the wooden beam to the other side.
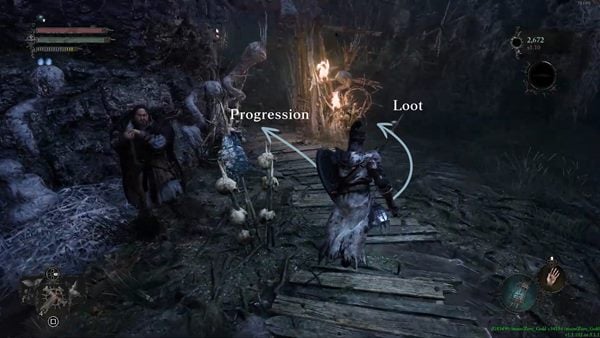
You'll eventually get to an open area with a large rock in the middle. If you skirt around the right of the rock, you can loot three Minor Fire Salts from the ground. Defeat the four Fetid Sacrifices and Shuja Strider in the area, then move on past the torch. Be careful as you're wading through the shallow river here, as some Fetid Sacrifices may emerge from the riverbed. When you pass underneath a wooden archway, turn left to find two Small Deralium Fragments behind some crates. Enter the Umbral, and you'll find a slope going down littered with Umbral Eggs. If you follow it down, you'll find an Umbral Belly that when soulflayed, will drop the Angel's Axe. Head back up the slope when you're done.
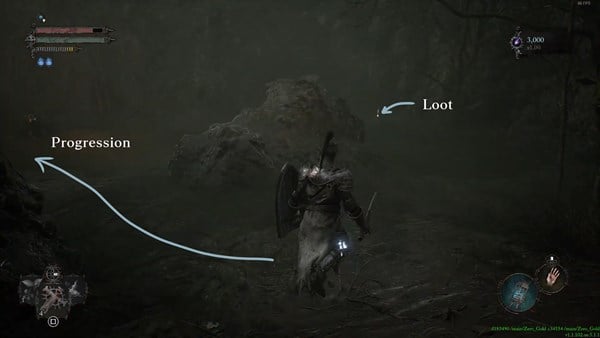
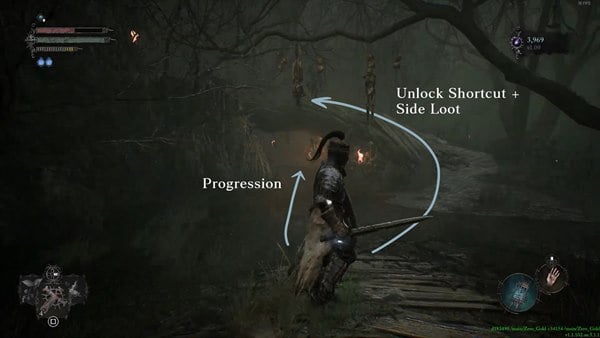
Continue following the wooden path and at the base of a sloping tree branch, you'll have to deal with a few Fetid Sacrifices and Brogids. There is a lot to explore in this section of the Forsaken Fen, but first, go up the sloping tree branch to grab some loot and open a shortcut. One Shuja Warrior can be found on the slope, afterwards, you can obtain two Ammunition Pouches and two Small Manastone Clusters by the wall at the top. Keep heading forward across some wooden scaffolding, and there'll be a ladder going upwards on your right in the Umbral. Before ascending it, defeat the Shuja Warrior and unlock the door nearby to open up a shortcut leading back to the Vestige of Valade.
Head back to where you found the Shuja Warrior and push the ladder nearby down to unlock a shortcut. Head down the ladder and on your left, cut down the vines on the wall. You can obtain both the Cursewyrm Ring and Exemplar in this hidden alcove.
Going for some extra loot
Go back up the ladder, and if you're not already in it, enter the Umbral. Head up the bone ladder that appears on the nearby cliff wall and you'll find a Regular Deralium Nuggets on the right. Defeat the Remnants that appear up ahead and keep going until you get to another fire surrounded by three Shuja Warriors. Right in front of the fire, you can obtain the Harbinger Armour Tinct from the ground. Turn left and keep going forward, defeating more Remnants on the way. On your right, you'll find an Emergence Effigy you can use to return to the Axiom.

Behind the breakable wooden half-wall nearby, you'll find a Holy Bulwark lying in wait. Deal with it then continue following the path. By the wooden barricades ahead, there'll be a patrolling Avowed. Keep going forward, to get to a broken wooden bridge lit by torches. Enter the Umbral here to repair the bridge and defeat the Marksman on the other side. Be careful of the Remnants that may come chasing after behind you.

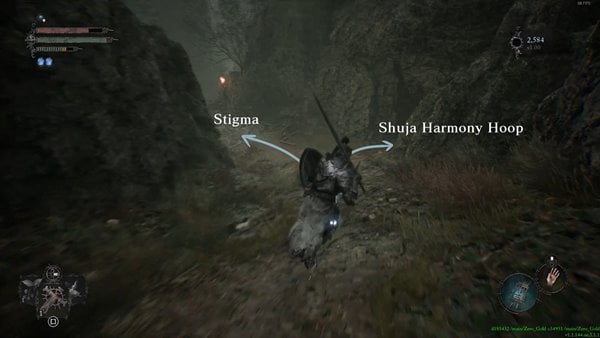
Make your way up the slope and you'll get to a fork in the road - one path going left and the other one going right. Start by going to the left. Defeat the two Marksmen and Avowed, then you'll be able to interact with the Emergence Effigy they were guarding. Don't return to the Axiom just yet. About halfway down the slope, you'll find some Umbral Eggs at the mouth of a cave. After defeating the Remnants within, you'll find the Shuja Harmony Hoop at the end.
Return to the entrance of the cave. At the bottom of the slope, you'll find a Stigma you can soulflay guarded by a Shrouded Remnant. After witnessing it, you'll earn two Umbral Scouring and the ground will turn into an Umbral Flowerbed. The ledge here drops you back down to the Vestige of Valade, but do note that you'll have to take the long way around to get back here if you didn't plant the Vestige Seedling. After all these events, you can interact with the nearby Emergence Effigy to return to the Axiom.

Backtrack back to the fork in the path and be careful of the three Marksmen that show up. The path on the right takes you further up and to another split, again going left or right. On the right, you can pick up two Smite Cures. On the left, a Marksman can be found on a ledge overlooking the previous left path. Defeat him, then continue walking across the wooden path ahead where you'll find another Holy Bulwark.

Keep following the path upwards until you find a Marksman on some wooden platforms. This is where you dropped down to The Congregator of Flesh's arena. On the right, you'll find Resh-Mesah's Sword at the end of a short platform. You can jump down and run back or teleport in some way, but either way, make your way back to the Vestige of Valade.

Finding the Petrified Woman
From the Vestige of Valade, head through the shortcut we opened up earlier and make your way back down the sloping tree branch. At the bottom, turn right and go underneath the tree branch to defeat the two Shuja Warriors by a bonfire. Head left from the bonfire and follow the sound of humming to find some vines you can cut down hiding a Petrified Woman in an alcove. She'll ask you free her of her affliction when spoken to. After speaking to her, be careful with swinging your weapon near her as you can destroy her, locking you out of her questline. You can help her if you have any radiant healing spell, such as Cleansing Spring or Sanctify, or holy throwable items that cleanses status effects, such as a Radiantburst Parchment or an Empyrean Grenade. After helping her, she'll express her intentions to move to Skyrest Bridge and hand over the Pendant of Induration. There's an item behind her that you can't reach until she moves or you destroy her as a statue. When you do manage to pick it up, you'll find that it's Wilmarc's Catalyst. You can also find an Umbral Flowerbed at the mouth of her cave if you wish to put a checkpoint here.
Exit her cave and turn left. Enter the Umbral if you're not already in it and up ahead, you'll find a gap between two rock formations, where a Shuja Strider on stilts can be found. Defeat the Shuja Strider and you'll find a split in the path ahead, one going left and the other going right. Go to the left and trigger the explosive entities with your Umbral Lamp. Continue forward, past a few torches and defeat the Shuja Warrior and Pilgrim. At the end, pick up the Poison Javelin, and you can drop down back near the Petrified Woman's cave.
Go back to the left, through the rock formations you found the Shuja Strider on stilts and go down the path on the right this time. You'll eventually stumble across a hut on your right. Before heading inside, follow the path to the end. You'll eventually make reach an Umbral Belly guarded by a few Remnants and Womb of Despair. After defeating them, the Umbral Belly can be soulflayed for a Saintly Quintessence.

Return to the hut and defeat the Remnants that ambush you. Head up the first set of stairs afterwards to find an Umbral Burrower. On the top floor, defeat the Shuja Warrior and exit out onto the 'balcony'. Forward and to the right is a dilapidated hut that houses two Poison Cures. Turn around back to the previous hut and follow the walkway to the right.

When you get to the end of the wooden walkway and onto the grass, there'll be another wooden pathway in front of you. Go to the left of the pathway. There'll be an Emergence Effigy in the corner of this upper platform that'll take you back to the Axiom. If you continue down the pathway here, you'll get to the large bonfire near the Petrified Woman. Go the other way down the path, following torches underneath a wooden archway.

Taking a Detour
The path will curve left underneath another torch-lit wooden structure. Before you head through, enter the Umbral and look towards the water on the right to see that a path has opened forward. Further down the path, you'll find an Umbral Flowerbed on the left and The Iron Wayfarer on the right. At the end, cut down the vines to enter a hidden cave. A Shuja Warrior will be waiting for you on the other side. Defeat it and at the wall at the end of the cave, you'll see a way forward to the right, and some vines blocking a hidden path to the left.
Start by cutting down the vines to the left. You'll be able to emerge back outside and find an Umbral Belly that when soulflayed, will drop the Verdure Ring. Turn left and keep following the path to get to a hut inhabited by a Shuja Warrior. Break through the flimsy looking planks on the wall to open up a shortcut back to the main path.
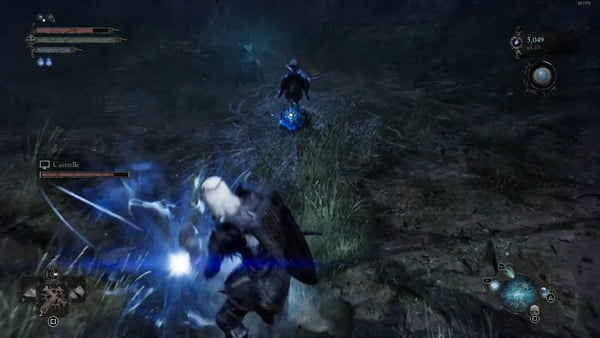
Before returning to the main path, go back to the cave and head down the path on the right you missed earlier. Defeat the Shuja Strider on stilts and Brogid in the circular area. Be careful going further as three large tumbleweeds will come crashing down from the slope ahead. Let them pass, then quickly run up the slope before the next set of tumbleweeds appear. Near the end, you'll find a ladder on the right you can kick down to open up a shortcut back to the area with an Emergence Effigy next to stairs leading back to the Petrified Woman. Take note and remember where this shortcut is, as a boss encounter is coming up. At the end of the pathway, soulflay the body to open up the way forward.
Boss: Mendacious Visage
When you walk through the now opened archway, you'll immediately initiate the fight against the Mendacious Visage. If you feel that the arena is too small, look to the wall on the left and to the right to find two bodies you can soulflay and remove the Umbral Tumor up ahead. The way behind the Umbral Tumor leads up to some wooden platforms you can kite the boss around to make the fight a little bit easier and to defeat the Shrouded Remnants throwing projectiles at you.
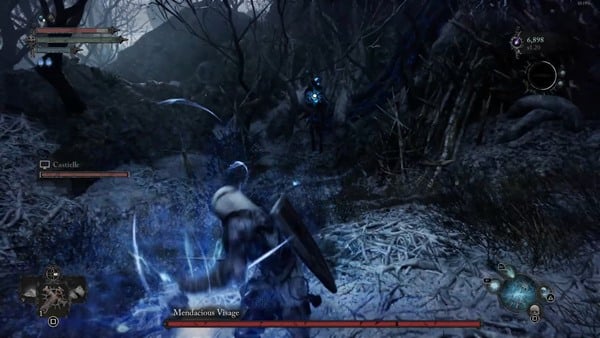
Most of it's attacks are fairly short. If you have ranged spells, it is entirely possible to spam projectiles at it while you kite away. Just watch out for when it leaps forward towards you. When the Mendacious Visage opens up it's face, you'll want to attack as much as you can as this is when it's most vulnerable. Be careful while it's face is open, however, as it gains access to more widespread Frostbite attacks during this period and can slam it's face shut, dealing huge damage to nearby players in front of it.
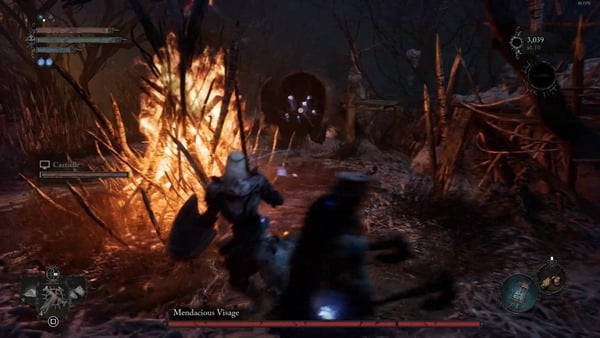
After being defeated, this boss drops the Mask of Wrath, a Vestige Seed, and a Precision Hammer. You can pick up two Purifying Balm from one of the huts next to the large bonfire on the upper platform. Afterwards, make your way towards the slope leading back down to the lower area of the arena. You'll see that a way forward has opened up here. Follow the wooden walkway and drop down the ladder on the left. Before heading down, continue forward down the walkway, and you'll get to a hut housing an Emergence Effigy you can use to return to the Axiom. You may run into a few Remnants on the way there. The body in this hut hold the Vanguard Barros' Rosary.

Return to the ladder you kicked down and when you turn left, you'll find yourself back at the area with the sloping tree branch leading to the shortcut back to the Vestige of Valade.
Back on the Main Path
When you're ready to proceed, return to where we took the detour leading to the Mendacious Visage. This time, follow the path underneath the lit wooden archway. On the left, you can grab three Minor Fire Salts. Keep following the path to find two Faint Vigor Skulls. On the right, in the water is an Animated Vigor Skull. Be careful of the Fetid Sacrifice that arises nearby, and defeat it, as well as the multiple other Fetid Sacrifices and Shuja Warriors in the vicinity. Further down the path on the left is another Faint Vigor Skull.

Go through the lit gateway ahead and defeat the shaman in your way. If you keep following the wooden walkway here, you'll eventually get to a raised bridge that can't be lowered from this side. Nearby, however, there'll be an Umbral Flowerbed you can use if you wish for a temporary checkpoint. This may be a good place to spend one of your Vestige Seeds as the lake area ahead is long, and you won't find another flowerbed or Vestige for a while. Enter the Umbral and step into the now empty lake to get to the other side. On the way, you'll have to defeat a few Fetid Sacrifice, Brogids, and Shuja Striders.

Turn right immediately when you go down the slope and head forward to find a bone slope going upwards. When you're on the slope, look to your right and upwards to find a body you can soulflay. This lowers a platform for you to get across. Head up the slope and at the very top, look out onto the lake. Up on a bone structure, you can soulflay another body to weaken the nearby Umbral Tumor. You won't find the other two bodies until later.

Head into the center of the lake and make your way through a short corridor. At the end, immediately look to your right to find a Forsaken Grenade guarded by two Remnants. Turn around and at the split, take the path on the right. Go under a wooden bridge to emerge into what seems to be the center of a small village. At the end of the path, look to the left to find an Umbral Belly under asmall archway. Defeat the Remnants and Womb of Despair in the area, then soulflay the Umbral Belly for the Umbral Eye of the Pale Butcher.

Down the path on the right in the split, keep heading forward before going up the slope to grab a Lucky Paw. Go back and head up the slope to another large bonfire. Around the bonfire, you'll find two Umbral Parasites, and on the outskirts of this platform, you'll find another two. Defeat all the Remnants, Womb of Despair, Shuja Warriors, and Fetid Sacrifices, then you'll be able to return to the Axiom using the Emergence Effigy on the edge of the platform.
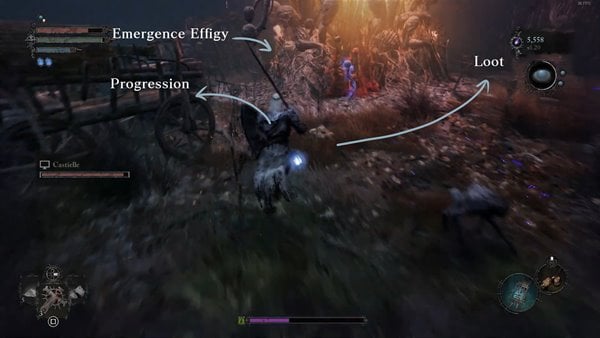
Looking at the Emergence Effigy, walk across the wooden walkway on your right and enter the hut to find a Shuja Warrior and the Pale Butcher's Blade on the ground. At the end, you'll be able to kick down a plank of wood bridging the way back across to the other side of the lake. Enter the Umbral to reveal a hidden bridge on the side. At the end of the bridge, on the left, you'll find a pile of Poison Salts. Walk all the way to the end of this walkway, dealing with the Shuja Warrior and Brogids on the way, and you'll find the Pyric Cultist Staff and three Burn Salts.

Return to the bridge and jump down to the right. Destroy all the Umbral Eggs in the area, then look back at the bridge and soulflay the body on it to weaken the Umbral Tumor. At the end of this area, there are some pieces of wood you can cut down to reveal another body to soulflay, again weakening the tumor. With three bodies soulflayed, the Umbral Tumor will fade away, opening a way between this area and the lake. Continue following the path, underneath a bridge, and in an alcove on the right at the corner, you can open a chest that contains the Angel of the Void Set.
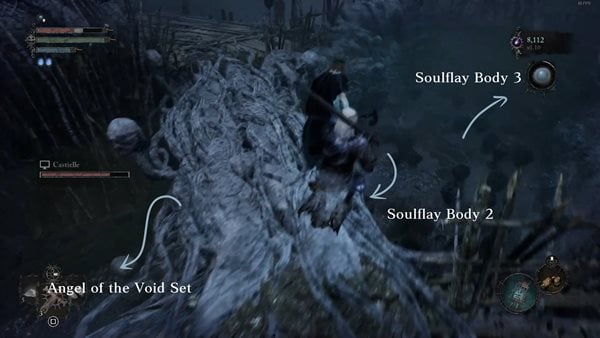
Head back into the lake and up to the large bonfire. You can look into the huts in the area for a Small Deralium Fragment. You'll also notice an item on top one of the huts in the area. While still in the Umbral, you have to enter the lake and circle up and around from the slope ahead and on the left to reach some wooden platforms leading to the roof of the hut. As you make your way there, you'll have to face numerous Remnants, Fetid Sacrifices, and some Womb of Despair. At the top of the slope, a section of wooden platforms leading directly to the roof of the hut will be found on the right. Rather than hop onto them, head forward through the grassy area. The spike structure on the right can be entered through a doorway on the far side. Inside, you can pick up the Putrefaction Spell from the corner. Exit the structure and turn right, where you'll find another set of wooden platforms, also leading to the roof of the hut. Follow them, and about halfway through, you'll find an Emergence Effigy you can use to return to the Axiom. When you get to the end, you'll find two Ammunition Pouches and two Small Manastone Clusters on the roof.
Hop back down into the large bonfire area. Go to the right and head down the pathway through an archway. About halfway through the tunnel past the lake, you'll find an Umbral Flowerbed in an alcove to the right. While the previous flowerbeds were optional temporary checkpoints, it is highly recommended to plant a Vestige Seed in this one as there is a boss fight further ahead. Whenever you're ready, emerge out of the tunnel to the other side.

Boss: The Hushed Saint
You'll witness a cutscene of your character walking closer towards one of the Hallowed Sentinel beacons you were tasked with cleansing. However, in your way stands The Hushed Saint, an undead knight on it's trusty steed. After dying to it once, you can request assistance from either The Iron Wayfarer, Stomund, Damarose, Tortured Prisoner, Pieta, or Kukajin if you freed her earlier. Asking Kukajin for help will require you to pay her 3000 Vigor afterwards at Skyrest Bridge.

The boss starts the boss fight mounted upon it's horse. While it's up there, you want to watch the boss' pathing carefully as you can get trampled and knocked down as the horse is running across the battlefield. During this period, also look out for signs that the boss itself is about to throw his halberd at you or that the horse is about to stop on the ground, sending damaging shockwaves outwards. Occasionally, the boss and it's horse may burrow into the ground. When it does this, you can tell where it is, and plan where it's going to emerge and attack by the trail it leaves behind.
When the rider hops off his horse, you'll just have to deal with the rider itself and won't have to worry about the horse. The Hushed Saint attacks with a series of halberd slashes and stabs while on foot. Avoid it's attacks, and get your hits in between each one.
After defeating The Hushed Saint, you'll be rewarded with a Vestige Seed and eight Umbral Scouring. Enter the Umbral if you aren't already in it, and soulflay the Stigma to obtain the Remembrance of the Hushed Saint and two more Umbral Scouring. Approach the Hallowed Sentinel Beacon glowing red. Right in front of it, you can find an Emergence Effigy to return to the Axiom. Interact with the beacon afterwards to witness a cutscene of your character cleansing it. Note that cleansing any beacon, including this first one, locks you out of the Inferno Ending.

Finding the next Vestige
Turn around at the beacon and face the boss arena. You'll see a light in the distance that marks the way out. Follow the path upwards and near the end, you'll find some blue moths swarming an area on the right. Enter the Umbral here and soulflay the Stigma to obtain two Umbral Scouring.

Continue up the path and at the end, you'll once again find Thehk-Ihir. He's moved here as the inhabitants of the Forsaken Fen seemed a bit too hostile for his tastes. You may want to check his wares here as he sells additional items he didn't previously sell at the start of the Forsaken Fen. Afterwards, interact with the Vestige next to him to activate the Vestige of the Pale Butcher.

If you continue down the path, you'll get to a raised bridge that can't be lowered from this side. You have to head into the Umbral to be able to be able to hop down and get to the other side. After lowering the bridge, return to the Vestige. Head opposite to the Vestige, where you'll be able to see an item off the path. Break through the wooden crates and defeat the Brogids here. Knock the item off of the branch with a ranged spell or a throwable item, then you can pick the Panoptic Ring from off of the floor.

You'll have three paths to take - one to the right, one in the middle going straight ahead, and one to the left. Taking the path to the right takes you back to the main path that leads to the raised bridge. Take the path on the left and you'll find two Briostone Trio behind a rock on the left. Further ahead, you can find two Ammunition Satchels and two Manastone Clusters.

Turn the corner to find some breakable wooden crates on your right. You'll see an item in the stone building next to you. Don't go for it, however, as it is a Ravenous Fascinator trying to lure you in with the promise of loot. Ravenous Fascinators are invisible enemies that try and lure victims from the Axiom into the Umbral. If you pick this item up while in the Axiom, you will 'die' and be forced into the Umbral. They can be soulflayed, causing them to run away and dropping an item. The only tell that an item on the ground is actually a Ravenous Fascinator is that the loot will quiver and sway.

Head forward and onto the wooden pathway and turn right when you can, off the path and onto some grass. You'll find a hut you can enter that emerges out onto some wooden platforms above the water. Turn left to lower the ladder, letting you come back up to these platforms in case you fall in. Down the pathway to the right of the ladder, you'll find three Poison Salts. Head further left of the ladder to find another ladder going up. This will take you to a third bonfire where two Shuja Warriors and a Shuja Strider are hanging out. Look to the left to find a ladder you can knock down. This will open up a shortcut back to where you found the Pyric Cultist Staff. Two Poison Resistance Balm can also be picked up from the ground nearby. Taking the ladder upwards in this area takes you to a narrow pathway filled with battling Avowed, Marksmen, Shuja Warriors, and Shuja Striders. You can loot the chest at the end for the Pendant of Burden. Return down the two ladders you used to get up here and head back to the wooden walkways.

Turn left when you can on the platform you entered the area in to progress. There's an Emergence Effigy at the end that takes can take you back into the Axiom if you lowered the bridge earlier or got eaten by the Ravenous Fascinator. Turn the corner, continuing down the path, and on the left you can grab four Small Deralium Fragments from the ground.

Make your way down the ladder at the end and you'll be back at the bridge leading to the Vestige of the Pale Butcher. Go the opposite way on the path and you'll find yourself at Fitzroy's Gorge.
Forsaken Fen Map
Forsaken Fen Videos
Videos Related to this Location
 Anonymous
I did what it said i equipped the Radiantburst Parchment used it on on woman and she disappeared Wtf

 Anonymous
 Anonymous
Precision Arrows can be found behind a breakable wooden wall near the “third bonfire” before the ladder to the Pendant of Burden.

 Anonymous
 Anonymous
 Anonymous
Just in case the DEV's are reading this: Spamming the same enemies over and over again does not make this a souls game, nor does it make the game "challenging". It makes the game annoying and borderline unplayable. Not giving us enough seeds to use, but oddly enough, there are a bunch of seed patches? In what reality does that make sense? Unless you are lucky and saved your seed to use right outside the boss gate, have fun trekking back to the boss arena where you are more than likely going to get hit before entering. Great job!

 Anonymous
 Anonymous
Why in the literal **** is the petrified woman killable when the game has been conditioning you up to this point to think that NPCs out in the world can't be harmed? I'm playing as a Paladin, too, so I locked myself out of some cool stuff.

 Anonymous
There’s only one saintly here not 2 the guide lists 1X for it twice

 Anonymous
Nothing fun about that area lmao
I have this visceral hatred of swamps after so many souls likes.
 Anonymous
 Anonymous
There is a extra poison javaline at the end of the area in top of the wood plataforms after the boss.






"Return to the entrance of the cave. At the bottom of the slope, you'll find a Stigma you can soulflay guarded by a Shrouded Remnant. After witnessing it, you'll earn two Umbral Scouring and the ground will turn into an Umbral Flowerbed. The ledge here drops you back down to the Vestige of Valade, but do note that you'll have to take the long way around to get back here if you didn't plant the Vestige Seedling."
nope. thank **** now there is a ladder shortcut to kick down here. best game ever. note to devs: thanks for not being munted.
0
+10
-1