Fief of the Chill Curse is one of the Locations in Lords of the Fallen (LotF). A distinct Location in the game where players will go through the snowy region of Mournstead, filled with secret areas and interconnected paths. In Lords of the Fallen (LOTF), players will get to explore a vast, interconnected world where they will journey across the worlds of the living and the dead. This page covers a full walkthrough and helpful guides for the Defiled Sepulchre location in Lords of the Fallen.
- Please visit the Walkthrough page for Lords of the Fallen (LotF) for a detailed guide on the main story.
- You can also check our Game Progress Route page for Lords of the Fallen (LotF) for a summarized progression path.
- Visit the Fief of the Chill Curse Map for a visual aid in finding all Items, Shortcuts, and relevant markers.
General Information
- Previous: Cistern
- Next: Revelation Depths
- Bosses:
- Griefbound Rowena
- Kinrangr Guardian Folard
- The Hollow Crow
- No. of Vestiges: 2
- Vestige of Svornil
- Vestige of Loash
Fief of the Chill Curse Map

NPCs in the Area
Bosses
Enemies
- Griefbound
- Kinrangr Guardian
- Kinrangr Hound
- Kinrangr Hunter
- Mendacious Visage
- Pilgrim
- Raw Mangler
- Remnant
- Rhogar Hound
- Umbral Egg
- Ravenous Fascinator
- Umbral Parasite
- Womb of Despair
- Shrouded Sparrow
- Shrouded Remnant
Items
Weapons
- Beast Axe
- Bow of the Mutilated
- Kinrangr Guardian Axe
- Kinrangr Leader's Axe
- Kinrangr Rebel's Hammer
- Pestilent Blade
- Putrid Child Sword
- Putrid Polearm
- Udirangr Shaman Bow
- Sunken Beseecher
- Talon
Shields
Armor
- J'deyl Skull Helm
- J'deyl Bone Armour
- J'deyl Bone Gloves
- J'deyl Trousers
- Kinrangr Guardian Armour
- Kinrangr Guardian Trousers
Accessories
Spells
Runes
Items
- Ammunition Satchel x7
- Enhanced Lacerating Knife
- Fire Salts x1
- Frost Arrows
- Frostbite Cure x6
- Frostbite Resistance Balm x2
- Large Manastone Cluster x2
- Manastone Cluster x4
- Minor Wither Salts
- Vestige Seed x1
Upgrade Materials
- Animated Vigor Skull x2
- Antediluvian Chisel
- Deralium Chunk
- Large Deralium Shards x4
- Umbral Scouring x2
- Saintly Quintessence
- Small Deralium Fragment x8
- Rebirth Chrysalis
- Regular Deralium Nuggets x10
- Umbral Scouring x2
Key Items & Others
Enemy Drops
- Ammunition Satchel
- Briostone Trio x3
- Kinrangr Guardian Axe
- Kinrangr Hunter Bow
- Kinrangr Hunter Helm
- Regular Deralium Nuggets x3
- Ruq x2
- Vigor Moth
- Vestige Moth
- Large Manastone Cluster x2
- Purifying Balm
- Wooden Cross
- Tumul x2
- Xiax
Full Fief of the Chill Curse Walkthrough
Locating the Fief of the Chill Curse Bell Door
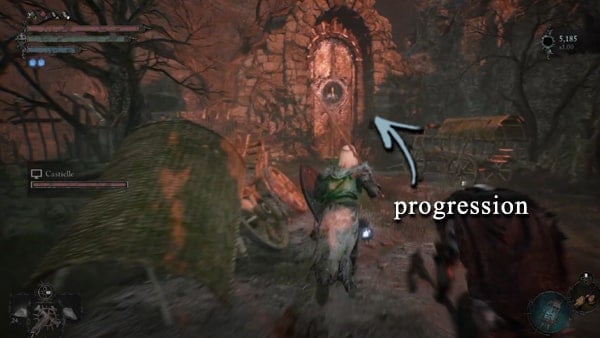
Fief the Chill Curse is one of the iconic levels in Lords of the Fallen. This level in particular is covered with snow and players need to overcome a harsh terrain and interconnected structures and pathways. To formally start your journey, you need to have the Fief Key and this will be given to you by Andreas of Ebb who later can be found in Skyrest Bridge after defeating The Congregator of Flesh. Simply talk to him and he will provide the key that you need. After having the Fief Key, warp to the Vestige of Marco the Axe, and the Bell Door that leads to Fief of the Chill Curse is not far from your location.
Explore the early sections
Past the Bell Door is a pathway that leads to a cave and a Raw Mangler and a Pilgrim will bid you welcome. After dealing with the enemies in the area, notice that there is a loot near the entrance of the cave. Pick it up and receive x1 Map of the Fief of the Chill Curse. Not far from your location, a well is located, head there and pick up the loot to get an x1 Splitting Axe. Head inside the cave and follow the straightforward path. Use your Umbral Lamp to get rid of the Umbral Entity blocking the path. Notice that there are barrels in the area, destroy them, and find a hidden loot which is x3 Frostbite Cure. Heading further inside the cave you will encounter an Emergence Effigy. Use it if you transferred to Umbral. Continue following the path and eventually, you will find yourself in a wide area and ready yourself for a boss battle.

Defeat Kinrangr Guardian Folard
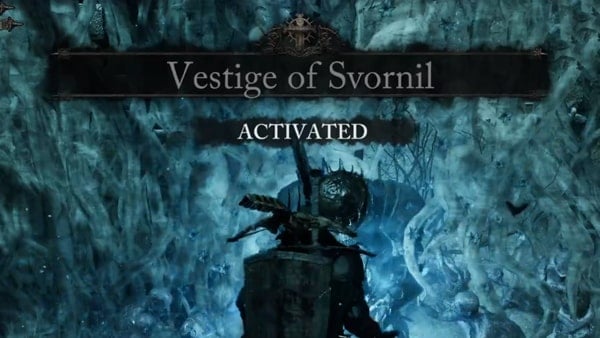
This boss fight will give you a warm-up for the upcoming battle. Kinrangr Guardian Folard is equipped with an axe and relies on melee combination attacks. Has the capability to release an ice shockwave that has a decent range. He tends to use this if his target is trying to avoid melee combat. His attacks are slow so you can use this to your advantage. The main threat in this battle are his Kinrangr Hounds. You can easily be ganked when not paying attention. Eliminate the hounds first and then focus on Kinrangr Guardian Folard and this fight will end in no time. After the battle ends, receive the following rewards, x1 Frostbite Salts, x1 Kinrangr Guardian Axe, x1 Kinrangr Guardian Armour, x1 Kinrangr Guardian Trousers, and x1 Vestige Seed. Access Umbral and you will notice that there is an Umbral Belly near your location. Soulflay it and receive an x1 Antediluvian Chisel. Head to the slope that will eventually lead you outside the cave. Outside the cave, you will eventually find yourself in a castle or outpost ruins. Activate the nearest Vestige which is the Vestige of Svornil.

Dark Crusader Class Side Quest Remarks
Useful information here before we move on. If you are currently doing the side quest of unlocking the Dark Crusader Class which will require you to do specific steps like soulflaying hidden Stigmas in the game. The Dark Crusader Stigma near the Vestige of Svornil is one of the key Stigmas that you need to Soulflay to advance this questline. Just make sure to do it before moving on and the second Stigma that we need to soulflay is in the area as well.
Witness The King's Stigma
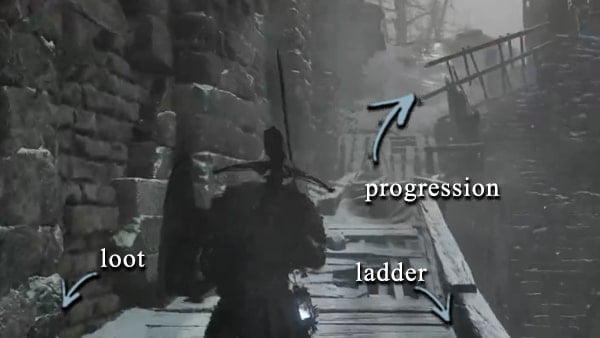
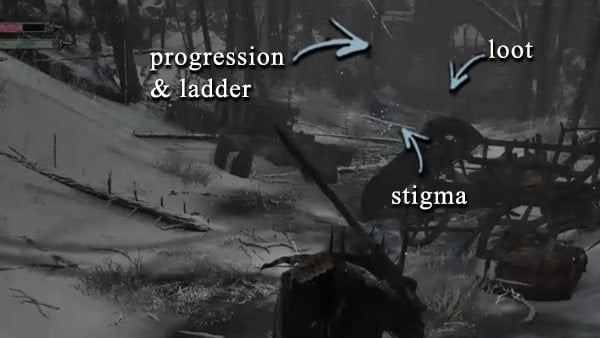
To proceed, access Umbral and Soulflay the Stigma near your location. it seems that it is a praying Dark Crusader Stigma. Receive x2 Umbral Scouring. Access the nearest to reach the upper platforms. Pick up the x1 Ammunition Satchel and x2 Large Manastone Cluster. Follow the slope and it will eventually lead you to a long road, filled with carriage wreckages. Follow the road and be cautious as Kinrangr Hounds will ambush you along the road. In one of the wreckage here, pick up x1 Lawless. Proceed by following the road and eventually, you will encounter a Stigma situated in another wreckage. Receive x2 Umbral Scouring. After the Stigma event, Kinrangr Hunter will spawn. Deal with and proceed accordingly.
Defeat Griefbound Rowena
There is a gate near your location however it is barricaded. Pick up the loot near the gate which is an x1 Enhanced Lacerating Knife. Use the ladder near the gate to access the upper platforms so you can pass through to the other side. Jump to the lower area and you will notice that the next Sentinel Beacon is not far from your location. Head through the beacon's direction by following the road. Eventually, you will encounter a broken stone bridge. Pass the broken stone bridge is another wooden bridge with loot. Pick it up and receive x3 Frostbite Cure. Note that a Kinrangr Guardian and a Hunter will spawn in the area and deal with them accordingly. When the area is safe to explore, pass the wooden bridge near the stone bridge, Umbra Rift and you will notice that the cliff near you will be extended. Head to the additional platforms that surfaced and eventually you will find a handful of loot that you can pick up. In this area get the following items, x1 Enervated Vigor Skull, x1 Seething Vigor Skull, x1 Replete Vigor Skull, x1 Animated Vigor Skull.
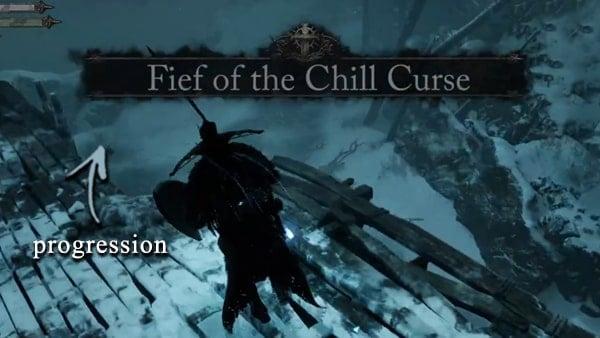

After picking up the said items, head back to the wooden bridge. Head straight by following the cliff and you will find an Emergency Effigy. Access it to return to Axiom. There will be another Kinrangr Hunter in here so proceed with caution. Near your location, head to the nearest cave and pick up the x2 Fire Salts. Head outside the cave and turn a sharp turn to the left to proceed. Near a cliff, another loot can be picked up. Receive x2 Frostbite Resistance Balm. You will notice a ruined church near a wooden bridge. Head inside and we will be taking down a mini-boss. Assuming you are in Umbral, there are a lot of Remnants that you need to take care of. Griefbound Rowena will appear and it will start throwing ice elemental projectiles on you. Avoid being hit while thinning the herd. This boss is not much of a challenge since it relies on its range attacks. After a series of blows, this mini-boss will be defeated in no time. There's an easily missed Umbral Belly in the wall behind where the boss spawns, which can be Soulflayed to drop the Umbral spell, Misery Missile.

Unlock the Iron Gate
After dealing with Griefbound Rowena, head outside the building take a sharp turn to the left, and notice that there are platforms that you can Soulflay and use to get across near the outpost. There is a treasure chest that you can open here. Do so and receive the following items, x1 Shield of Thunder, x4 Small Deralium Fragment, and x2 Regular Deralium Nuggets.

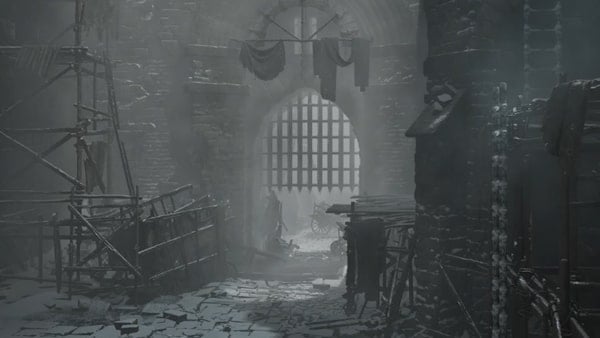
You will notice that below the platform, there is a section where you can jump off. Use the platform so you can be close to it before actually jumping on it. An Umbral Belly is waiting for you here and Soulflay it and receive x1 Saintly Quintessence. To proceed, head to the nearest opening and you will find yourself back in the outpost where the Vestige is located. Activate the lever to unlock the iron gate and pull down the ladder shortcut nearby to unlock the shortcut.

Talk to Drustan
Head to the iron gate and past it, you will find yourself in a ravine. Follow the path here and there will be a loot situated near a carriage. Pick it up and receive a x1 Fire Salts. Not far from your location, another loot can be picked up. Receive x2 Frostbite Resistance Balm. Access the Umbral Rift and continue following the ravine until you reach the end where you need to jump to the lower area. Pick up x1 Udirangr Shaman Bow on the ground. At the center of the area, there's an Umbral Belly that you can Soulflay. Receive x1 Sunken Beseecher as a reward. Beware of the Mendacious Visage lurking in the area. Eliminate it to proceed. Head to the slope and return to Axiom by accessing the nearby Emergency Effigy. Follow the platform and notice that there is an item hanging on a wooden contraption in here. Hit it with a ranged weapon or a spell. Receive a x3 Regular Deralium Nuggets.

Also, there is an available Umbral Flowerbed that you can use here. Follow the platform and you will notice that there is a house nearby, pull down the ladder to unlock the shortcut. Get an x1 Kinrangr Rebel's Hammer from a dead body nearby. Head to a nearby cave and eventually you will reach a section where the icicle deposits will fall. If you get caught up with it, you will die. In Umbral, you will be able to cross the debris by accessing the platform. Pick up the Halting Gesture and there will be a Griefbound in the area, so deal with it accordingly. Exit the cave and notice that there is a settlement nearby. Head there and another Kinrangr Hunter will appear. After dealing with it, head to the gate and use your lamp so you can get past it. One of the houses here is where Drustan is located. Talk to him and he will tell you that he can't stand the cold.


Witness the Experiment Stigma
Transfer to Umbral and you will notice that there is an umbral belly near the gate. Eliminate the Mendacious Visage in the area and Soulflay the belly. Receive x1 Pestilent Blade for doing so. Take the nearest wooden staircase that will lead you to the lower area where a Kinrangr Hunter and Guardian are waiting. You will be in ruins of previous quarters and pan your camera on the upper part of the ruins and you will notice that there is hanging loot. Shoot it and receive x1 Errant for doing so. Not far from your location, there are x2 Regular Deralium Nuggets, hidden in one of the ruined foundations.

To proceed, head to the pathway under the bridge and you can also set up a Vestige Seedling in here since there is a flowerbed. Pass the bridge, and you will find yourself in an open area. Head to the nearest broken bridge ahead of you and get the x1 Glacier Ring situation on a supporting pillar at the end of the bridge.

Past the bridge, follow the pathway ahead, leading to the ruined castle that you can easily see from here. Head to the entrance and there will be two Kinrangr Guardians guarding the area. After dealing with them, obtain the nearest loot which is a x2 Manastone Cluster and x1 Ammunition Satchel. Transfer in Umbral and near the shed, you will notice that there is a ladder that you can use to access the castle gate's ramparts. Get x1 Frost Arrows. To proceed, head down and get past the gate by entering the broken wall near the iron gate. Access the nearest Emergence Effigy to return to Axiom. You will find yourself traversing the roofs of the nearby houses. Head to the lower area and follow the pathway leading further into the inner section of the area. You will find another iron gate that is tightly shut with a Kinrangr Guardian's dead body. Loot it and receive x1 Ancestor's Sword.

Near your location, take the slope that will lead you to the residential district of this area. However, this area is flooded so you will need to access Umbral for you to traverse safely. I will be using the town square's monument as a point of reference since this area has a lot of entry points for walkthrough sake. Head into the Town Square and find the statue. Soulflay the Umbral Belly situated on the statue and receive x1 Putrid Child Sword. From the statue look for the wide path that leads to an empty area with long intact stone fences. There is an Umbral Belly in here that you can soulflay. Receive a x1 Putrid Polearm upon doing so. Head back to the statue and look for a small alleyway that you can go through. At the end of this alleyway, get an x2 Large Deralium Shards.

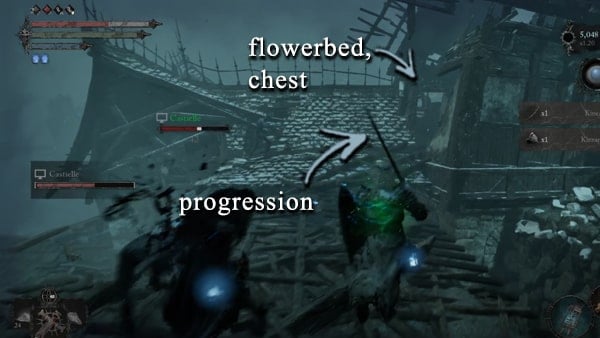
Near the statue, look for an area where there are planks that will let you access the upper area. Follow the rubbles and this will lead to the nearest house' attic where there is an Umbral Flowerbed that you can use. Erect a Vestige Seedling and rest here or do your upgrades. Near the flowerbed, there is a treasure chest for you to loot. Open it and receive the following rewards, a x1 Bow of the Mutilated, x4 Small Deralium Fragment, x3 Regular Deralium Nuggets, and x3 Ammunition Satchel. Follow the debris and it will lead to the nearest ruined house. Get x1 Animated Vigor Skull here. The path that lies ahead is pretty straightforward. Follow it and you will encounter the ladder shortcut. Pull it down to unlock it and transfer to Umbral to Soulflay the stigma situated inside the nearest ruined house.

Activate the Vestige of Loash
There is a wooden bridge that you can use to access the nearby roofs. There is a loot nearby situated on a roof. Pick up the x3 Ammunition Satchel and a x2 Large Manastone Cluster. Head to the lower area and get the x1 Animated Vigor Skull. Head to the ladder shortcut to access the upper areas where the Stigma is located. Access the bridge once again and take the rubbles that lead further to the town square. You are in the right direction if an Emergency Effigy is available nearby. Access it to return to Axiom. Follow the floating debris and it will lead you to an almost fully intact roof that has a x1 Talon on it. Head back to where the stigma is located and head back to the location where you opened a treasure chest. If you are in Umbral you can use the Emergency Effigy here to return to Axiom. Notice the opening that you can get through and eventually, you will find yourself on the other side of the previously iron gate. You are in the right direction if the area looks like the upper section or area of the residential district.


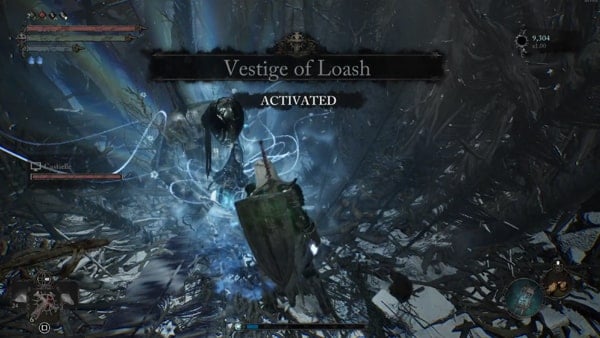
Continue following the stairs and eventually, you will encounter a treasure chest. Open it and receive the following items. x1 J'deyl Skull Helm, x1 J'deyl Bone Armour, x1 J'deyl Bone Gloves, and x1 J'deyl Trousers. Near your location, there is a broken outpost that has a loot inside. Use your Umbral Lamp to get past through the wooden Barricade. Get the x3 Frostbite Cure. Access the nearest stone staircase that leads even further to the upper section of the area. Not for long, you will notice that a Vestige can be activated. Activate the Vestige of Loash and rest. Do your upgrades before moving forward. We will be dealing with the Colossal Boss in this area.
Defeat The Hollow Crow
The Hollow Crow's battle is one of the gimmick fights in the game. The difficulty of this fight varies greatly depending on how fast can you clear its summoned minions. Technically, you will be fighting two bosses in here. Lucy, The Hollow Crow's companion, and him. When the fight starts, transfer to Umbral and you will see that Lucy can be perceived when in this realm. By dealing damage to Lucy, you also deal damage to The Hollow Crow. Once you depleted Lucy's HP, she will retire from the battle momentarily and The Hollow Crow will throw ice breaths with icicles at you or release a homing ice stalagmites.

You can easily dodge this by paying attention to the floor if it glowing. Once Lucy returns to the battle, she will summon more Umbral entities and Kinrangr Hounds. Deplete Lucy's HP and once she's down, the summon enemies will purged as well. Rinse and repeat and in no time, Lucy will encounter her demise, dying for good. Once Lucy has been taken care of, The Hollow Crow will be staggered and you can interact with it to deal the final blow. Get x1 Vestige Seed and x8 Umbral Scouring after the fight.

Kukajin's Questline Remarks
Note that if you progressed Kukajin's Questline and she already offered her services to aid you, you can summon her before fighting The Hollow Crow. After the fight, players need to pay her 6000 Vigor.
Soulflay The Hollow Crow's Stigma
Not far from your location, there is a tunnel that you can access and along the way, The Hollow Crow's Stigma can be Soulflayed. Get x2 Umbral Scouring and x1 Remembrance of the Hollow Crow as a reward.
Cleanse the Beacon
Follow the tunnel and there is an Emergence Effigy nearby, use it to return to Axiom. Get the x1 Kinrangr Leader's Axe near the Effigy. Access the nearest ladder and you will find yourself on a straightforward rampart that will lead to the tower beacon. Upon entering the tower, leave the nearest ladder and access the wooden staircase that will lead you to the top of the tower. Eventually, you will reach the beacon and get the treasure chest first near it and receive the following rewards, x1 Deralium Chunk, x2 Large Deralium Shards, x3 Regular Deralium Nuggets, and x4 Small Deralium Fragment.


Confront The Lightreaper
To proceed, remember the ladder that we skipped when we entered this tower? Access it and it will lead to an open area with a broken bridge. Get the nearest loot which is a x1 Animated Vigor Skull. Not far from your current location, get the x1 Yorke's Ring. In this area, The Lightreaper will spawn and you will be forced to fight him. However, this is not going to be the final encounter with The Lightreaper thus, if you die here, he will leave the area and the fight will no longer continue. This is more of a theming fight to set the stage later on for the final bout. Just get the items in this area and move on. If you would like to know more about The Lightreaper or you are eager to know how to locate him to settle the score, head to our Bosses page or Bramis Castle Walkthrough. Head back to the wooden bridge and access Umbral so you can traverse the lake. Head to your right first and notice that there is an Umbral Belly that you can Soulflay. Do so and get a x1 Aelstrix Take a sharp turn to the left and follow the lake.

Past the bridge, you will be encountering submerged residential houses. There is an Umbral entity blocking the path here. Soulflay it and proceed. You will find yourself in an area where an Umbral Entity is blocking the path and you need to find the entity that is controlling the tumor. Follow the alleyway here and you will notice that there is an Umbral Entity situated on the top of a nearby house that you can Soulflay. Do so and get an x1 Minor Wither Salts and an x1 Xiax. Follow the alleyway and you will get a x1 Beast Axe from a dead Kinrangr Guardian.
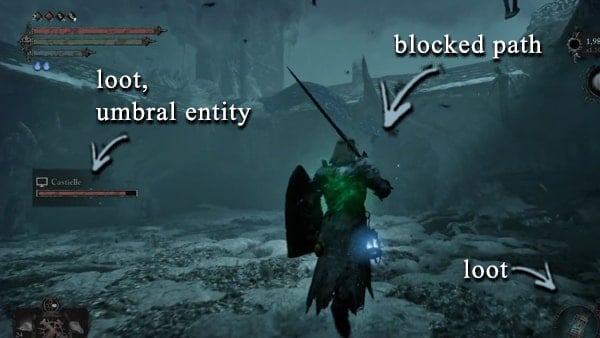
Head back to the area and notice that there is another path blocked path that you can Soulflay. Do so and proceed to the next area that looks like a nest. Clear the area and there is an Umbral Belly that you can Soulflay to get a x1 Rebirth Chrysalis. Not far from your location, you will notice the Umbral Entity that controls the tumor, blocking the first path we noticed in this area. Soulflay it and it will be unlocked. This area will be festered with enemies like Mendacious Visage. Be cautious and clear the area. Soulflay the Umbral Belly nearby and get an x1 Saintly Quintessence.

Now that we are done here, head back to the lake and follow it until you find a Stigma that of a dying man. Soulflay it and you will receive x2 Umbral Scouring. You will find yourself on a series of slopes that will lead you further in the upper area past the lake. There is an Emergence Effigy that you can use to return to Axiom.
Dark Crusader Class Side Quest Remarks
Note that this is one of the required Stigma to progress the Dark Crusader Class side quest. If you are following this guide, this is the second Stigma in this area that you need soulflay so you can move on to the next.

Upon following the slope, you will realize that this is a shortcut back to the original outpost or camp which the Vestige of Svornil. That goes for this area and we pretty much covered everything that it has to offer. Access the Vestige and prepare to head out to the next area.
Useful Umbral Ending Remarks
It is worth noting that if players aim to acquire the Umbral Ending, the Fief of the Chill Curse area should be revisited once again. After acquiring and giving the Rune of Adyr to a non-hostile remnant in Mother's Lull, it will transform into the Withered Rune of Adyr. After defeating the Iron Wayfarer in front of Bramis Castle gates, and also defeating The Sundered Monarch in the castle's throne room, the following steps must be followed to progress and acquire the Umbral Ending. Players need to use the Umbral Seedpod on Melchior's body. After doing the said step, head to Fief of the Chill Curse so we can look for the Iron Wayfarer's presence in the Umbral Realm. To find him, from the Vestige of Svornil, access the ladders to reach the upper platforms. You will soon find yourself on the same road that we used when we first traversed this area.
This is the pathway filled with carriages and barrels. Follow the long road and eventually pass the wooden bridge, you will reach a barricaded gate where a ladder is situated near it. Access the ladder and the banner of the area will be displayed. Access the nearest stairs and transfer to Umbral. Follow the cliffs and eventually, you will find the Iron Wayfarer. Interact with him and use the Withered Rune of Adyr. This will end him and grant the player Harkyn's Umbral Parasite. This is a key item that is required to further progress the Umbral Ending.
Fief of the Chill Curse Map

Fief of the Chill Curse Videos
Videos Related to this Location
 Anonymous
This area has a MASSIVE difficulty curve. Those invisible archers are pure cancer. The I frames needed to dodge the frost aoe arrow needs to be precise or say goodbye to 50% of your health. 2 or more of these in a fight is super hard. Recommend an aoe spell like cataclysm when doesn't need a lock on to get them.

 Anonymous
so when you go to the town square, get ready for a BRUTAL and unfair battle with 3 mendacious visages... and if you wind up by the halberd, expect 2 silences to ambush you as well... theres also 2 or 3 of the little gargoyle creeps crawling around the alleys.... no one in the guide mentions this SERIOUS roadblock...

 Anonymous
Decided to check through previous stuff I've done to make sure I didn't miss anything, and noticed Dustan had died because the guide didn't say to LIGHT THE FIRE he's at when you first find him. Now I'll need to do his whole quest line again in another playthrough, which is something I was hoping not to worry about again.

I find this area the most difficult of the areas regarding Heresy Bosses guarding Radiant Beacons(Others being The Empyrian, Forsaken Fen, and Tower of Penance.) While the bosses are not particulary hard compared to others, your basic enemy types here are deadly. The enemies hit extremely hard, not to mention the archers are invisible, and the place is loaded with minor Kinrangr Guardians, with the addition of minor Mendaction Visages accompanied by Bringers of Stillness in the Umbral Realm. Not to mention there are multiple Ravenous Fascinators(mimics) hiding amongst the loot. Be sure to always check your loot to ensure it does not have a "pulsating" effect to it prior to picking it up. THIS IS A RAVENOUS FASCINATOR! It will deal significant damage and force you into the Umbral Realm if you are currently in the Axiom Realm. While you WILL need to be on top of your game, skill wise, to brave this area, I would also recommend doing it as late in the game as possible, when your gear is upgraded higher and your level is higher. Personal recommendation for an easier time: above 75+ in character levels, with gear that has been upgraded at least a couple of levels. It CAN be done earlier, especially by veteran players, but it will be much more difficult than other Radiant Beacon areas to new players.

 Anonymous
What's a good level to be here for a less than brutal time? I'm 62 and this place is wrecking me at the first wooden bridge

Missing item: After the Griefbound Rowena mini boss fight. In the same area where we fought her there is a belly that can be soulflayed to get the Umbral spell "Misery Missle"

 Anonymous
Thank god this was my last area. I somehow ended up doing Manse & Empyrean before even Calrath lol I was over lvld tho, but I don't care.

 Anonymous
There are several mimic spawns in this level that you didn't mention. If you're following a guide you're naturally gonna assume whoever wrote it would have mentioned a mimic if there was one, so you don't bother looking for them. Those who said mimic spawns aren't guaranteed don't really get how mimic spawns work. There are specific spots where they can spawn. They don't always spawn there, but they *never* spawn in most areas. So obviously it's important to indicate which areas might have mimics.

 Anonymous
Thanks for not mentioning that their is a mimic amongst the items across the umbral path near the bridges...

 Anonymous
Continuing the tradition of snow areas being dogshit, even Elden Ring was no exception - and neither is this game. I've yet to play through a snowy area that hasn't sucked major balls. The only redeeming part of the Ashes of Ariandel DLC was Sister Friede, however in this area even the main boss is complete trash.

 Anonymous
So far worst area... invisible super archers that can oneshoot you and kill ya in 2 Hits close range. Also one of the lost frustrating area in umbral with 3 stone faces an hawk eye and 2 Reapers near if you pull the stones wrong. I love the game so far but the dude who Designed the area needs to be spanked.

 Anonymous
Nice of you to leave out we have to fight 3 Big Heads in town square here

 Anonymous
There is an item on the roof where talon is located, anyone has a clue of how to get it?

 Anonymous
Ive lost THEHK-IHIR the merchant and cant find him here or skyrest help

 Anonymous
The "open area" after the boss fight has a Lightreaper fight in it.

 Anonymous
 Anonymous
 Anonymous
What is up with the stupid 1v5 in the umbral in this place? 3 of those faces and 2 reapers.
This game just loves gank fights

I hate this realm.
0
+10
-1