Abandoned Redcopse is one of the Locations in Lords of the Fallen (LotF). Abandoned Redcopse is the first official Location that the player explores after the tutorial Location. The Abandoned Redcopse is a swampy area with winding paths littered with vines. It's also where players get to fight their first Boss in the game. In Lords of the Fallen (LOTF), players will get to explore a vast, interconnected world where they will journey across the worlds of the living and the dead. This page covers a full walkthrough and helpful guides for the Abandoned Redcopse location in Lords of the Fallen.
- Please visit the Walkthrough page for Lords of the Fallen (LotF) for a detailed guide on the main story.
- You can also check our Game Progress Route page for Lords of the Fallen (LotF) for a summarized progression path.
- Visit the Abandoned Redcopse Map for a visual aid in finding all Items, Shortcuts, and relevant markers.

General Information
- Previous: Defiled Sepulchre
- Next: Skyrest Bridge
- Bosses: Holy Bulwark Otto, Pieta, She of the Blessed Renewal, The Lightreaper
- No. of Vestiges: 3 - Vestige of Ranik, Vestige of Hannelore, Vestige of Marco the Axe
Abandoned Redcopse Map
NPCs in the Area
Bosses
Enemies
- Corrupted Penitent
- Corrupted Pilgrim
- Holy Bulwark Otto
- Proselyte
- Raw Mangler
- Remnant
- The Lightreaper
- Umbral Egg
- Umbral Parasite
Items
Weapons
- Broken Sword
- Hallowed Condemnation
- Holy Ward
- Paladin Isaac's Sword
- Pointed Stick
- Raw Mangler Axe
- Splitting Axe
Shields
Armor
Spells
- None
Accessories
Runes
- None
Items
- Ammunition Pouch
- Ammunition Satchel
- Desiccated Vestige Moth
- Enervated Vigor Skull
- Fire Ward
- Large Manastone Cluster
- Minor Fire Salts
- Minor Holy Salts
- Small Manastone Cluster
- Unripe Berries
- Vestige Seed
Upgrade Materials
Key Items & Others
- Flayed Skin
- Forsworn
- Map of Abandoned Redcopse
- Map of Mournstead
- Tacitus' Journal
- Umbral Eye of Betrayed Eliard
- Umbral Scouring
Enemy Drops
Lords of the Fallen Full Abandoned Redcopse Walkthrough
First Vestige and First Bosses
After walking out the large doors to exit the Defiled Sepulchre, you'll immediately find the Vestige of Ranik amongst some vines and flowers. Activate it to get a Desiccated Vestige Moth, upgrade your character if you want to, and then head down the path. Pick up Tacitus' Journal and the Map of Mournstead from the corpse you'll pass by. As you reach the damp open area you'll get a tutorial on blocking, parrying, and Grievous Strikes. When you're ready, step forward and start your first Boss fight against Holy Bulwark Otto.
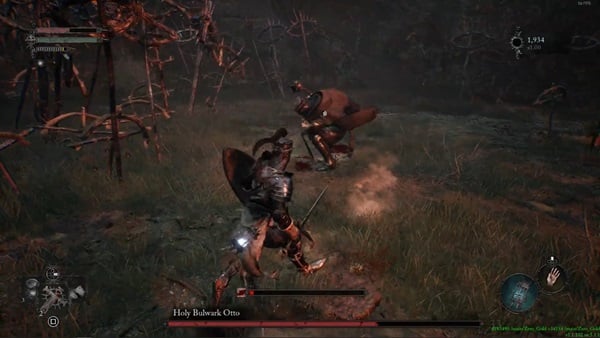
Holy Bulwark Otto, is a formidable adversary clad in heavy armor, wielding a massive mace. This fight shouldn't be too hard as he relies on slow heavy strikes that arc overhead. Use what you've just learned about blocking and parrying and practice on his slow attacks. Note that his attacks can inflict bleeding and knock you down. Pay close attention to his movements, particularly when he telegraphs his attacks by pulling back or raising his weapon. This fight will be a good chance to perfect your parry timing allowing you to counter-attack and ultimately create an opportunity to stagger him. Once staggered, capitalize on the moment with a charged heavy attack followed by a Grievous Strike to deal substantial damage. He won't have a second phase, so just keep at this for practice until you bring him down.

After defeating him, a cutscene will ensue as the smiling Enemy who killed the previous lamp bearer finds you and demands the lamp. This will start yet another Boss fight against The Lightreaper, atop a large three-headed creature. Immediately, he'll use his powers to jump up and disappear from your sight and reappear above you and attack. The three-headed creature will sometimes reappear and glide just above you to breathe fire down. You can try your best to stay alive and dodge all of their attacks. However, as you might have noticed by now, this isn't a fight you're meant to win. After just one or two hits, you'll find yourself dying. As your Enemy tries to loot you, someone steps forward and intervenes before you resurrect at the Vestige of Ranik.
It is, however, possible to win this with a lot of patience and practice, and nailing down all of The Lightreaper's attack patterns. As his health pool decreases to certain points, he'll empower himself with Rhogar flame, and then his blades. He might also summon forth his shadow to attack without riding it sometimes. If you are somehow able to defeat him, you will be rewarded with a Vestige Seed, the Lightreaper Flesh, The Lightreaper's Umbral Parasite, and a whopping twenty-five Umbral Scourings.

Head back down to where you fought The Lightreaper and reclaim the Vigor you lost when you died. From the battlefield, you can either head to the right or to the left. If you head to the right you'll come to a wall of thorns. For now, head to the left and then turn right at the fork to find a Flayed Skin at the end of the path in Axiom or the normal realm. If you hold up your Umbral Lamp here, you'll notice that there's a large door in front of you in Umbral, but you won't be able to open it. If you head back to the fork and head along the path you didn't take, you'll find a Corrupted Pilgrim empowered by an Umbral Parasite. Follow the tutorial and use your Umbral Lamp to destroy it and then take the Corrupted Pilgrim down with it. At the end of the path sits the Map of Abandoned Redcopse.
Use your Umbral Lamp to transition to Umbral here to reveal a target to Soulflay that will move the platform to you. Soulflay the target ahead of you once you're on the platform to cross to the other side. Head up the slope to find The Iron Wayfarer. He's a daunting figure with a large claw on his left arm. Talking to him will have him warn you to not take your task lightly. Talking to him further will just have him advise you to defy the wills of anyone seeking to control you, as he has done. Beside him will be the Vestige of Hannelore. Activate it and use it as necessary.
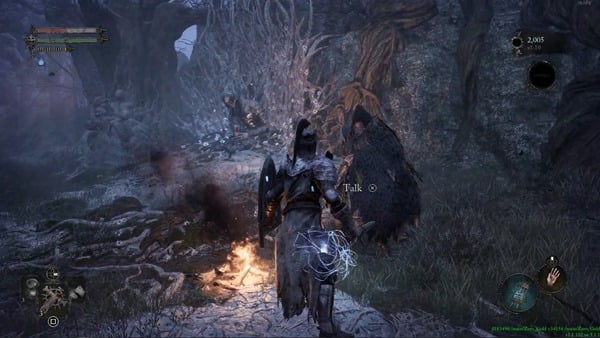
An Abandoned Village
Move forward along the path past the Vestige of Hannelore to eventually get a tutorial on Stigmas, which are remnants of past events that happen in the Axiom, leftover in the Umbral. You can only interact with them while transitioned to Umbral so use your Umbral Lamp and do so if you returned to Axiom by resting at the Vestige just now. This particular Stigma reveals a scene where the Hallowed Sentinels are cowering and running away from Enemies, despite the cries for help of those they are leaving behind. Afterward, you'll be rewarded with two Umbral Scourings for watching the Stigma. From the Stigma, head to the left to find three Minor Holy Salts at the end of the path.
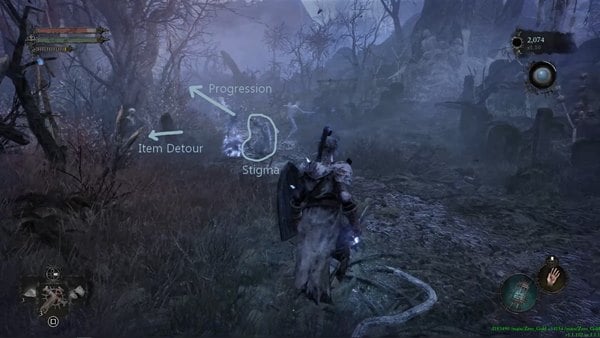
Head back towards the Stigma, and then find an opening to the left as you fight any Remnants that appear. Along this little detour, pick up the three Fire Wards as you follow the path, right before the Corrupted Penitent you'll find flailing about. After defeating it, you'll find yourself back on the road where the Stigma was, so make a left heading to the path you haven't taken yet. As you progress forward, look to your left to find an Emergence Effigy you can use to transition back to Axiom.
From here on you'll be exploring an area that looks like an abandoned village. In between the first two houses to your right will be some Enemies to quickly take care of. Past them, there's an archway to your left that'll lead to a short detour where you can find a Broken Sword. Be careful of the Corrupted Penitent behind the wooden wall near the Broken Sword waiting to surprise you. There's also a hidden chest behind some breakable objects on the other side of the other wooden wall in this lot, containing the Hallowed Condemnation.

As you emerge from this detour, you'll find a lot of Enemies to defeat. Make sure to check for any Umbral Parasites making any of them stronger. There's a ladder on the house nearby that'll help you get to the Corrupted Pilgrim throwing Rhogar bombs at you on top of the house. Up here, if you look toward the large tree nearby you can find an Item on a corpse hanging from the tree. Throw anything at it, like a Throwing Rock, and it'll drop the Pilgrim Garb and the Pilgrim Skirt for you to pick up. After clearing the area, head along the path parallel to the detour to find a broken gate, guarded by a lone Corrupted Penitent. Break the objects inside to find two Ammunition Pouches and two Small Manastone Clusters from the dead Avowed.
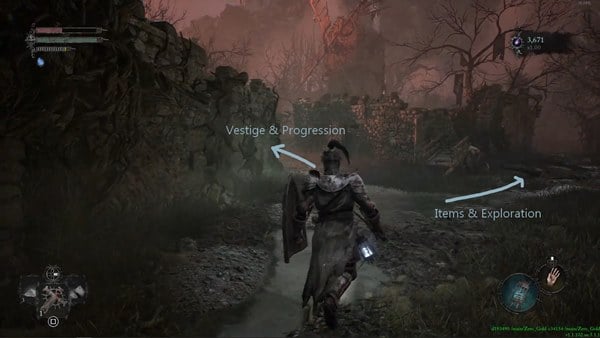
From here, you can either head back and keep exploring the area for some more Items and Enemies to defeat and farm Vigor from, or you can progress to the next area. You can also choose to progress a little bit first to the next nearby Vestige before exploring so you have a nearby checkpoint. To do so, follow the path to the left, past the bent gate. Ignore the breakable carriages on your right first. Be careful of the Corrupted Penitents hiding behind the wooden barricade on your right, and the one hiding behind a large broken jar further on. As you turn the corner, enter the gateway on your right to backstab a Raw Mangler elite Enemy and then finish it off. In the corner here are three Unripe Berries under a breakable cart. Exit out the gateway and follow the earlier path on the right up the stairs. At the top turn left toward a shack and you'll be able to find and activate the Vestige of Marco the Axe and use it as necessary.
If you want to explore first and find some Items, head back down toward the carriages you ignored a while ago, which should be to your left now. Past it will be a slightly isolated section where you can fight an elite Enemy wielding a greatsword. This Proselyte can empower his greatsword with flames and can unleash devastating combos with a wide attack range so be careful and time your blocks and attacks properly. Head up the nearby ladder to reach the roof of a small house. If you transition to Umbral here you can cross the short bridge that looks like a spine and throw anything you can at the corpse hanging above you. It'll drop the Orian Preacher Shield for you to pick up. Make your way back to that rooftop and fully cross the bridge this time.
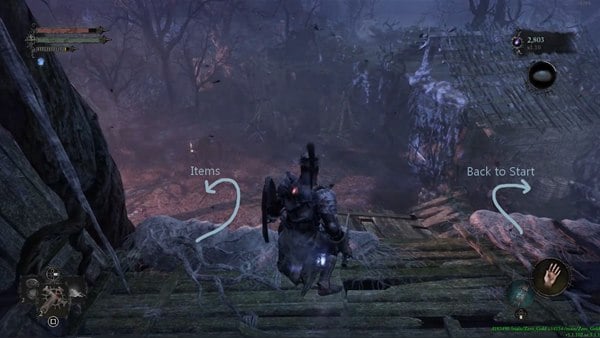
If you drop to the right you'll head back to the previous area where you started in this abandoned village, while dropping to the left leads to another slightly isolated area with some more Items to pick up. Hang a left and drop into the isolated area first as there's no other way to get to it other than from above. If you've been in Umbral all this time, be careful as more dangerous Enemies will appear the longer you've stayed in Umbral, making the isolated area a small deathtrap for Enemies to pile onto you. On the graves at the very corner near the rooftop you dropped in from is an Enervated Vigor Skull. You'll find another nearby on another grave. At the center of an area is the Raw Mangler Axe on a dead Avowed. When you're done, head back to the initial area of this abandoned village by crossing the planks and then return to the Vestige of Marco the Axe you recently activated.
Past the Vestige
Across the Vestige of Marco the Axe is a large gate with a bell at the center that's frozen over. To its left is a gap in the cement barrier. If you transition to Umbral here, you'll find a target to Soulflay, which gives you access to an area below you. Jump down the platforms and then Soulflay the Umbral Belly amidst some Umbral Eggs to pick up the Umbral Eye of Betrayed Eliard. If you head forward into the enclosure, you'll find another Stigma to Soulflay. This time it'll be of someone choking to death. You'll get two more Umbral Scourings for listening to it. Head back out and follow the path that U-turns into a ladder. This takes you to the rooftop of a shack near the gateway with the Raw Mangler. Drop down and head back to the Vestige.
The large gate can't be opened for now so head along the path to its right instead. Up the stairs, you'll find the Mineowner's Ring on a hanging corpse near the house on your right. Careful of the Corrupted Pilgrim who'll throw Rhogar bombs at you here while you try to throw something at the corpse. Ahead of you is a gap with a long wooden plank standing up on the other side. For now, head down the path near where the Corrupted Pilgrim was to reach a lower area that's flooded over. If you transition to Umbral here, the water will disappear and you'll find an Enervated Vigor Skull among some Umbral Eggs on the right, and an Ammunition Satchel and a Large Manastone Cluster on the corpse ahead.
Follow the path until you reach another hanging corpse carrying the Pilgrim Hood and Pilgrim Bandages at the end of it. There are also some more Enervated Vigor Skulls under the Umbral Eggs you'll break underfoot. Head back along the path to find a ladder on your right. Be careful as you reach the top as you might be greeted by a Raw Mangler. To your immediate left is a small doorway that leads to the wooden plank you saw a while ago. You can kick it down to form a shortcut back to the Vestige of Marco the Axe. Right by the doorway is an Emergence Effigy you can use to transition back to Axiom.
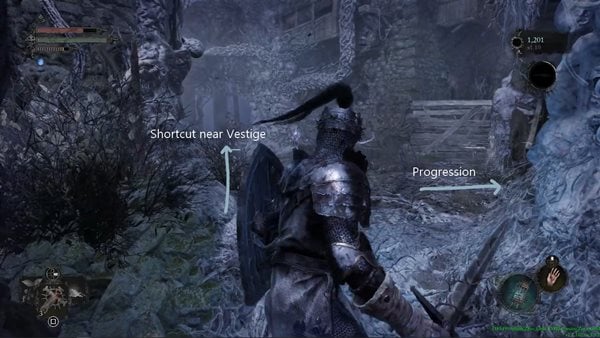
The opposite path leads to another Raw Mangler. At the fork, turn left to find a ladder. At the top, you'll find three Holy Wards on another dead Avowed. Follow the short path deeper in and drop down the gap under the ledge you'll see above you. You'll drop into a chamber where you'll find The Iron Wayfarer has relocated to. If you speak to him, he'll give you a Vestige Seed. The game then promptly gives you a tutorial on Vestige Seedlings, which are basically temporary Vestiges that you can activate on Umbral flowerbeds if you have a Vestige Seed. They'll have the same functions as any Vestige, giving you more options as you explore, and more checkpoints to fall back on should you die. Use the one you just planted as necessary.
If you head up the ladder to the right of The Iron Wayfarer you'll find yourself climbing a long set of narrow stairs up the structure. This serves as the exit that takes you up to the Skyrest Bridge.
After Path of Devotion
After Soulflaying Paladin Isaac's last Stigma in Path of Devotion and defeating his Umbral persona, you'll be rewarded with the Umbral-Tinged Flayed Skin. If you head back now to the large doors in Umbral, right in front of the spot where you got the Flayed Skin, you'll be able to use the Umbral-Tinged Flayed Skin to open it. Follow the path to a corpse that is carrying the Paladin Gauntlets, Paladin Armour, Paladin Helm, and Paladin Leggings for you to pick up. Completing this Questline will also allow you to request Isaac's Umbral persona for aid whenever you fail your first attempt at certain Boss fights.

Abandoned Redcopse Map
Abandoned Redcopse Videos
Videos Related to this Location
 Anonymous
The Paladin Set links to here and the DLC does not work. Where is it?

 Anonymous
it says you get the paladin set here. Where do you get it? Is it only available with DLC?


Right after the lightreaper fight, if you go up the path and go left, you will come upon a cliff where you can see an item in the distance but no way to get to it. If you come to the same spot in umbral you'll find large closed doors and I've finished the game but it still doesn't open. Does anyone know how to get to that item? Can we get there from the other side? In the interactive map the "otherside" doesn't have any name so not sure how to get there.
8
+10
-1