Revelation Depths is one of the Locations in Lords of the Fallen (LotF). Revelation Depths is situated beneath Sunless Skein where players will traverse a series of caverns and interconnected platforms and tunnels. As usual, locked gates and ladder shortcuts on the other hand will help the Lampbearer traverse this location effectively. In Lords of the Fallen (LOTF), players will get to explore a vast, interconnected world where they will journey across the worlds of the living and the dead. This page covers a full walkthrough and helpful guides for the Revelation Depths location in Lords of the Fallen.
- Please visit the Walkthrough page for Lords of the Fallen (LotF) for a detailed guide on the main story.
- You can also check our Game Progress Route page for Lords of the Fallen (LotF) for a summarized progression path.

General Information
- Previous: Fief of the Chill Curse
- Next: Belled Rise (Pilgrim's Perch)
- Bosses:
- Harrower Dervla the Pledged Knight
- The Unbroken Promise
- No. of Vestiges: 1
- Vestige of Lost Berescu
Revelation Depths Map
[map to be added]
NPCs in the Area
- None
Bosses
Enemies
- Corrupted Pilgrim
- Mendacious Visage
- Proselyte
- Raw Mangler
- Remnant
- Rhogar Hound
- Shrouded Sparrow
- Trapper
- Umbral Egg
- Ravenous Fascinator
- Umbral Parasite
- Womb of Despair
Items
Weapons
Shields
- None
Armor
- None
Accessories
Spells
- None
Runes
- None
Items
- Ammunition Satchel x4
- Ammunition Pouch
- Briostone Trio
- Enervated Vigor Skull
- Enhanced Short Javelin
- Enhanced Snake Oil Grenade
- Large Manastone Cluster
- Minor Wither Salts
- Poison Cure
- Wither Arrows
- Wither Bolts
- Vestige Moth
- Vestige Seed
Upgrade Materials
- Deralium Chunk
- Saintly Quintessence
- Regular Deralium Nuggets x9
- Small Deralium Fragment x8
- Umbral Scouring x10
- Worthless Coins
Key Items & Others
- Dark Crusader's Call
- Harrower Dervla's Rosary
- Remembrance of the Unbroken Promise
- Umbral Eye of Dieter
Enemy Drops
Full Revelation Depths Walkthrough
From the Vestige of Catrin
Revelation Depths is located beneath Sunless Skein. Essentially, players need to progress in Cistern and access its lower areas to formally enter Revelation Depths. We will be breaking down the progression into a series of objectives for you to easily follow. If you are following this guide, you were given the option to explore Upper Calrath or Revelation Depths. Assuming that you chose to explore the Depths, continue further. Starting from the Vestige of Catrin in Sunless Skein, head to the shortcut you unlocked if you followed our Cistern Guide. Pass the gate, ride the lift and it will lead you to Revelation Depths.
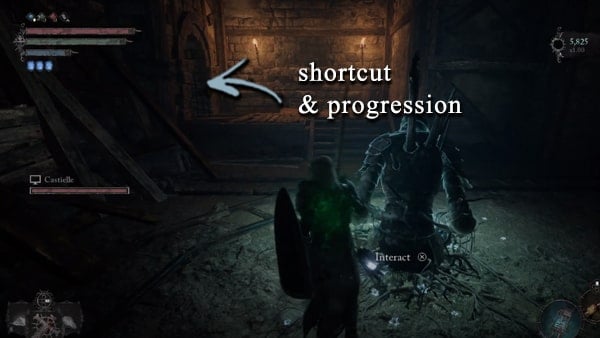
You will find yourself in the area we explored back in the Cistern guide where the lift is located. Head to the lower part of the platform you are in and find a x1 Wither Bolts. Examine the cliffs near the lift area with your lamp and you will notice that in Umbral, there are a series of platforms that you can traverse, so you can descend into the chasm. It is advisable to do an Umbral Rift so you can traverse this place effectively. A word of advice before you continue, be extra careful when rolling or strafing in this area since you will be fighting in tight spaces and you can easily fall into the chasm when fighting enemies.
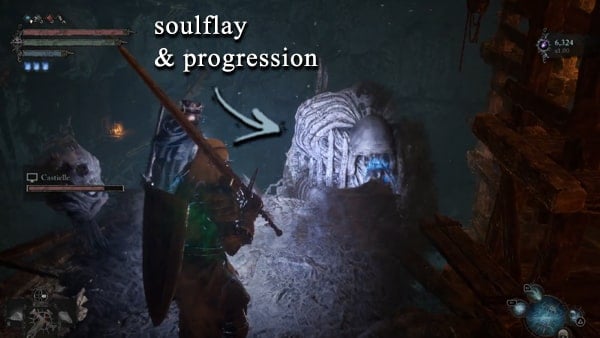
Obtain the Saintly Quintessence
To proceed, soulflay the nearest platform so it will be extended and you can jump on it afterwards. Also, we will be doing a lot of platforming in this area so come prepared. After jumping to the first platform beneath it, there is an Umbral Belly that you can Soulflay for an item. Receive an x1 Umbral Eye of Dieter. Notice that there are scaffoldings near your location that you can jump into. Head there and face the Pale Shadow lurking in the area. Also, you will be dealing with Remnants and Miners in this area thus be careful. After clearing the enemies pick up the x2 Briostone lying on the ground. On this platform, there is a nearby Emergence Effigy that you can use to return to Axiom. Proceed by traversing the nearest long bridge. At the end of this bridge, you will notice a ladder that you can climb onto to access the upper areas. Before doing that, pick up the x2 Poison Cure that is hidden behind the barrels.
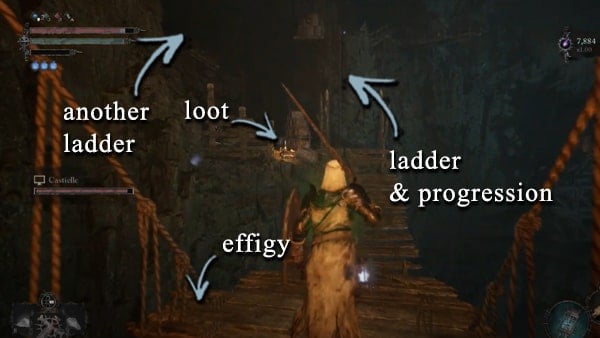
Head to the ladder located in the inner section of the solid ground you are in. Climb on it loot the dead body near the ladder and get an x3 Ammunition Satchel and x2 Large Manastone Cluster. Head down to the previous platform and access the other ladder available in this area. You will find yourself on a path that splits into two. The other one is the broken bridge and the other one leads to the upper parts of the area. Ignore the broken bridge for now. In the next area, you will be dealing with a Shrouded Sparrow and it will ambush you. From where the sparrow appeared, pick up the available loot which is an x1 Chipped Spear there is an Umbral Flowerbed that you can use, just in case you need to plant a Vestige Seedling to recuperate.
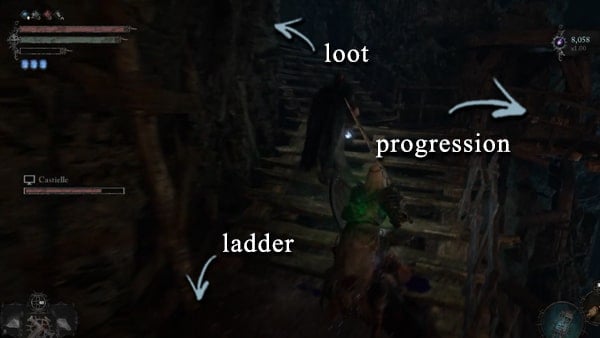
It is time to proceed and remember the broken bridge that we asked you to ignore. Head there and do an Umbral Lift. You will notice that there are long platforms that you can use to further descend. Another platform is waiting to be soulflayed so it will be extended, making your transition from the next platform easier. Follow the platform and the path will split into two again. One leads to a ladder and the other one leads to another platform. Turn left first and pick up the x2 Regular Deralium Nuggets along the way.
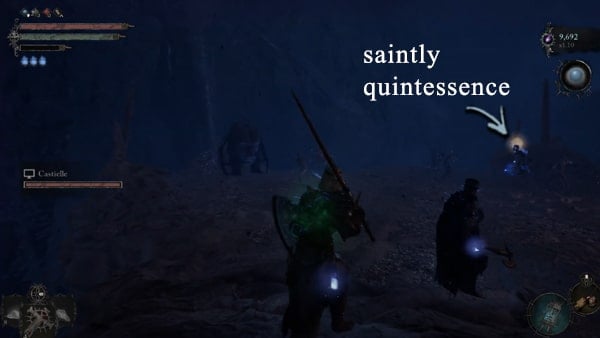
It is time to take the ladder and as soon as get off the ladder, you will notice that you can soulflay the nearest platform so it will be extended. Use the extendable platform to get into the larger platform. Beware as this platform will spawn a lot of enemies and Mendacious Visage is the leader of the pact. This platform can also spawn a Womb of Despair enemy. Clear all enemies and soulflay the Umbral Belly and receive an x1 Saintly Quintessence. Near your location pick up a x1 Enervated Vigor Skull.
Activate the Vestige of Lost Berescu
Now that we covered the majority in this area, head back to the previous platform where you obtained the Regular Deralium Nuggets near the ladder. Head to the other path that we were unable to progress a while ago and follow the path and eventually, you will notice that you can jump into a previously explored area with the long wooden bridge. You've been here before, and as soon as you land in the said area, there is an effigy that you can access to return to Axiom.
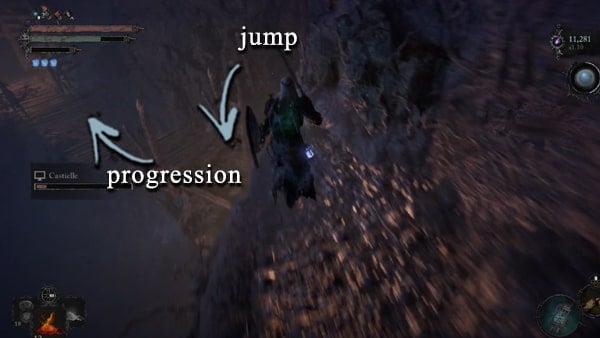
After the first wooden bridge, there is a flowerbed that you can use. Take advantage of it if you need to. Pass the second wooden bridge, you will notice a huge wooden piece of machinery with a huge wheel on it. Notice that there is a lift attached to this machinery. You can jump into the said lift to access the lower area of the wooden machinery. Get a x1 Enhanced Snake Oil Grenade. Past is, there will be a Fungal Bowman. Take it out and pick up the nearby loot which is a x3 Regular Deralium Nuggets.
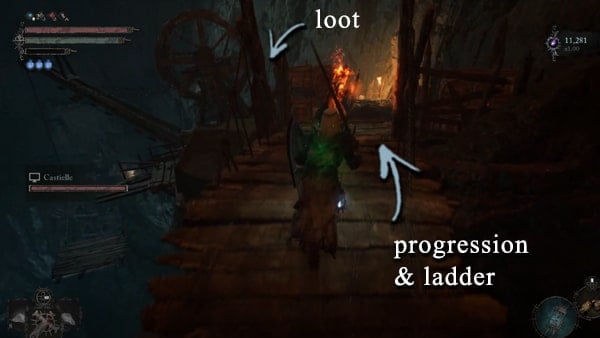
Head to the nearest ladder and climb down to the lower area and notice that there is a locked shortcut in the form of a bridge ahead. Proceed by entering the nearest cave. Follow the cave path and eventually, you will find yourself in well-lit caverns with a setup tent. Once again you will be dealing with Shrouded Sparrows in here. After clearing the enemies, get the x1 Nimble Ring in front of the tent.
To proceed, there is a series of platforms nearby that you can use to cross the chasm. At the end of the platform where the path is broken, refrain from getting the nearby loot since it is a trap. If you pick it up a Ravenous Fascinator will ambush you, pulling you into Umbral. Skip the loot and jump on to the next area where an Umbral Flowerbed is located. It is advisable to plant a vestige seedling in here since if you die, the last Vestige or Vestige seedlings are far from this area. Recuperate and rest before progressing.
If you are ready to proceed, head to the nearest tunnel entrance. Access Umbral. You will notice that there is a blocked path that you can soulflay. Do so and a secret path will be revealed. At the end of this pathway is an Umbral Belly. Soulflay the Belly to receive x1 Pendant of Atrophy. Access the nearest Emergence Effigy to return to Axiom. Return to the main tunnel and along the way pick up a x3 Regular Deralium Nuggets. Follow the tunnel and you will notice that the previously locked bridge shortcut can now be unlocked. Eliminate the Fungal Bowman in here first before lowering the bridge.
To proceed, in this area, you will notice an altar with a loot on it. Pick it up and get an x1 Wither Arrows. Near the altar, you will notice that there is a barricade that you can easily break. Past it, follow the tunnel and it will lead you to an open area with set tents with another Umbral Flowerbed.
NPC Byron and Winterberry Questline Remarks
In this location, if you follow our guide regarding Byron Questline, an NPC will show up here named Winterberry. Winterberry is not an ordinary NPC but a special one as well. She can serve as a merchant who can sell valuable wares, especially Rebirth Chrysalis. This item can be used to respec your character, in case you want to change your build. The Lampbearer will also notice that upon checking her wares, Catrin's Pendant is in her inventory. Access the nearest Vestige warp back to the Vestige of Catrin and inform Byron about the situation. He will be astonished at how an individual can survive in Revelation Depths.
After this point, it is safe to access the bell elevator that we warned you not to access until you have fulfilled Byron's request about the pendant. If you did everything correctly, after using the bell elevator to Upper Calrath, activate the Vestige of the Forgotten Warrior and head back to Skyrest Bridge. Head to the area where you freed the Tortured Prisoner and you will notice that both Byron and Winterberry are stationed here. This leaves Byron's Questline fully accomplished.
Get the nearby loot which will provide x1 Worthless Coins. Head back to where the wooden bridge is located and head into the nearest tunnel where an Umbral Flowerbed is accessible. Follow the straightforward path here and there a single miner that you can take out along the way. Pick up the x4 Small Deralium Fragment lying on the ground.
Proceed by accessing the wooden staircase. By following the path, you will eventually stumble upon stone structures or an enemy camp where the pathway is barricaded. The path split into two here, the other one leading further inside the caves and the other one leading to the stone structures. Head to the cave first as this is an optional area to explore. Inside there are miners working, clear them out so you can explore the area safely. Pick up the x3 Regular Deralium Nuggets near where the miners were located. What will pique your interest here is the x1 Deralium Chunk lying around the area. It is located not far from the Regular Deralium Nuggets you looted. That is all for this area.
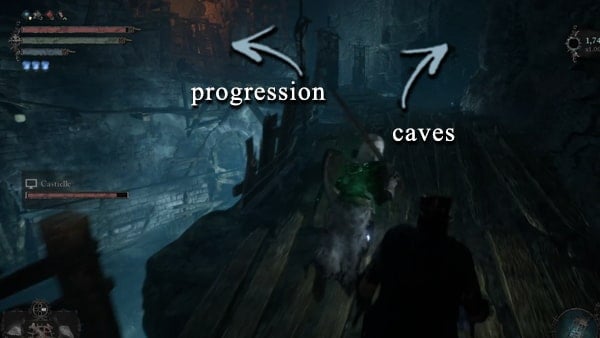
Return to the cave entrance head to the stone structures and destroy the barricade. A handful of enemies are guarding the area. A Holy Bulwark is one of them and multiple Avowed. Eliminate them before heading toward the inner section of the stone structures. Inside the enemy camp, a Receiver of Sacred Resonance is waiting for you with Marksmen with him. Deal with them and we do have a handful of items to collect in this area. Beside the tent, there is a loot hidden behind the boxes. Get it and get a x1 Justice. Skip the ladder for now and notice that there is another tunnel near the tents, head in there and transfer to Umbral and notice that there is an Umbral Belly that you can Soulflay. After doing so, receive a x1 Lost Berescu's Catalyst. There is a ladder that you can use to reach the upper part of the structure. Pick up the loot nearby which will provide you an ammunition. A x1 Enhanced Short Javelin. Proceed by accessing the ladder located near where you picked up the Justice weapon. After getting off the ladder, get the x1 Marksman Crossbow near the ladder.
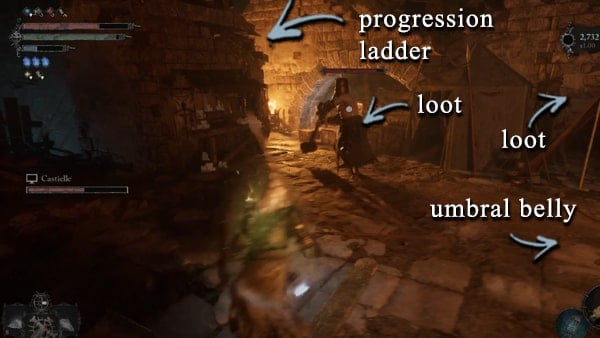
Head to the nearest cave entrance and prepare yourself since we will be dealing with a handful of enemies, in here. Umbral ones included. You will notice that to progress, you need to traverse to the lower areas. To do so, traverse the series of platforms here but before accessing your first ladder in the area to climb down, there is a treasure chest nearby. Open it and receive a x1 Death's Finger, x1 Ammunition Satchel, and x2 Ammunition Pouch. On the second platform, you will notice that there is another loot that you can pick up. Get a x4 Small Deralium Fragment. Proceed by heading to the next level. Be sure to deal with the Umbral Parasites located on this platform to lessen the threat a little bit. After clearing the enemies on each platform, head on to the next. Near the lowest ground in this area, there is an available lift. Activate it and this will provide a shortcut that leads to the platform where there is another lift leading to Vestige of Katrin.
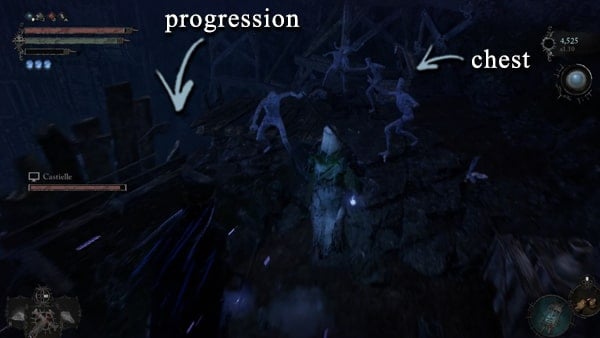
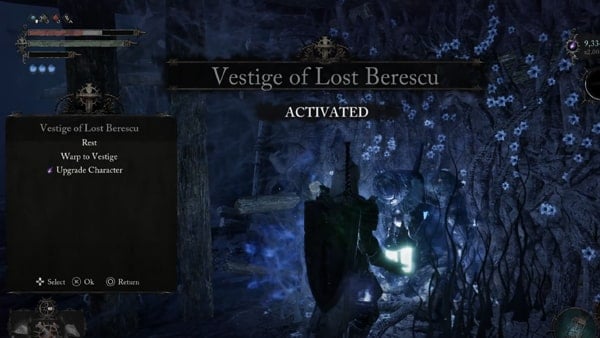
Activate the lift head towards the staircase and explore the lower areas. Follow the train tracks here and notice that there's an available loot nearby. Pick it up and receive a x1 Minor Wither Salts. Before you head past the flowerbeds, turn around you will notice that you can explore the other side of the wooden structure here for more loot. Pick up the loot from a dead body, and receive an x1 Exacter Dagger. Head further and eventually, you will find the Vestige in this area which is the Vestige of Lost Berescu. Activate it and rest. Do the upgrades you desire since we are about to engage the main Colossal Boss in this area.
Defeat Harrower Dervla, the Pledge Knight
Head to the flowerbeds and notice that there is a stone staircase nearby. Descend and enter the boss arena past the corners with lit candles. Upon entering the boss arena, a cutscene will play. After the cutscene, the battle will commence. Even though it seems that you are dealing with two entities here, only Dervla has an HP bar. Almost in all aspects, this fight is fair especially when in terms of attack movesets. Let's start with the other entity, chained up on an altar-like look pedestal. This entity throws projectiles at you or emits an arena-wide shockwave that can hit you easily. However, there are proper indications of when the entity will do this attack aside from its normal attacks.
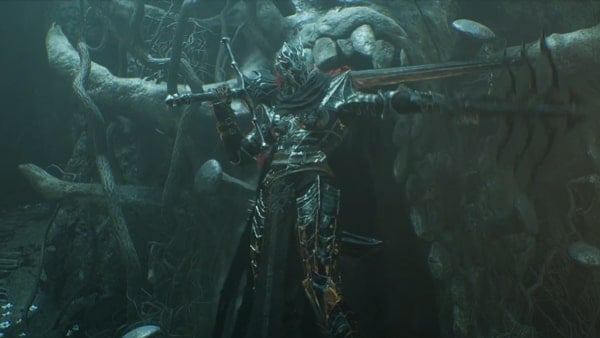
Pay attention to it and it only attacks when Dervla is done. So it is a pretty fair fight. Dervla on the other hand is an easy opponent, equipped with a huge two-handed sword, Dervla has a good range especially when dealing with wide arc slashes. She tends to deal with sword attack combinations but she does have a slow attack animation due to her weapon. One to note is her thrust attacks, it can deal a grab-like animation if you get caught. Be mindful of her crossbow attacks as well especially past the 50% HP threshold.
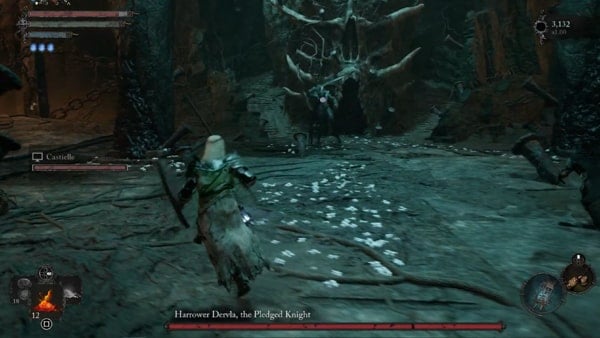
She will imbue herself with umbral magic, making her attacks stronger when her HP has been depleted past 50%. Her sword and projectiles will be imbued as well. Expect new attack animations such as shockwaves and arrow barrage. However, her speed still remains the same. The key to this fight is to take advantage of your speed. You are definitely faster than her so always wait for her to strike before you attack. Pay attention to her partner as well and you can use the pillars if her partner will release an arena-wide shockwave. One thing to note as well is her delayed attacks. Yes, her attacks are slow but you can be baited by her attacks. Untimely rolls will result in catastrophic damage. Assuming that you defeated Harrower Dervla the Pledged Knight, do not rejoice yet. You will be fighting her second form where the entity and Dervla will be as one.
Defeat The Unbroken Promise
In this second phase, we will be fighting the second form of Dervla and her partner. Naming them as The Unbroken Promise. Despite her intimidating appearance, do not worry as the fight is still fair. The Unbroken Promise will now deal with a new set of attacks including hard-hitting homing nails and claw swipes. It is still slow regardless so use this to your advantage. At the start of the battle, she will thrust her sword onto the ground and charge it with Umbral magic. As much as possible, move away from her and prepare an AOR shockwave when she pulls her sword from the ground. This shockwave can be avoided by i-framing it. Or you can also block it. Her attacks are pretty slow still and every time she uses her sword, it will create a shockwave still. Her claw attacks are telegraphed.
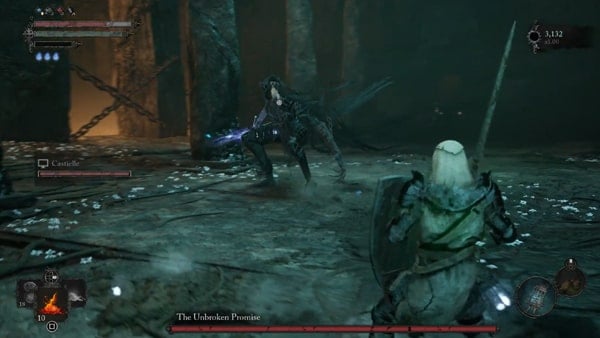
You just need to pay attention to her left arm. Her new attacks that you need to pay attention to as well are her homing nail attacks. She will summon two huge nails that she can use to hit you. These nail attacks have a lot of variations such as delayed strikes, and spinning attacks that cover a wide range. You will eventually notice that each nail attack has its window time. In this window of time, you can counter and deal damage to The Unbroken Promise. Upon defeating The Unbroken Promise, receive the following rewards. x1 Vestige Seed, x8 Umbral Scouring, x1 Harrower Dervla's Rosary, x1 Dark Crusader's Call and a x1 Ammunition Satchel.
Soulflay Dervla's Stigma
After the battle, head to the altar and it is time to Soulflay Dervla's Stigma. After doing so, receive x2 Umbral Scouring and Remembrance of the Unbroken Promise. If you are still having a hard time defeating this boss, we suggest to consult our Bosses page. This page will provide detailed information on how to defeat all Bosses in the game. This concludes the exploration of Revelation Depths and to exit this area, you may simply access the Vestige of Lost Berescu.
Revelation Depths Map
Map to be added
Revelation Depths Videos
Videos Related to this Location
 Anonymous
Also on the bridge where the Holy Bulwark busts out of on the left side heading in there are some wood planks you can jump down to and grab the Enhanced Forsaken Grenade.

 Anonymous
In the optional cave where all the miners are along with the 3x regular deralium nuggets and one deralium shard. In the back corner there is a pilgrim with some breakable boxes hiding a Grenade. This is right before the bridge where you fight a Holy Bulwark.

 Anonymous
I feel like something happens if you find all the lamps in the area before you reach the boss, maybe the boss room lights up or the adds vanish.
Havent seen any mention of the lamps at all, even though the eccentrics scribbles at the start of the area specifically points them out, and seemingly nothing else, apart from the entrance to the boss room itself having several lamps of the same kind that cant be lit leading inside, and you really have to go out of your way to activate some of them, kinda reminds me of the sewer area in dark souls 2 when you light all the sconces and it makes a special invader appear.
If this is something, someone mention it, ive looked everywhere i can and i feel like ive lit all but one sneaky lamp that i cant locate.
 Anonymous
This HAS to be a optional boss. Made my way to adyr and have not killed this boss. Dont even know where it is.

 Anonymous
Dev who thought placing two teleporting archer together and one with parasite should be burn in hell.

 Anonymous
Why would you put this after Upper Calrath? And ruin witnerberry quest?

 Anonymous
At the altar asking you to "Seek Scouring" you need to get back to Molhu and buy the "Umbral Scouring Clump" for 50 Umbral Scourings. Get back to the altar and you can use it.

 Anonymous
what happens if you lit all the fires in this location? it seems that something will happen, but nothing happens in my playthrough, but im not sure if i missed any

 Anonymous
After the boss fight you can interact with the thing at the top where the girl was chained. It says seek scouring. What does it mean??

 Anonymous
At the very beginning of the area, right after you cross the first wooden bridge, if you turn around you can see 2 big cave entrances on the mountain wall. Can't find any way to access them. Are they even accessible? Or are fake entrances? If anyone has info let me know!

 Anonymous

After soulflaying Devrla, there's an altar or something like it you can interact with, but it seems it won't do anything unless you have enough scourings. Does anyone know what it does when you have the scourings?
0
+10
-1