Pilgrim's Perch is one of the Locations in Lords of the Fallen (LotF). Pilgrim's Perch is a ramshackled town built onto a cliff face and is inhabited by various Pilgrims. In Lords of the Fallen (LOTF), players will get to explore a vast, interconnected world where they will journey across the worlds of the living and the dead. This page covers a full walkthrough and helpful guides for the Pilgrim's Perch location in Lords of the Fallen.
- Please view the Pilgrim's Perch Descent tab to find information on how to obtain the Bowl of Revelations.
- Please view the Belled Rise tab if coming from the Revelation Depths or Path of Devotion walkthroughs.
- Please visit the Walkthrough page for Lords of the Fallen (LotF) for a detailed guide on the main story.
- You can also check our Game Progress Route page for Lords of the Fallen (LotF) for a summarized progression path.
- Visit the Pilgrim's Perch Map for a visual aid in finding all Items, Shortcuts, and relevant markers.

General Information
Pilgrim's Perch
- Previous: Skyrest Bridge
- Next: Forsaken Fen
- Bosses: Gentle Gaverus, Mistress of Hounds, Scourged Sister Delyth
- No. of Vestiges: 2x Vestiges
- Vestige of Chabui
- Vestige of Blind Agatha
Belled Rise
- Previous: Revelation Depths
- Next: Path of Devotion/Manse of the Hallowed Brothers
- Bosses: The Sacred Resonance of Tenacity
Pilgrim's Perch Map
NPCs in the Area
Bosses
Enemies
- Ardent Penitent
- Crimson Rector
- Marksman
- Penitent
- Pilgrim
- Pureblade
- Radiant Hound
- Ravenous Fascinator
- Remnant
- Umbral Egg
- Umbral Parasite
- Womb of Despair
Items
Weapons
- Bloodletter
- Bloody Glory
- Broken Bucket
- Devotion's Might
- Hallowed Bow
- Hallowed Praise
- Hammer of Holy Agony
- Partisan Crossbow
- Perdam Falchion
- Reject's Blade
- Thorned Crimson Rector Sword
Shields
Armor
- Antique Hallowed Sentinel Set
- Ardent Penitent Head Cage
- Condemned Set
- Orian Preacher Set
- Penitent Trousers
- Sacred Resonance Set
Accessories
- Brawn Ring
- Cleric's Benediction
- Defaced Ring
- Defiance Ring
- Holy Blood Ring
- Relic of Perpetuation
- Slinger's Ring
- Warrior's Claw
Spells
Runes
Items
- Ammunition Pouch x10
- Bleed Cure x4
- Bleed Resistance Balm x6
- Bleed Salts x3
- Bloody Hatchet x1
- Empyrean Grenade x1
- Enhanced Bloody Hatchet x1
- Faint Vigor Skull x2
- Holy Ward x5
- Lacerating Knife x1
- Lucky Paw x2
- Minor Fire Salts x6
- Minor Wither Salts x3
- Poison Resistance Balm x3
- Pulsing Arrows x1
- Radiant Bolts x1
- Radiantburst Parchment x1
- Small Manastone Cluster x10
- Smite Cure x2
- Umbral Scouring x4
- Umbral Vertebrae x6
Upgrade Materials
- Large Deralium Shards x6
- Saintly Quintessence x1
- Small Deralium Fragment x22
- Regular Deralium Nuggets x3
Key Items & Other
- Bloody Aspergillum
- Book of Sin
- Bowl of Revelations
- Common Orian Prayer
- Hallowed Sentinel Scripture
- Map of Pilgrim's Perch Ascent
- Map of Pilgrim's Perch Descent
- Pridebound
- Umbral Eye of Iorelo the Cursed Knight
- Umbral Eye of Rosamund
Enemy Drops
- Ammunition Pouch
- Ammunition Satchel (Boss Drop)
- Ardent Penitent Arm Chains
- Bell Staff
- Large Manastone Cluster (Belled Rise)
- Marksman Crossbow
- Pilgrim Bandages
- Pilgrim Hood
- Prison Cell Key
- Pureblade Trousers
- Regular Deralium Nuggets (Belled Rise)
- Sacred Resonance Set or Sacred Resonance Hammer (Boss Drop)
- Scourged Sister Set or Scourged Sister Flail (Boss Drop)
- Sin-Piercer Set or Sin-Piercer Sword (Boss Drop)
- Small Deralium Fragment
- Small Manastone Cluster
- Vestige Seed x3 (Boss Drop)
Merchant Wares
- Adyr's Rage x1
- Charred Finger x5
- Corrupted Pilgrim Bandages x1
- Corrupted Pilgrim Cape x1
- Corrupted Pilgrim Hood x1
- Corrupted Pilgrim Trousers x1
- Fist of Insight x1
- Raw Mangler Axe x1
- Raw Mangler Sleeves x1
- Raw Mangler Cape x1
- Raw Mangler Trousers x1
Lords of the Fallen Full Pilgrim's Perch Walkthrough
Click on the tabs for the sections of Pilgrim's Perch you are looking for.
Departing Skyrest Bridge
Pilgrim's Perch is accessed by taking the stairs to the right after going down some wooden platforms from the Skyrest Bridge, past Thehk-Ihir. If you've followed the Skyrest Bridge walkthrough to the end, you'd have found the Map of Pilgrim's Perch Ascent on a platform beneath Thehk-Ihir as you skirt the edges of the border separating Skyrest Bridge and Pilgrim's Perch. If you've activated the Vestige of Chabui previously, you can also just teleport to it. Once you do, transition to Umbral here and then Soulflay the Stigma for a glimpse at a scene from the past in this area, possibly concerning Thehk-Ihir, if you haven't already. You'll get two Umbral Scourings for watching the scene.
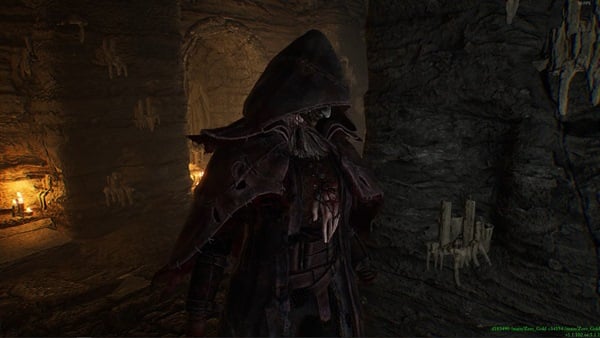
Across the Vestige will be a ladder you can climb. At the top, move forward and hold your Umbral Lamp up near the steel bars to cross them and get the Broken Bucket, Condemned Head Cage, Condemned Garb, Condemned Manacles, and Condemned Fetters on the dead Avowed. Use your lamp to head back and then carefully cross the narrow wooden beam amidst the bells to the other side. Turn left and break the objects to head past the ladder first. Hold up your lamp again to get past the bars for an Empyrean Grenade. Climb down the ladder now and turn right to find a character adorned in a red coat. You can't see much of her face due to her hood. Speaking to her will reveal her allegiances with Adyr and she'll warn you not to go around cleansing the beacons. She'll also mention she'd seen a Dark Crusader wielding your Umbral Lamp before you not too long ago. She won't start a fight with you though and she'll leave you alone after you keep talking to her.
Boss Encounter: Scourged Sister Delyth
Past her will be a ladder that'll allow you to reach the lower floor where you can hear some pilgrims whimpering. Walking some steps across from the ladder will put you in a Boss fight against the Scourged Sister Delyth. She won't chase after you as you enter and will wait for you to approach her. In the meantime, keep going across from the ladder to a large statue and pick up the Bloody Aspergillum. When you're ready, head down the stairs to the pool of water to properly fight Scourged Sister Delyth.
This fight isn't too difficult. Scourged Sister Delyth's attacks are largely telegraphed. She's rather slow, but her attacks with her flail have a large range. Her successive attacks also increase in range as she tries to hit you, so you'll need to really be patient and wait for the right time before you start with your own combos. Getting hit by her attacks causes your buildup of the Bleed Status Effect to go up per hit.
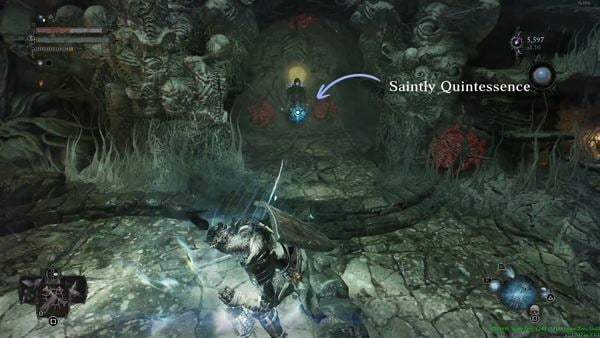
At about sixty percent health, she'll enter phase two. At this point, she'll power herself up, generating a yellow halo above her, as well as enveloping herself and her flail with yellow energy. Her attacks will still be as slow, but she'll attack more aggressively and hit even harder. She'll also start blinking behind you in a streak of yellow light before letting loose another onslaught of attacks. Despite this semi-teleportation move, her attacks will still be as slow so you'll have plenty of time to dodge out of the way of her combos. Keep being patient and attack her at the right time until she goes down. Defeating her will reward you with either the Scourged Sister Flail and/or a piece of the Scourged Sister Set, and a Vestige Seed. If you're not already in the Umbral, use your Umbral Lamp to enter the land of the dead and you'll find an Umbral Belly in a small alcove where Delyth was found initially. Soulflay it to obtain a Saintly Quintessence.
The Stormy Perch
Head to where Scourged Sister Delyth was at the start of the fight and head through the doorway past the pool. You can kick off the Pilgrim by the ledge here to defeat it, then there are two ladders you can take, one going down to your left and the other going up to your right. Start by looking to your left. You'll find an item that, when approached, will fall to the lower platform as the wooden planks below you collapse. Pick up the three Bleed Salts, then enter the Umbral using your Umbral Lamp to find some large bones acting as bridges ahead. Hop across to the next bone, and at the end, you'll find a Lacerating Knife on a corpse.
Hop back across the bones and make your way back up the ladder. Take the next ladder up and enter the tunnel ahead. Continue forward, where you'll find an Umbral Flowerbed at the corner. Turn left and you'll find a gate on the right wall that requires the Pilgrim's Perch Key to be unlocked. If you've already purchased it from Stomund, you can explore this area now. If not, keep going forward to exit the tunnel and get back outside. Do note that the areas behind the locked doors in Pilgrim's Perch hide tough enemies, so it is recommended to come back later for them when you're a higher level. You can find walkthroughs for them in the Belled Rise tab.

Turn the corner, where there'll be two Pilgrims. You'll also notice if you're in the Umbral here that there are two bone bridges in the vicinity - one going up to the left and another going down to the right. The one going up leads to a ledge holding three Minor Wither Salts and the one going down leads to a platform with the Hallowed Bow and a bundle of Pulsing Arrows. Climb up the stairs after you're done looting and defeat the Ardent Penitent. To the right of the top of the stairs, you can pick up four Small Deralium Fragments. Head up the ladder and you can defeat the Pilgrim throwing spells at you. Next to it, you can pick up a Plain Shield. Go back towards the ladder, but don't go down it. Instead, if you're not already in it, enter the Umbral and use your Umbral Lamp to pull the platform ahead towards you. You can use it to get to the other side of the area.
Head down the ladder ahead to be able to kick down the wooden plank bridging the two sides. Turn back around, and on the left, you'll find a ladder next to the wooden strip you're on that goes down. Here, on this lower platform, you can obtain the Common Orian Prayer Gesture. Return back up the ladder to progress forward.

To the Next Vestige
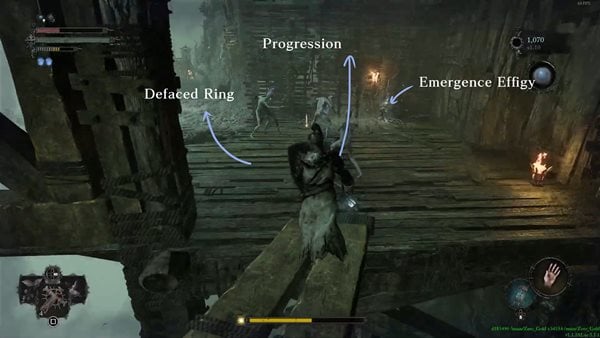
Head back up the ladder ahead and cross the wooden plank ahead to the other side. You'll have to defeat another Ardent Penitent, as well as quite a few Remnants. You'll find an Emergence Effigy in the area. Next to the Emergence Effigy, you can pick up the Penitent Trousers. Before going up this ladder next to it, make sure you're in Umbral and explore behind the wall with the ladder. You will find a path heading to a descending ladder and a hidden item in a lower level. Pick up the item (Defaced Ring) then return to this position. You can now use the Emergence Effigy to to return to the Axiom. Climb up the ladder next to it and defeat the Pilgrim. There's a swinging platform nearby that you can use to get to another platform with two Pilgrims. Defeat them, then jump over to the nearby platform by the wall. There are another three Pilgrims here. After dealing with them, you can pick up the Hallowed Praise.
Take the ladder nearby upwards. At the top, turn right and take the next ladder upwards. Enter the Umbral and when you look to your right, you'll find a pathway leading to an Umbral Belly. Grab the item, then return to the top of the ladder and keep going forward. Defeat the Pilgrim on the upper platform and drop down ahead to find another Pilgrim and an Ardent Penitent. Enter the Umbral to reveal a path on the side. Use your Umbral Lamp to pull out the bone bridge ahead, then hop onto it. Follow the path and up the slope to find another set of moveable platforms. Pull yourself to the other side and go up the slope. Push the ladder down at the end to open up a shortcut back up here. Turn around and cross the arm on your left to find the Thorned Crimson Rector Sword guarded by two Remnants.
*Note: You can go down the ladder shortcut to the previous platform and explore the corner of it. You'll notice a ledge with an item. Drop down to pick up Perdam Falchion then backtrack to this upper platform to continue.
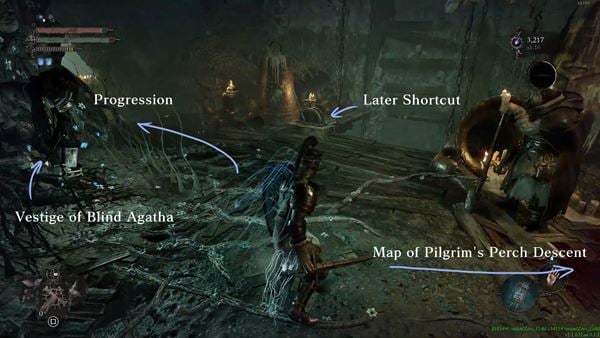
Go back and cross the wooden beam on the right. Defeat the Pilgrim on the platform, then climb up the ladder to defeat another one. There are also another four Small Deralium Fragments on this upper platform. Descend back down the ladder and enter the tunnel on the right. You'll have to deal with a lot of Remnants and an Ardent Penitent within, but if you wish, you can press forward to find and interact with the Vestige of Blind Agatha on the left instead. Rest up here to return to the Axiom. On the right, you can speak to a currently unnamed NPC, though he doesn't say much at the moment. Behind him, you'll find the Map of Pilgrim's Perch Descent. The door next to it requires the Pilgrim's Perch Key to be unlocked.
Pilgrim's Perch Ascent Map
Past the Vestige of Blind Agatha
Next to the NPC, you'll find a lever that doesn't quite work at the moment. Continue through the tunnels ahead, and you'll eventually emerge into a cavern featuring a lake. Defeat the four Pilgrims ahead, then go to the other side and defeat the other five. Before you continue any further, you can point your Umbral Lamp at the water and find some stairs going up to a side room. At the top of the stairs and after following the curve, you'll find a Womb of Despair and some Remnants. The Umbral Belly here can be soulflayed for the Umbral Eye of Rosamund. Keep following the path, past the red growths on the wall, and you'll eventually get to a small room with a chest and an Umbral Flowerbed. The chest contains the Antique Hallowed Sentinel Set. On the balcony past the archways, you can grab three Bleed Resistance Balms. Head up the stairs behind the Umbral Flowerbed next. In the hallway, you'll find three Minor Fire Salts. When you reach the balcony outside, destroy the wooden crates on your left to find Pridebound.

You'll see an area at the below the balcony and an elevator going up to the right. These areas are filled with tough enemies that you will struggle to deal with at the moment. If you wish to, you can ignore them for now and come back later when we come across it again in the Belled Rise tab. However, if you are keen to grab the items and run, you can find the Hallowed Sentinel Scripture at the end of the bottom platform and Cleric's Benediction from the room on the left when you take the small elevator up. Again, these sections will be revisited in the Belled Rise tab, so for more loot and more comprehensive enemy explanations of these two area, be sure to check it out later.
After exploring the side area, backtrack and wade back through the lake to continue forward. Through the doorway ahead, you'll find a ladder on the left you can let down later. Go to the right, where you'll find a Faint Vigor Skull behind some small crates. Make your way up the stairs and defeat the two Pilgrims on this platform. Use the swinging platform to reach the other side and defeat the next Pilgrim. You can swap over to the Umbral to open up a bridge connecting these two platforms if you wish. If you follow the walkway on the right, an Ardent Penitent will come towards you. Keep going down the walkway and on the left, take the ladder going down.

Circle around the pillar the ladder is on to find a Faint Vigor Skull. Take the ladder down nearby and defeat the various Remnants and Womb of Despair here. You can circle around the stone pillar on the right to find a Lucky Paw. You may also notice a another item on the piece of cloth, which if hit with a throwable object, will drop onto the ground, allowing you to obtain another Lucky Paw. There is an Umbral Belly in this area can be targeted and soulflayed with your Umbral Lamp to drop a Bowl of Revelations and two Umbral Scouring.

Take the ladder behind the statue, then continue forward and head up the next one. If you circle around to the left, you'll find an Remnant and three Umbral Vertebrae at the end. To progress, go to the right from the top of the ladder and cross the arm to defeat a Pilgrim. You'll also find an Emergence Effigy here to let you return to the Axiom.
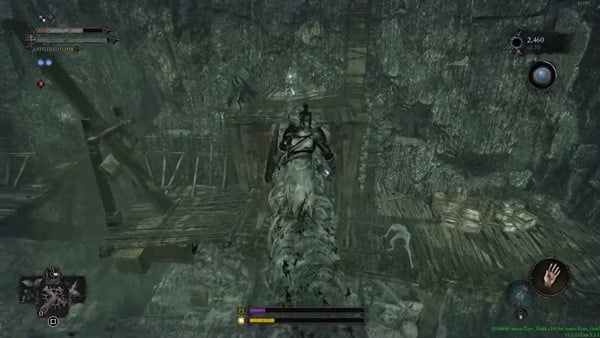
Climb down the ladder on the right and kick the bridge down ahead to unlock the shortcut back. Turn around and head forward. Defeat the three Pilgrims and pick up the item at the end to obtain two Ammunition Pouches and two Small Manastone Clusters. Look over the ledge here and drop down onto the wooden platform below. Defeat the two Pilgrims here, then loot the Partisan Crossbow from the corner. Take the ladder down to the bottom, then defeat the Pilgrim and two Ardent Penitents.

There is an Umbral Tumor blocking the way forward. Enter the Umbral and head down the bone slope that appears. At the bottom, defeat the two Remnants. An Umbral Belly you can soulflay using the Umbral Lamp drops the Book of Sin. Head to the end of the area and look down over the ledge. Use your Umbral Lamp to soulflay the body. Go back up the bone slope and towards the tumor blocking the door. If you look to it's right and upwards, you'll find the second body you need to soulflay to banish the Umbral entity. Use your Umbral Lamp on the final body entangled on the door, opening up the way forward.
Liberating Gerlinde
At the end of the tunnel, take the ladder going down. Continue downwards, descending down the next ladder. You can cross a wooden beam on your right to find one cluster of Radiant Bolts. Nearby, you'll find a ladder going down. Descend the ladder and defeat the Pureblade, Pilgrim and three Radiant Hounds at the bottom. The Pureblade will drop the Prison Cell Key. With your back towards the ladder, head to the right and speak to the blacksmith behind bars. She'll tell you that her name is Gerlinde and asks you to give her the key. Speak to her once more to give her the Prison Cell Key, and she'll move to Skyrest Bridge. To the left, you'll find a locked door that requires the Pilgrim's Perch Key.

Instead, look behind the ladder you came from to find a waterfall area. By the waterfall itself, you can pick up the full Orian Preacher Set from the ground. Go to the left afterwards and you'll find a doorway blocked by an Umbral presence. Enter the Umbral using your Umbral Lamp, then pull out the body from the doorway to gain access to the room behind it. There'll be a chest within that contains the Defiance Ring. To return to the Axiom, interact with the Emergence Effigy found behind the ladder in the previous room.

Ascend the ladder after you're done with this lower area. Up ahead and to the right, you'll find an elevator that takes you back up to the Vestige of Blind Agatha. Use it to unlock the shortcut, then head back down when you're ready to progress. If you returned to Skyrest Bridge then fast traveled back to Pilgrim's Perch, you can visit Gerlinde's previous jail cell to find four Small Deralium Fragments by the fireplace.

Back at the elevator, keep going forward to find three more Pilgrims. At the end, take the ladder going down. Interact with the lever to call the lift up, then take it down all the way to the bottom. Ahead and to the left, you'll find Damarose the Marked. She's a Merchant that sells various pieces of equipment and Adyr's Rage. Slightly in front of her, you'll be able to pick up two Ammunition Pouches and two Small Manastone Clusters from the ground. If you go further ahead, you'll initiate a boss fight.

Boss: Gentle Gaverus, Mistress of Hounds
When you approach her, Gentle Gaverus, Mistress of Hounds will be standing alone in the middle of her arena. Her moveset is relatively simple, comprising of a series of basic sword slashes when in melee range and a charged bow attack that has a sound cue when in range. The difficulty of this fight stems from the Radiant Hounds Gaverus will summon. You can opt to simply focus on Gaverus to conclude the boss fight, however, you may find yourself being overwhelmed quickly the more Radiant Hounds there are on the battlefield.

At the start of the fight, two Radiant Hounds will be present. Defeat them quickly, then move over to Gaverus to chip at her health. If she's in the middle of a ranged attack animation, she can be interrupted easily by simply hitting her. Her sword attacks you'll have to be a bit more careful of. After a short period of time, Gaverus will call in additional Radiant Hounds. When they appear, defeat the Radiant Hounds and then focus fire on Gaverus.
When defeated, Gaverus will drop an Ammunition Satchel, Vestige Seed, and either the Sin-Piercer Sword or a piece of the Sin-Piercer Set. You may interact with the Umbral Flowerbed that emerges after the fight for a shortcut back here. At this point you can head back to Skyrest Bridge to hand over the Book of Sin to Exacter Dunmire and purchase the Pilgrim's Perch Key from Stomund, which will also net you the Map of Belled Rise.

Whenever you're ready to progress forward, head through the lit tunnel at Gaverus' boss arena to reach the Forsaken Fen.
Pilgrim's Perch Descent Map
Tackling the Locked Doors
This section of Pilgrim's Perch covers the areas behind the locked doors requiring the Pilgrim's Perch Key. This key can be bought from Stomund, Captain of the Fidelis at Skyrest Bridge, and comes with a complimentary Map of Belled Rise. Though the key and the areas locked behind it can be obtained and reached as soon as you get to Pilgrim's Perch for the first time, it is intended to be tackled at a higher level, after completing Revelation Depths.
Teleport to the Vestige of Blind Agatha and unlock the door opposite to it, in the area where you first met Byron. Enter the area and behind the pillar immediately in front of you, you'll find a Pureblade and a Marksman. After defeating them, look left from the pillar to find a Thorned Penitent sitting in front of a wooden gate. After defeating the enemy, take your Umbral Lamp out and shine it at the gate to reveal a path forward.

Pass through the gate and ignore the item directly to your left, as it's a Ravenous Fascinator lure. Also be careful of shining your Umbral Lamp out in this room as it is filled with Remnants, Umbral Egg, and Womb of Despair waiting to ambush you. Follow the curve of the room to the right, and you'll emerge out onto some wooden platforms overlooking some lower platforms. Defeat the Marksman at the end here, then jump down onto the lower platform ahead and defeat the three Marksmen and Avowed.
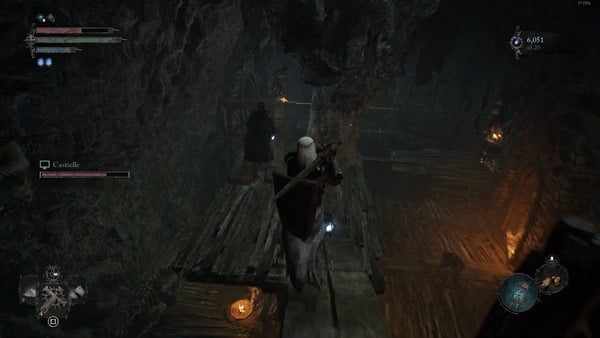
If you look back towards where you came from, you'll see that there's an item we missed in the water below the lower platforms. With the threat of the Marksmen now dealt with, walk across the lower wooden platforms back until you reach the platform with a statue of a woman. When you walk onto small planks of wood connecting this platform and the next, the platforms will collapse and you'll get ambushed by the three Ardent Penitents in the water. You can make the jump across to the next platform without falling through, but before you do, there are a couple things to note. If you look ahead and to the right, you'll find a ladder you can climb to get back up to the lower platforms. Use it after running and grabbing the item, or if you fall into the water by mistake. If you want to fight the three Ardent Penitents, use your Umbral Lamp to soulflay the Umbral Parasite in the middle of the water first. You can do so from the platforms here. Either way, grab Devotion's Might from the water, then climb back up to the end of the wooden platforms.

There are now two ways to proceed forward - to the right, into a red-hued room, or to the left, into a blue-hued room. Go right to progress. If you have any ranged capabillites, defeat the Pilgrim on the other side of the room. Afterwards, take your Umbral Lamp out and soulflay the Umbral Parasite in the hole. You can now jump down and defeat the Crimson Rector, after which the Brawn Ring next to it can be freely looted. Approach the double gates in the area and open them. You can find an Umbral Flowerbed just outside.

At the Umbral Flowerbed, again there will be two ways to go - one path going directly forward from the gate and the other going left. If you follow the path going left. You'll find a Pilgrim and two Thorned Penitents on a wooden walkway. If you enter the Umbral here, you'll eventually get back to the earlier split in the path leading back to the red room. You can find an Emergence Effigy to take you back to the Axiom by the entrance of the red room if you decide to explore this loop.

At the Umbral Flowerbed, head straight forward from the gate, taking the slope curving right. You'll get to the Pilgrim's side of the room that you defeated from range earlier. Head through the narrow passageway at the top of the path, and it'll lead back outside. When you exit through the doorway to try and defeat the Pilgrim ahead, another Pilgrim to the right will shove you. Deal with both Pilgrims and enter the Umbral.
Continue forward and before you hop onto the bone bridge ahead, look to the left and carefully make your way across the thin wooden beam to find the Hammer of Holy Agony. After crossing the bone bridge, defeat the Pilgrims and Shrouded Remnant. You'll find a doorway to your left, but before you head through, continue down to the end of the wooden walkway to find an Umbral Belly. When soulflayed, it drops the Umbral Eye of Iorelo the Cursed Knight.

Head back and go through the doorway we passed by earlier. In this small cavern, you'll find another Umbral Flowerbed, as well as two Large Deralium Shards behind the ladder. If you decide to plant a Vestige Seed here, you can return to the Axiom by resting. Climb up the ladder when you're ready to proceed, and up the slope you'll find a Pureblade and Radiant Hound. Continue up the slope and at the top, you'll emerge into what looks to be some holy hideout.

Two Ways Forward
From here, you can either go down the stairs to the left, or through a doorway on the right. Going through the door on the right leads to the Path of Devotion and going down to the left leads to the Manse of the Hallowed Brothers. Avoid going down to the left for now as that starts up a boss fight. Start by heading through the doorway on the right. Deal with the Pureblade praying by the altar, then approach the stairs going up and avoid the rolling barrel. Ascend the stairs and when you turn the corner, avoid the next rolling barrel. At the top of these stairs, you'll find an Ardent Penitent and Marksman. Deal with them, then continue going upwards. At the top, you'll be in a cavern occupied by three Radiant Hounds, an Arden Penitent, and a Pureblade. In the far left corner, you can pick up the Bloody Glory.

When you exit the cave here and get back outside, you'll find yourself on the Path of Devotion, a brightly lit pathway surrounded by eye-shaped totems. The Path of Devotion is a stand-alone optional area when you can find several pieces of equipment and useful upgrade materials. When you're done with the Path of Devotion, return here to continue through Belled Rise and progress through the game.
Boss: The Sacred Resonance of Tenacity
After completing the Path of Devotion, head back to Belled Rise by entering the cave near the Vestige of Dieter. Return downstairs to the room where you found a Pureblade praying. Exit the room and go down the stairs towards a gazebo-looking structure. Circle around to it's entrance and you'll start the fight against The Sacred Resonance of Tenacity. Try and defeat the Pilgrims in the area first to avoid getting overwhelmed. To do so, you'll have to soulflay the Umbral Parasite in the middle of the gazebo.

The Sacred Resonance of Tenacity is a Receiver of Sacred Resonance, highly regarded 'saints' of the Hallowed Sentinels wielding large hammers. This boss has a fairly simple moveset made up of a variety of hammer swings, but it's attacks can build up Bleed and Smite. One move to look out for in particular is when the boss imbues it's hammer with Smite. A few seconds later, a large shockwave is released from it, knocking you down and dealing heavy damage. You can dodge into the shockwave to avoid the attack.

When defeated, it'll drop either the Sacred Resonance Hammer or a piece of the Sacred Resonance Set, and a Vestige Seed. You can also pick up a Radiantburst Parchment from within the gazebo. Exit the cave back outside on the balconies of Pilgrim's Perch, where there'll be an Umbral Flowerbed nearby. Turn left as you exit to find two Large Deralium Shards. Do a 180 and go down the wooden walkway the other way. You'll find an Enhanced Bloody Hatchet on a corpse by the wall on the right.

Onto the Manse
Take your Umbral Lamp out and shine it on the broken bridge to reveal an Umbral path leading to the other side. There'll be a ladder on the right up ahead, but before you go up, an Ardent Penitent will jump out from behind it. Remember where this ladder is, and continue down the wooden walkway. You'll have to take out your Umbral Lamp again or just enter the Umbral to get up to the next platform. Defeat the Pilgrim up here then enter the doorway on the right. There'll be an Umbral Flowerbed directly on the left, and a chest containing four Small Deralium Fragments, three Regular Deralium Nuggets, and two Large Deralium Shards. If you continue to the end, you'll get to a ladder you can knock down to open up a shortcut back to the cavern lake next to the Vestige of Blind Agatha. If you entered the Umbral earlier you can take this opportunity to return to the Axiom at the Vestige.

Return up the shortcut ladder and make your way back to the ladder an Ardent Penitent was hiding behind. Climb up this ladder and take the stairs up to find a Pilgrim. Up the next two set of stairs, you'll find two Avowed and a Marksman. Take the ladder at the end upwards, where you'll find two more Marksmen and a Pureblade guarding a large elevator. Before hopping onto the elevator, open the door on the opposite side to find a Crimson Rector next to the Bloodletter. As you exit this room, there'll be a ladder going upwards to your right. When you reach the top, be careful of the Pilgrim behind the wooden barricades on the right, as they will push you off the platform, killing you. Further ahead, past a wooden plank bridge, defeat the other Pilgrim and enter the doorway on the right.

Keep following the cave, until you get to a doorway leading back outside. Here, you'll find a Marksman, a Pureblade, and a Crimson Rector. Lure them back into the cavern to avoid getting knocked off the platform to your doom. After defeating them, go back outside and head up the ladder on the right. You can defeat a Marksman up here and pick up the Slinger's Ring from the corner. Head back down the ladder, then descend the next ladder ahead. Waiting for you at the bottom are three Pilgrims and an Avowed. To the right of the ladder, you can find two Bleed Resistance Balms. Through the doorway on the right halfway across the platform, you'll find a congregation of about seven Thorned Penitents and two Pilgrims. Before they can be defeated, you'll need to soulflay the Umbral Parasite in the middle of the room. Afterwards, the corpse on the throne at the top of the stairs can be looted for Cleric's Benediction, two Holy Wards, two Smite Cures, and two Bleed Cures.
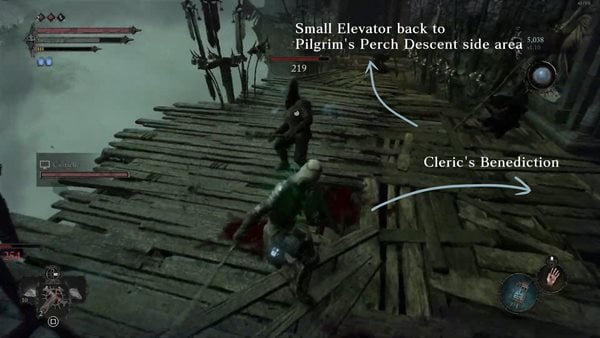
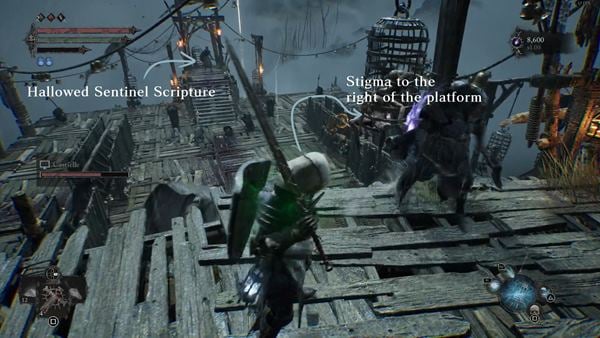
Exit the room and turn right to find a small elevator. This brings us back to the balcony with Pridebound that leads back into the side room where you obtained the Antique Hallowed Sentinel Set, reached through the Umbral by wading in the lake next to the Vestige of Blind Agatha at Pilgrim's Perch Descent. Now that you've levelled up significantly, you can jump down to the area if you skipped it last time. Here, you'll find a Pureblade, two Ardent Penitents, three Pilgrims, and a few Penitents. After clearing the area, you can grab the Hallowed Sentinel Scripture from the cage at the top of the stairs in the middle of the other side of the platform. Enter the Umbral, and on the right side of the platform, you'll find a hanging cage with a Stigma you can soulflay for two Umbral Scouring. The wooden plank going to the right leads back down to sections of Pilgrim's Perch Descent. Instead, head up the ladder back to the upper balcony, and you can return to the Axiom using the Emergence Effigy here.
Go back up the small elevator and backtrack back to the large elevator. Taking it will bring you up to the Manse of the Hallowed Brothers.
Optional Doors
There are two other locked doors in Pilgrim's Perch that can be unlocked with the Pilgrim's Perch Key, though they are entirely optional and only contain loot behind them. One such door can be found to the left of Gerlinde's prison cell. Return to the Vestige of Blind Agatha, and take the elevator down. Descend down the ladder on the right and in the right side of this lower area, you'll be back at Gerlinde's cell. Further in will be the locked door requiring the Pilgrim's Perch Key. Out the door and on the balcony, you'll find two Pilgrims, two Marksmen, a Thorned Penitent, a Pureblade, and a Crimson Rector, all protected by an Umbral Parasite. After defeating them, you can find the Warrior's Claw on the right side of the platform

Another optional locked door can be found right at the entrance of Pilgrim's Perch. From the Vestige of Chabui, head down to Scourged Sister Delyth's arena, then head out the doorway past it. Out on the balcony, take the ladder to your right upwards. In the cave ahead, you'll return to an Umbral Flowerbed we found earlier. another locked door can be found to the left of it. Use the Pilgrim's Perch Key to unlock it, and you can find the Sacred Resonance Set in a chest behind the door.
Pilgrim's Perch Belled Rise Map
Pilgrim's Perch Videos
Videos Related to this Location
Item location: After defeating The Sacred Resonance of Tenacity before heading outside look to the left of the gazebo he was inside of to find some stairs leading up to a door you can unlock with the Pilgrims Perch key to find the spell Adyr's Hardiness.

 Anonymous
I used you as a guide for Elden Ring and you were fantastic. But so much is missing in this one. It seems very erratic and chopped up. There is no clear transition points between your chapters. Take ending with blind Agatha and then it’s just see you in forsaken fen. Where is the B between A and C?

 Anonymous
There’s another door the pilgrims key can be used on up a ramp to the right of the gazebo if you are looking back at it. In it is a chest with Adyrs authority spell

 Anonymous
 Anonymous
So much is missing, why does the guide stop at Agatha's vestige? What about all the stuff from the decent of the perch and the side area next to the npc?




So I just killed the boss that reminded me of Lorian and Lothric but it was chicks. The guide just says use the vestage to go to the next part. Down the elevator that can mess up Byrons quest? Should I go way back and do upper Calarath?
1
+11
-1